Post by Speed Neon on Mar 31, 2009 14:40:57 GMT -6
so your classic sunroof no longer parks itself?
does it make a horrible grinding noise when you allow it to go back on its own?
does it make that same horrible noise when you use the vent function, or does the vent function not work at all?
than i have the walk through you have been waiting for.......
Tools needed:
Phillip head screw driver, a good sturdy one.
T-40 inside torx and 3/8 ratchet
A bunch of rags to protect your paint and to clean up your sunroof tracks.
Parts Needed:
This depends on how long you have allowed your sunroof to malfunction, grind etc. it could be as simple as the motor assembly, two screws, or you could have to replace the entire sunroof.
If your sunroof makes a grinding noise than you will be replacing the entire sunroof assembly. if your a more cautious, less neglectful, classic owner you will get away with the motor assembly.
Were to get a sunroof motor or complete sunroof assembly:
I went to my local pull and pay. and spent 30 bucks for a sunroof assembly that included glass and the motor. Than i got two more motor assemblies due to the fact that 5/10 classics suffer the limiting switch failure.
But how do you know if your getting a good assembly? take a rag and a pair of vice grips and grab the toothed wheel that is visible once you remove the sunroof motor. using the rag to protect the teeth on the wheel. and than twist away. if you get the extreme travel of the sunroof and don't hear any grinding when you try to over extend the vent lift mechanism, or try to over retract the glass than your golden. chances are that the sunroof on that classic is functioning perfectly fine, including parking were its suppose too. i would take that motor and or assembly if i needed it.
all together i spent about 50 bux on parts to fix my roof, a freebie in the world of classic ownership.
LETS GET IT!!!! (not a typo)
First you will need to move the front seats to their most forward position, seat backs up right. as you will need as much space to work as possible.
Remove the two rear interior panels, the ones that are around the rear window, by first pressing down and then pulling them toward you.
Remove the two rear courtesy/ grab handles. pull the handle down to reveal the two screws that attach each handle to the roof supports.
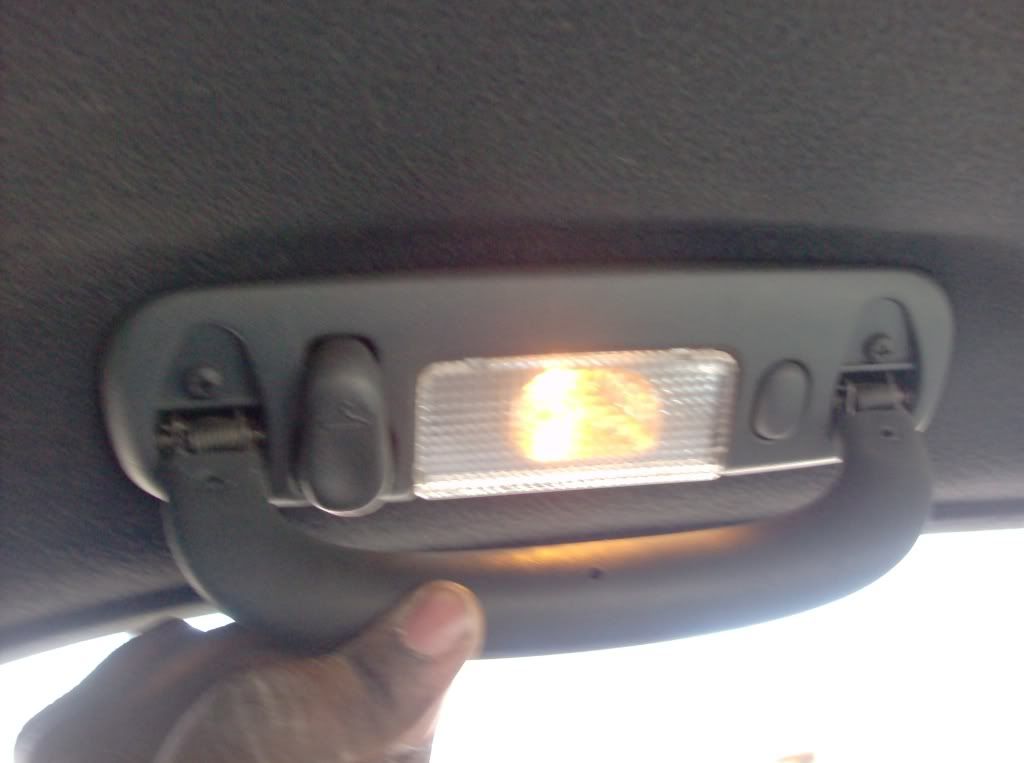
Remove both back window trims, not the big black ones but the ones that are the color of your interior.
at this point your fiber backed head liner will drop down about 7-8 inches depending on condition.
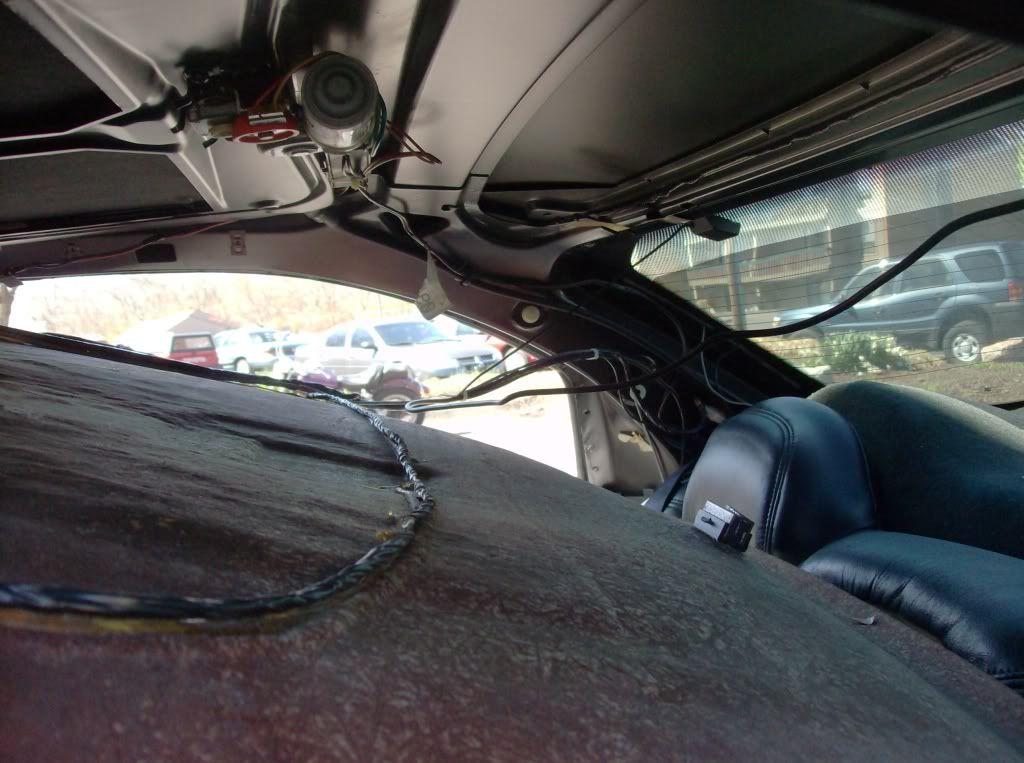
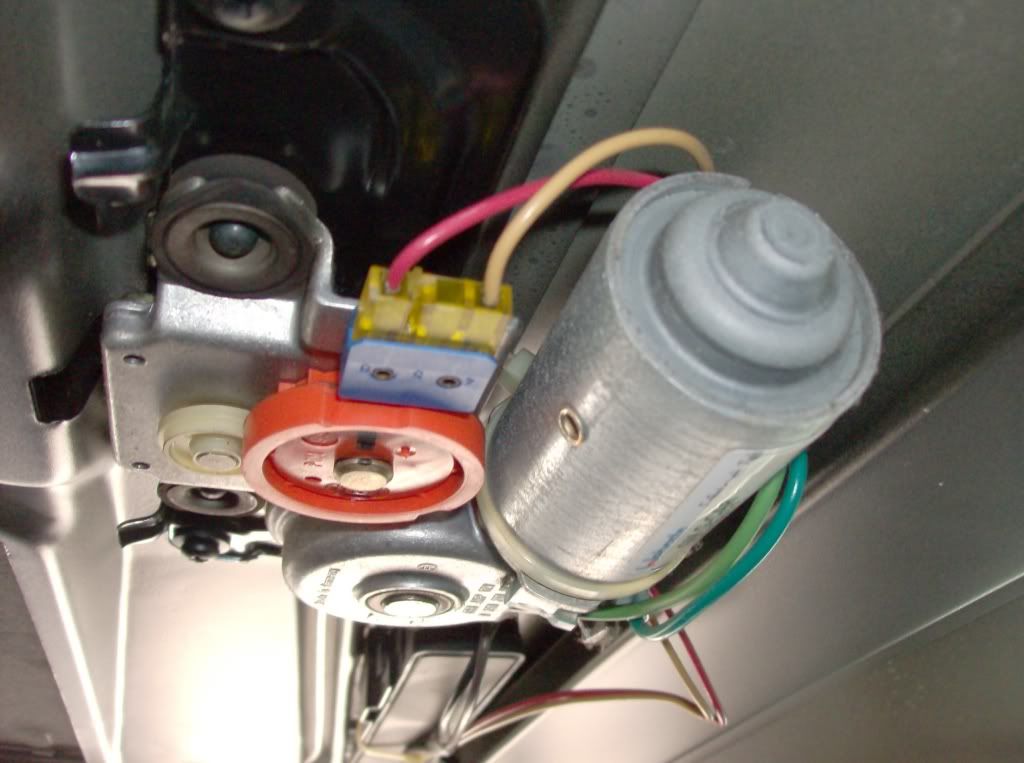
You now have access to the sunroof motor. take your sturdy screwdriver and remove the two screws that hold the motor to the sunroof support bracket. Give the motor a slight tug and it should come off in your hand. Disconnect the the limiting switch connector, yellow, and both motor wires, lime green on the top and dark green on the side. remember that because if you connect them wrong the motor will be run in reverse and will destroy your sunroof assembly in short order.
WE REACH A CROSSROADS HERE........
IF YOU ONLY NEEDED TO REPLACE THE MOTOR ASSEMBLY due to sunroof failing to park in the closed position you can jump to the motor install portion of this walk through.
IF YOUR SUNROOF IS MAKING A GRINDING NOISE than please read on.
After you have removed the motor assembly, you will see a small toothed wheel with a screw on either side. remove those screws.
PLEASE NOTE THAT THE SUNROOF HAS TWO DIFFERENT TYPES OF SCREWS. a fine thread and a coarse thread, do not mix or lose these screws.
Loosely reinstall and reconnect the sunroof motor. power up your classic and retract the sunroof. leave the motor attached for now and stand on the front door seal of your classic and remove the 4 track screws per side.
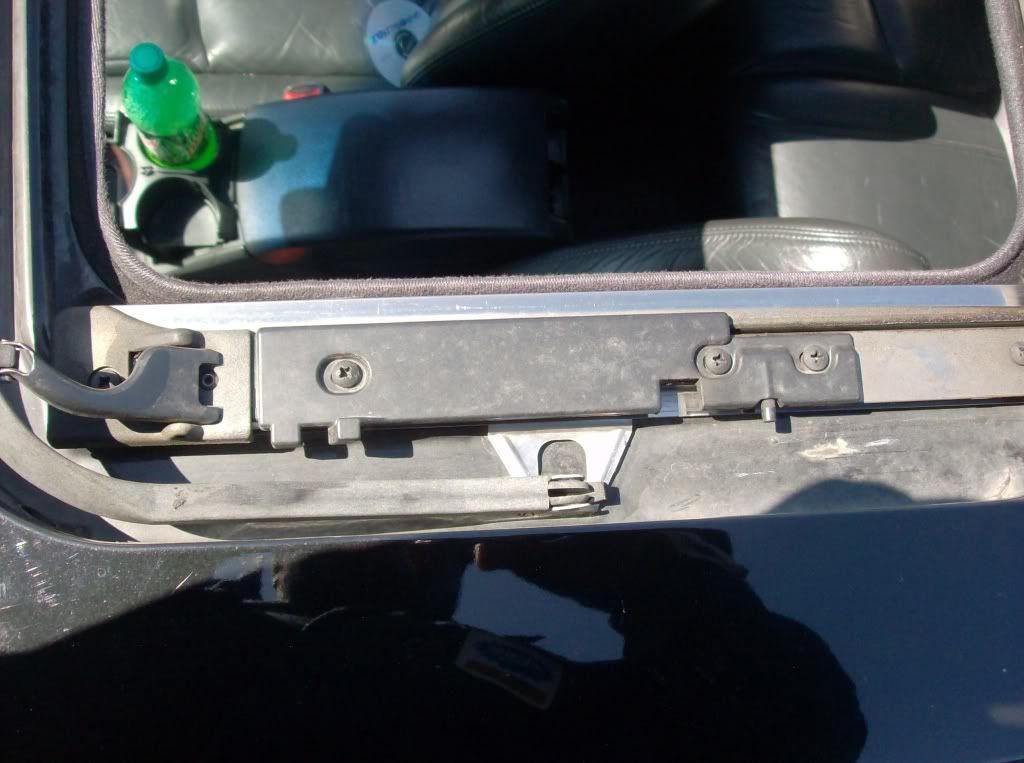
Power your classic back up and close the sunroof, cautiously as there isn't anything attaching the sunroof assembly to your car.
Now remove and disconnect the sunroof motor yet again, and push up and forward on your now closed sunroof. It should easily pop up and slide forward. BUT DO NOT PUSH IT MORE THAN 1/4 INCH or you will have two nice scratch marks on the roof of your classic.
standing on the door seal again. grab the sunroof with two hands and pull up and toward the front of the car.
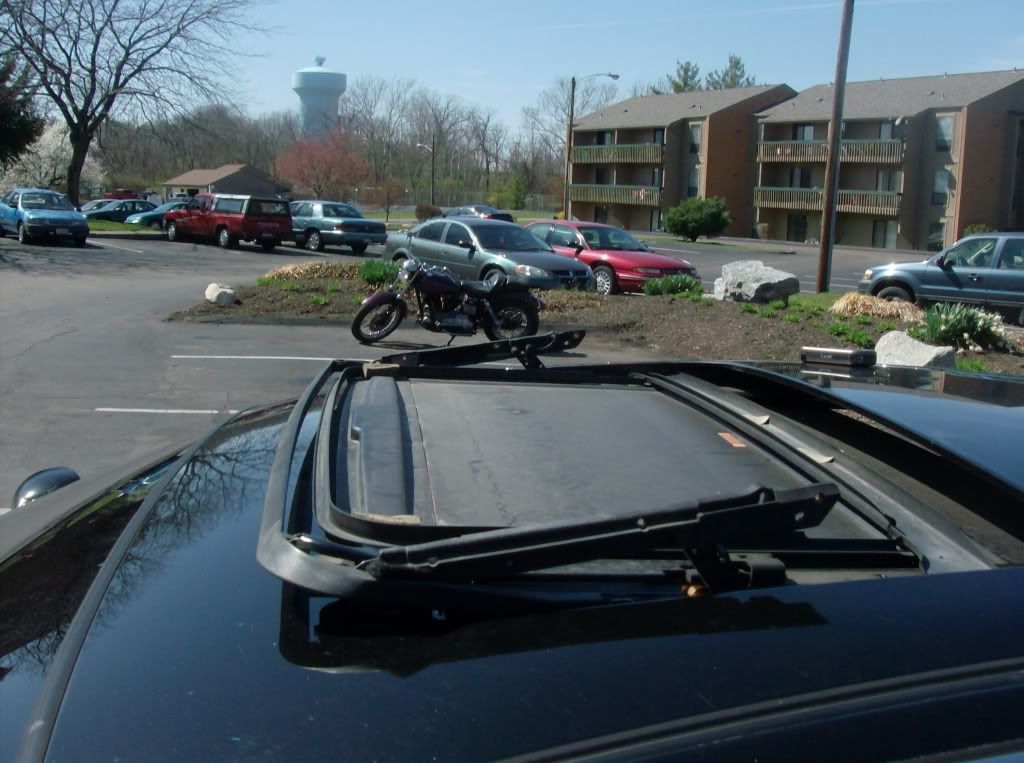
(glass removed for easier viewing of sunroof assembly)
The sunroof assembly weighs about 5-7 pounds with the glass installed and about 3 pounds without. So you shouldn't have any problems carrying it.
you should now have a hole in your roof. while you are looking at the hole in your roof take the time to make sure that the four drainage tubes for your sunroof are free of obstruction, and that you don't have any errand leaves and road debris in this cavity.
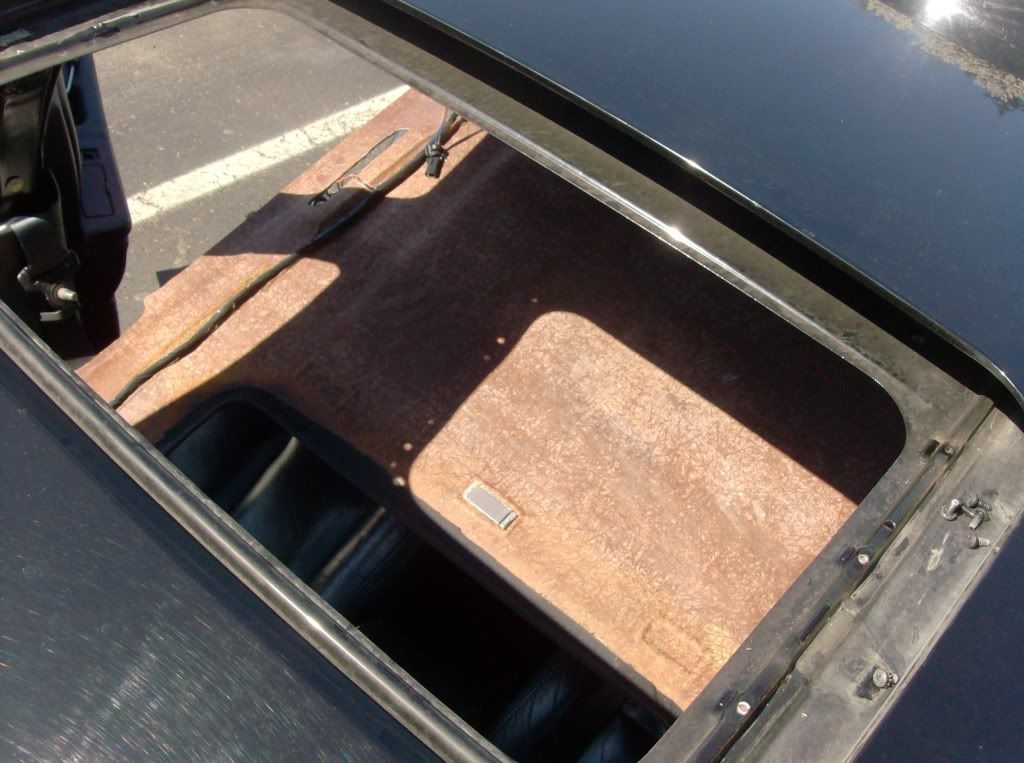
Its time for re-installation, so lets get down to it.
There is a reason for everything i do. and this is no exception. take your new, or new to you sunroof assembly and slide it toothed wheel end first into the sunroof cavity. again using rags to protect your paint.
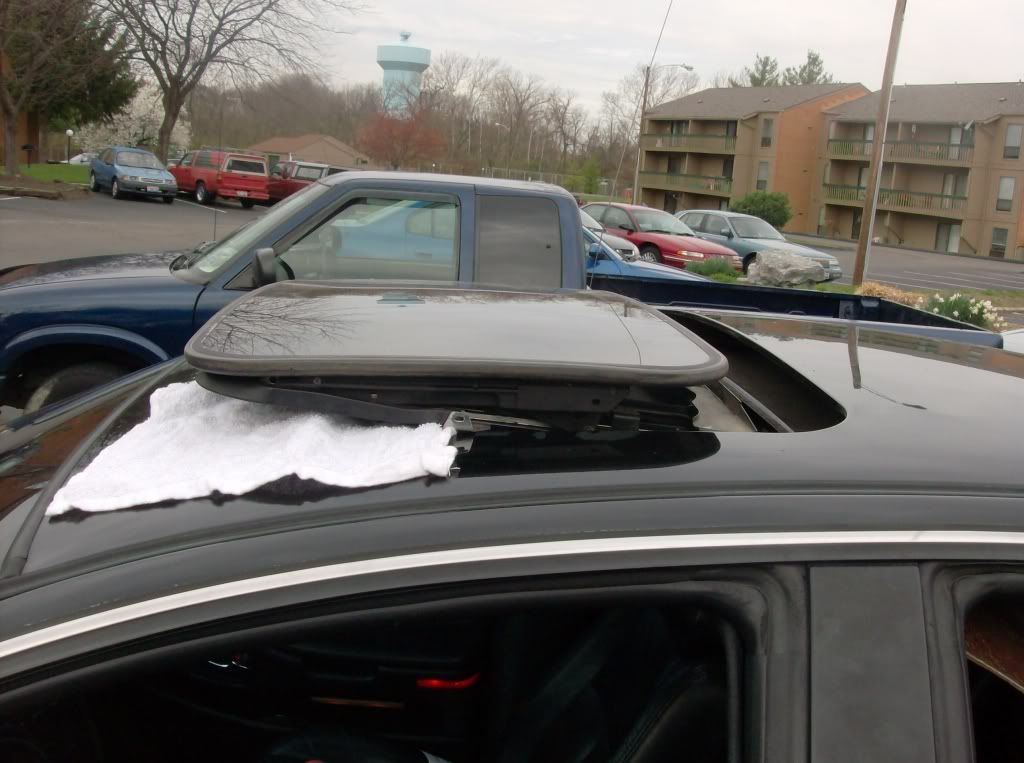
now you may have to get into the back seat and line the wheel up with the hole but don't worry about sliding the assembly because the rags will make sure nothing is scratched in the process.
After you get everything lined up the sunroof assembly should just drop into place like so.
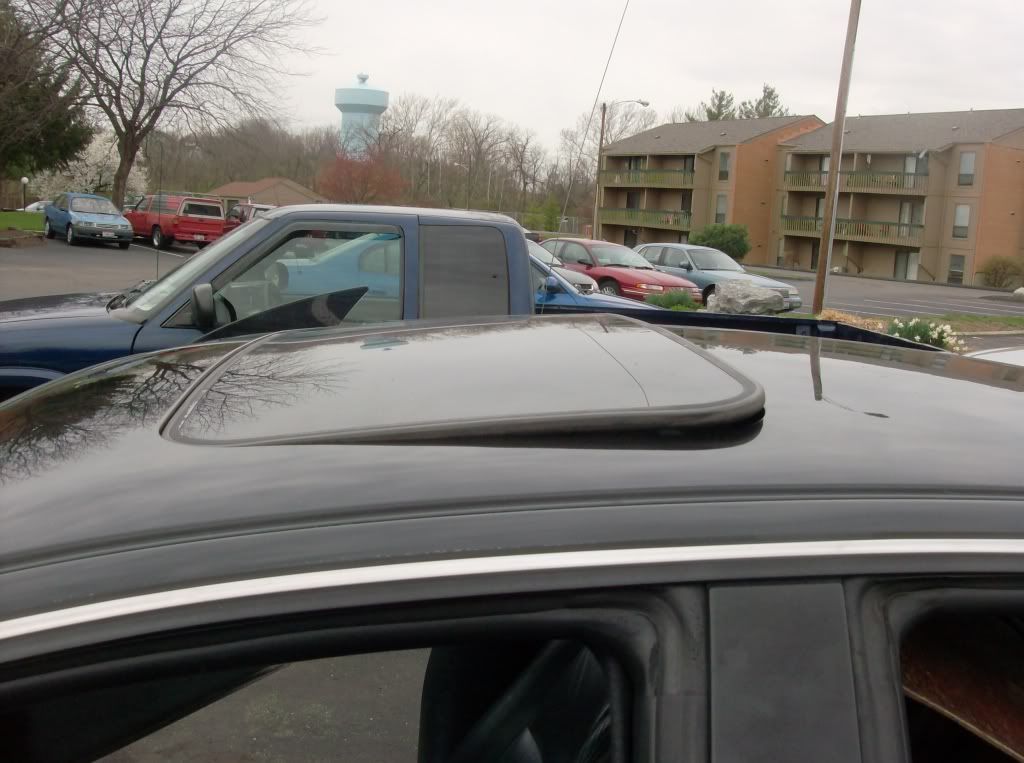
you will need to reinstall the two screws by the toothed wheel, and temporarily reinstall the old sunroof motor, to cautiously retract the sunroof into the car to access the 4 per side track screw holes in the front of the assembly. you can also use a rag and a pair of vice grips like i mentioned at the top of this post.
Install the most forward screw on each side of the sunroof track first to line up the sunroof properly. than install the remaining screws as you see fit. just make sure they are tight. please note that the track screws are of coarse thread.
MOTOR INSTALLATION AND ADJUSTMENT.
This can make or break this job. you will need to use either the old motor or the vice/rag combo to position the sunroof glass in the closed/ flush position. i would prefer that you use the motor, but if your comfortable with the vice/rag combo have at it.
Connect your new/ new to you motor and let it hang free. you can support it but its really not needed, the wires are of sufficient gage to support the assembly with ease.
NOW IF THE SUNROOF WAS IN THE PARKED POSITION WHEN YOU REMOVED THE MOTOR FROM THE DONOR CAR, OR IF IT IS BRAND NEW. YOU CAN INSTALL IT AS IT, BARRING YOU DIDN'T GET THE ITCH TO SEE IT IN ACTION BEFORE YOU INSTALLED IT.
IF YOUR SUNROOF WAS PARTIALLY OPEN OR YOU GOT THE ITCH YOU WILL NEED TO PARK THE MOTOR IN THE CLOSED POSITION.
Connect the motor, and with it hanging free press the sunroof retract/ open rocker switch toward open/retract. the motor will hum along for about 5-7 secs and stop. now press the sunroof switch toward close/vent. hold it until it stops, than release the button. bingo that is the closed position. you can now install the motor.
Simply line up the toothed wheel and the receiver on the motor assembly, install the two mounting screws and your done.
Test the functioning of the sunroof, by FIRST going from closed to vent. NEVER RETRACT FIRST TO TEST, BECAUSE IF IT FAILS TO PARK IN RETRACT IT WILL GRIND AWAY THE SUNROOF ASSEMBLY TRANSMISSION AND YOU WILL BE BACK TO SQUARE ONE.
Now press the close/ retract. the sunroof should park in the closed position, and not retract. if it does retract the motor assembly you pulled is junk and you need another one. if it parks your golden.
IF YOUR SUNROOF PARKS FROM THE VENT TO CLOSED TEST check the flushness of the glass to the roof skin, and if your happy with it, which you should be. retract the sunroof, with your finger on the close switch just in case the motor fails to park in the open position which is rare as the limiting switch controls parking in both instances.
Reinstall all interior pieces, and your 95% of the way done.
LUBE THAT FREAKING SUNROOF PLEASE, FOR THE LOVE OF AURORA.
Lack of lubrication is a major contributor to the classic sunroof failing. if your motor died chances are your sunroof is as stiff as a mummy.
so lets lube it up shall we.
Grab either some white lithium or wheel bearing grease. yeah i said wheel bearing grease, works wonders. and apply it to the top and outside edges of the sunroof tracks. on the sides of the tracks run the weight carrying components of the sunroof, while the thin metal cable runs in the groove on top of the sunroof track.
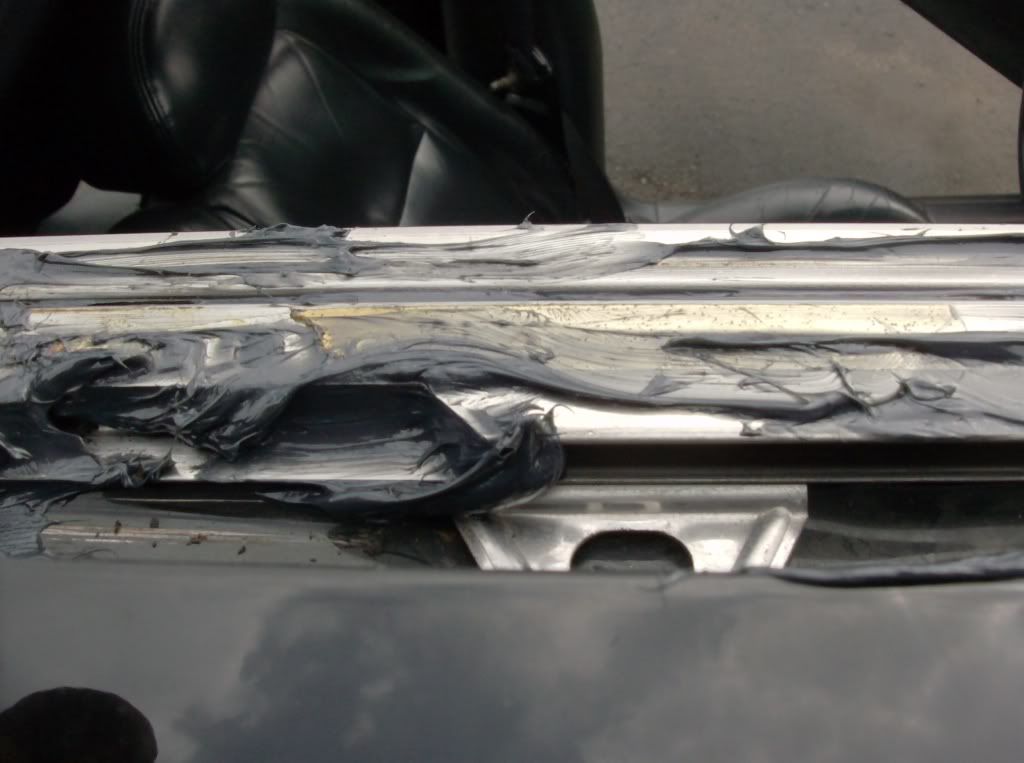
You wanna pack that top groove full of grease, and the same thing with the outer track. the easier it is to move the glass the longer your sunroof will work as intended.
does it make a horrible grinding noise when you allow it to go back on its own?
does it make that same horrible noise when you use the vent function, or does the vent function not work at all?
than i have the walk through you have been waiting for.......
Tools needed:
Phillip head screw driver, a good sturdy one.
T-40 inside torx and 3/8 ratchet
A bunch of rags to protect your paint and to clean up your sunroof tracks.
Parts Needed:
This depends on how long you have allowed your sunroof to malfunction, grind etc. it could be as simple as the motor assembly, two screws, or you could have to replace the entire sunroof.
If your sunroof makes a grinding noise than you will be replacing the entire sunroof assembly. if your a more cautious, less neglectful, classic owner you will get away with the motor assembly.
Were to get a sunroof motor or complete sunroof assembly:
I went to my local pull and pay. and spent 30 bucks for a sunroof assembly that included glass and the motor. Than i got two more motor assemblies due to the fact that 5/10 classics suffer the limiting switch failure.
But how do you know if your getting a good assembly? take a rag and a pair of vice grips and grab the toothed wheel that is visible once you remove the sunroof motor. using the rag to protect the teeth on the wheel. and than twist away. if you get the extreme travel of the sunroof and don't hear any grinding when you try to over extend the vent lift mechanism, or try to over retract the glass than your golden. chances are that the sunroof on that classic is functioning perfectly fine, including parking were its suppose too. i would take that motor and or assembly if i needed it.
all together i spent about 50 bux on parts to fix my roof, a freebie in the world of classic ownership.
LETS GET IT!!!! (not a typo)
First you will need to move the front seats to their most forward position, seat backs up right. as you will need as much space to work as possible.
Remove the two rear interior panels, the ones that are around the rear window, by first pressing down and then pulling them toward you.
Remove the two rear courtesy/ grab handles. pull the handle down to reveal the two screws that attach each handle to the roof supports.

Remove both back window trims, not the big black ones but the ones that are the color of your interior.
at this point your fiber backed head liner will drop down about 7-8 inches depending on condition.

You now have access to the sunroof motor. take your sturdy screwdriver and remove the two screws that hold the motor to the sunroof support bracket. Give the motor a slight tug and it should come off in your hand. Disconnect the the limiting switch connector, yellow, and both motor wires, lime green on the top and dark green on the side. remember that because if you connect them wrong the motor will be run in reverse and will destroy your sunroof assembly in short order.

WE REACH A CROSSROADS HERE........
IF YOU ONLY NEEDED TO REPLACE THE MOTOR ASSEMBLY due to sunroof failing to park in the closed position you can jump to the motor install portion of this walk through.
IF YOUR SUNROOF IS MAKING A GRINDING NOISE than please read on.
After you have removed the motor assembly, you will see a small toothed wheel with a screw on either side. remove those screws.
PLEASE NOTE THAT THE SUNROOF HAS TWO DIFFERENT TYPES OF SCREWS. a fine thread and a coarse thread, do not mix or lose these screws.
Loosely reinstall and reconnect the sunroof motor. power up your classic and retract the sunroof. leave the motor attached for now and stand on the front door seal of your classic and remove the 4 track screws per side.

Power your classic back up and close the sunroof, cautiously as there isn't anything attaching the sunroof assembly to your car.
Now remove and disconnect the sunroof motor yet again, and push up and forward on your now closed sunroof. It should easily pop up and slide forward. BUT DO NOT PUSH IT MORE THAN 1/4 INCH or you will have two nice scratch marks on the roof of your classic.
standing on the door seal again. grab the sunroof with two hands and pull up and toward the front of the car.

(glass removed for easier viewing of sunroof assembly)
The sunroof assembly weighs about 5-7 pounds with the glass installed and about 3 pounds without. So you shouldn't have any problems carrying it.
you should now have a hole in your roof. while you are looking at the hole in your roof take the time to make sure that the four drainage tubes for your sunroof are free of obstruction, and that you don't have any errand leaves and road debris in this cavity.

Its time for re-installation, so lets get down to it.
There is a reason for everything i do. and this is no exception. take your new, or new to you sunroof assembly and slide it toothed wheel end first into the sunroof cavity. again using rags to protect your paint.

now you may have to get into the back seat and line the wheel up with the hole but don't worry about sliding the assembly because the rags will make sure nothing is scratched in the process.
After you get everything lined up the sunroof assembly should just drop into place like so.

you will need to reinstall the two screws by the toothed wheel, and temporarily reinstall the old sunroof motor, to cautiously retract the sunroof into the car to access the 4 per side track screw holes in the front of the assembly. you can also use a rag and a pair of vice grips like i mentioned at the top of this post.
Install the most forward screw on each side of the sunroof track first to line up the sunroof properly. than install the remaining screws as you see fit. just make sure they are tight. please note that the track screws are of coarse thread.
MOTOR INSTALLATION AND ADJUSTMENT.
This can make or break this job. you will need to use either the old motor or the vice/rag combo to position the sunroof glass in the closed/ flush position. i would prefer that you use the motor, but if your comfortable with the vice/rag combo have at it.
Connect your new/ new to you motor and let it hang free. you can support it but its really not needed, the wires are of sufficient gage to support the assembly with ease.
NOW IF THE SUNROOF WAS IN THE PARKED POSITION WHEN YOU REMOVED THE MOTOR FROM THE DONOR CAR, OR IF IT IS BRAND NEW. YOU CAN INSTALL IT AS IT, BARRING YOU DIDN'T GET THE ITCH TO SEE IT IN ACTION BEFORE YOU INSTALLED IT.
IF YOUR SUNROOF WAS PARTIALLY OPEN OR YOU GOT THE ITCH YOU WILL NEED TO PARK THE MOTOR IN THE CLOSED POSITION.
Connect the motor, and with it hanging free press the sunroof retract/ open rocker switch toward open/retract. the motor will hum along for about 5-7 secs and stop. now press the sunroof switch toward close/vent. hold it until it stops, than release the button. bingo that is the closed position. you can now install the motor.
Simply line up the toothed wheel and the receiver on the motor assembly, install the two mounting screws and your done.
Test the functioning of the sunroof, by FIRST going from closed to vent. NEVER RETRACT FIRST TO TEST, BECAUSE IF IT FAILS TO PARK IN RETRACT IT WILL GRIND AWAY THE SUNROOF ASSEMBLY TRANSMISSION AND YOU WILL BE BACK TO SQUARE ONE.
Now press the close/ retract. the sunroof should park in the closed position, and not retract. if it does retract the motor assembly you pulled is junk and you need another one. if it parks your golden.
IF YOUR SUNROOF PARKS FROM THE VENT TO CLOSED TEST check the flushness of the glass to the roof skin, and if your happy with it, which you should be. retract the sunroof, with your finger on the close switch just in case the motor fails to park in the open position which is rare as the limiting switch controls parking in both instances.
Reinstall all interior pieces, and your 95% of the way done.
LUBE THAT FREAKING SUNROOF PLEASE, FOR THE LOVE OF AURORA.
Lack of lubrication is a major contributor to the classic sunroof failing. if your motor died chances are your sunroof is as stiff as a mummy.
so lets lube it up shall we.
Grab either some white lithium or wheel bearing grease. yeah i said wheel bearing grease, works wonders. and apply it to the top and outside edges of the sunroof tracks. on the sides of the tracks run the weight carrying components of the sunroof, while the thin metal cable runs in the groove on top of the sunroof track.

You wanna pack that top groove full of grease, and the same thing with the outer track. the easier it is to move the glass the longer your sunroof will work as intended.




 This is a repair I need too (I have the *grinding* problem upon closing), but honestly the effort looks pretty considerable!


