Post by Randy T. on Apr 1, 2009 21:32:42 GMT -6
**xjsman89 edit 7.11.14: I added Blower Motor pics and instructions. If you want to change the module view the first part of the how-to, if you want to replace the motor follow the steps to remove the kick panel and then jump to the second part of the how-to.**
1. You will need a 1/4 ratchet, a 7mm(9/32) socket or Phillips screwdriver, and a 5.5 mm(7/32) socket. Also a small screwdriver or pick, and possibly a pair of needle nose pliers.
2. Remove your passenger side kick panel. That is the panel that is above your feet when you are sitting in the passenger seat. Two screws hold it in, 7mm or Phillips screwdriver. The panel will drop down, remove the light and remove the panel.
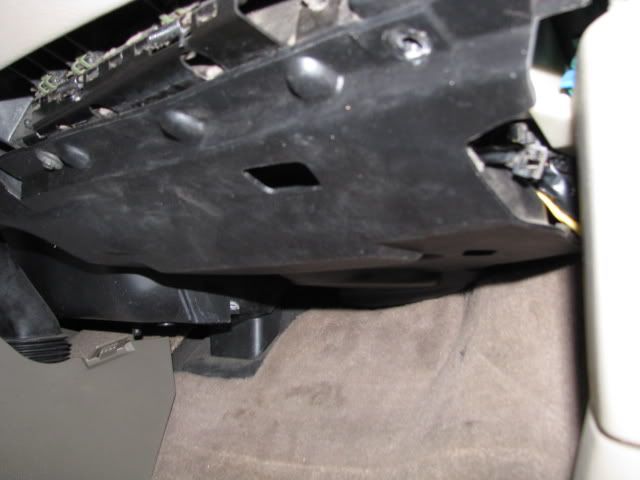
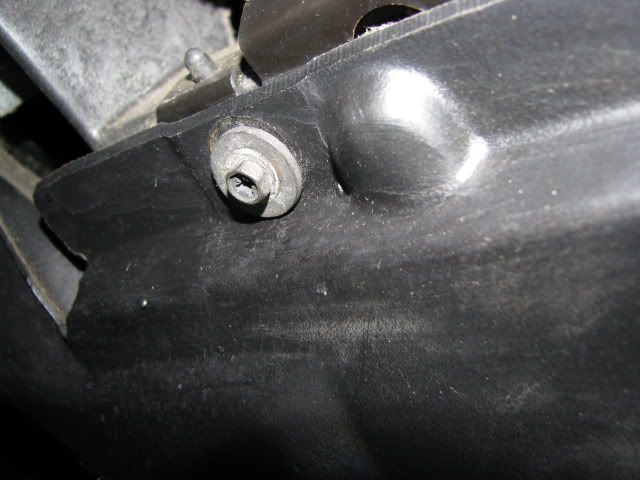
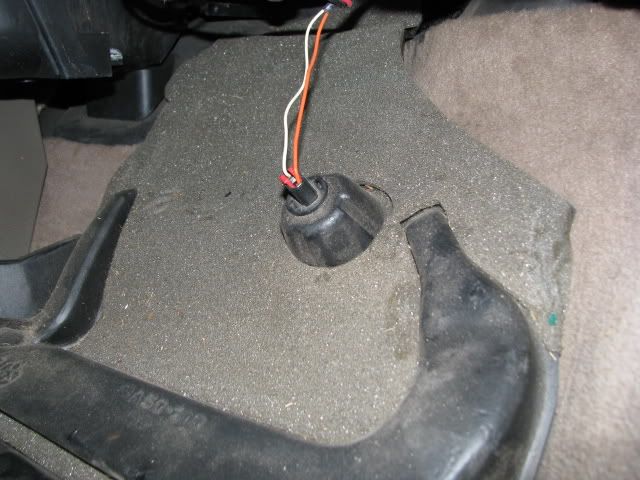
**If you are replacing the Blower Control Module**
3. Next unplug the module. To do that you must first remove the gray clips. There is one clip on each plug and there are two plugs. Use the small screwdriver or pick to gently remove them. You might have to force the back one out, it is harder to access. After the gray clips are removed unplug the two module plugs.
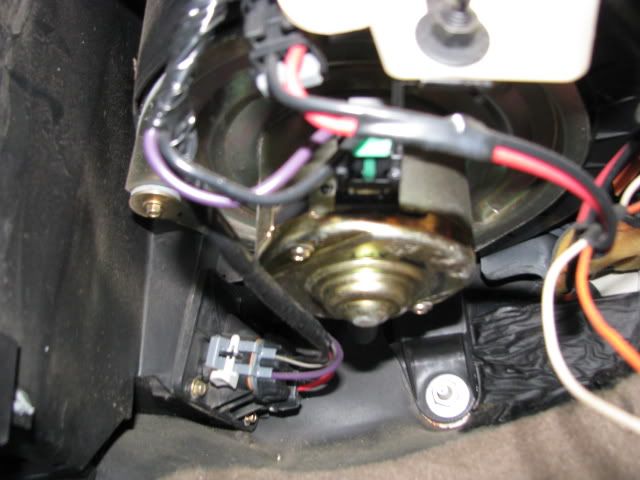
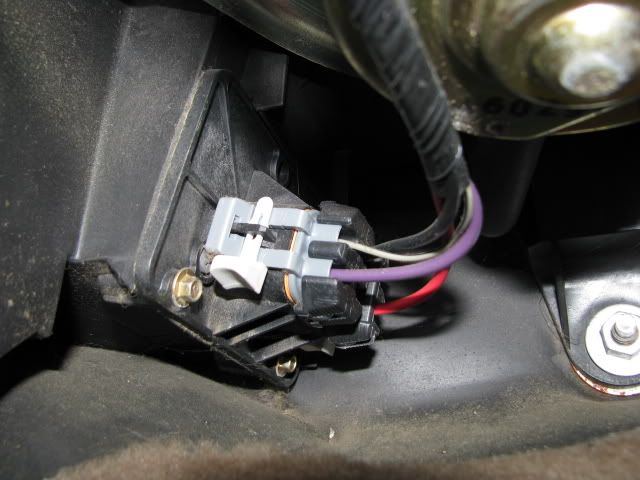
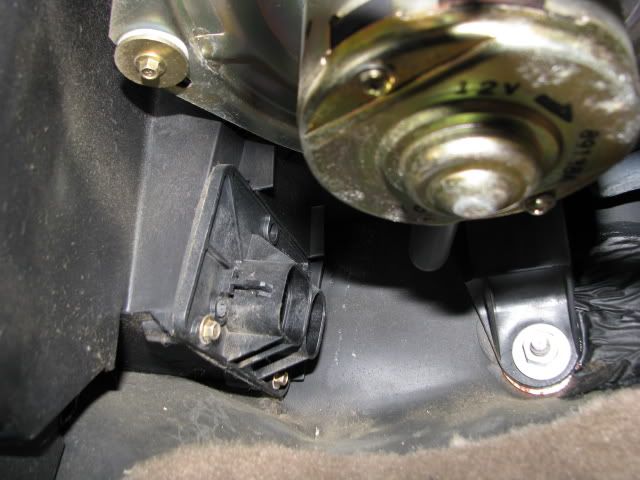
4. Remove the two screws from the module, 5.5 mm. Now it is ready to be removed. A lite tug will release it from the housing. Installation is the opposite of removal.
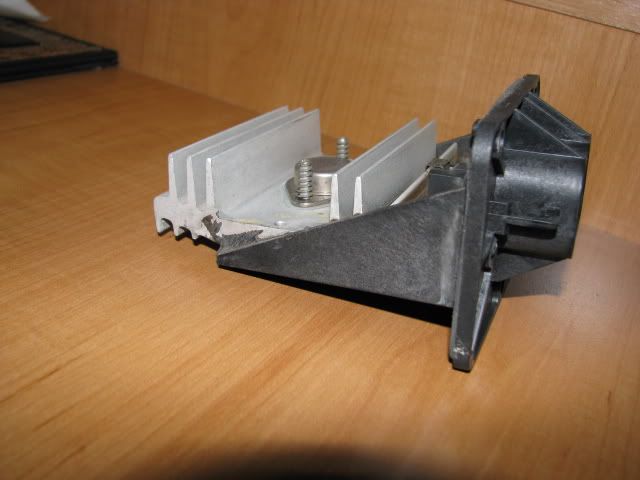
**If you are replacing the blower motor**
3. Once you have the panel removed, you can see the blower motor and control module. The blower motor is the circular gold part in the center.
4. There is one connector that you need to remove prior to pulling the motor out. The connector will be facing you, you need to pull the little green tab toward you (out from the connector, not down) with a pair of pliers and then squeeze the tab on the connector while pulling the connector out.
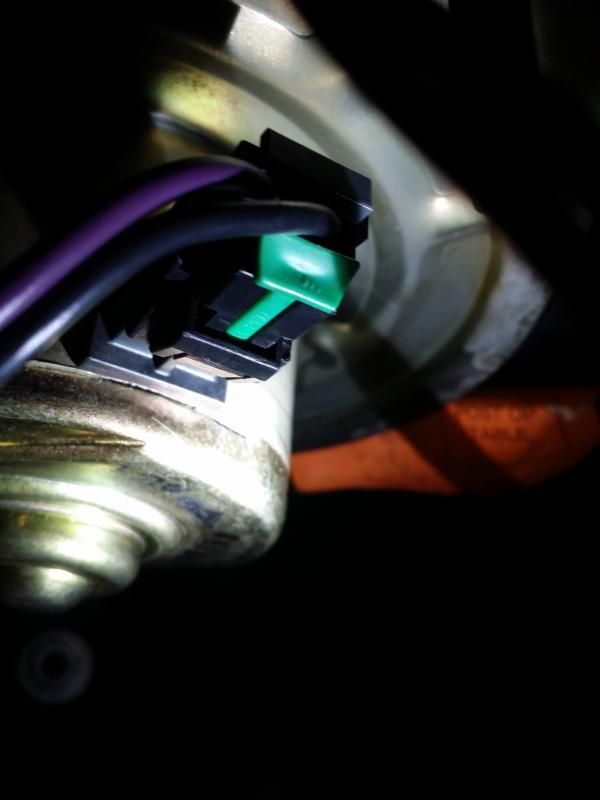
5. There are three hex head screws holding the blower motor into the duct. On my 99 (parts car) they were 7mm, on my 96 they were 7/32. Same screw, different size head. One of them is circled below.
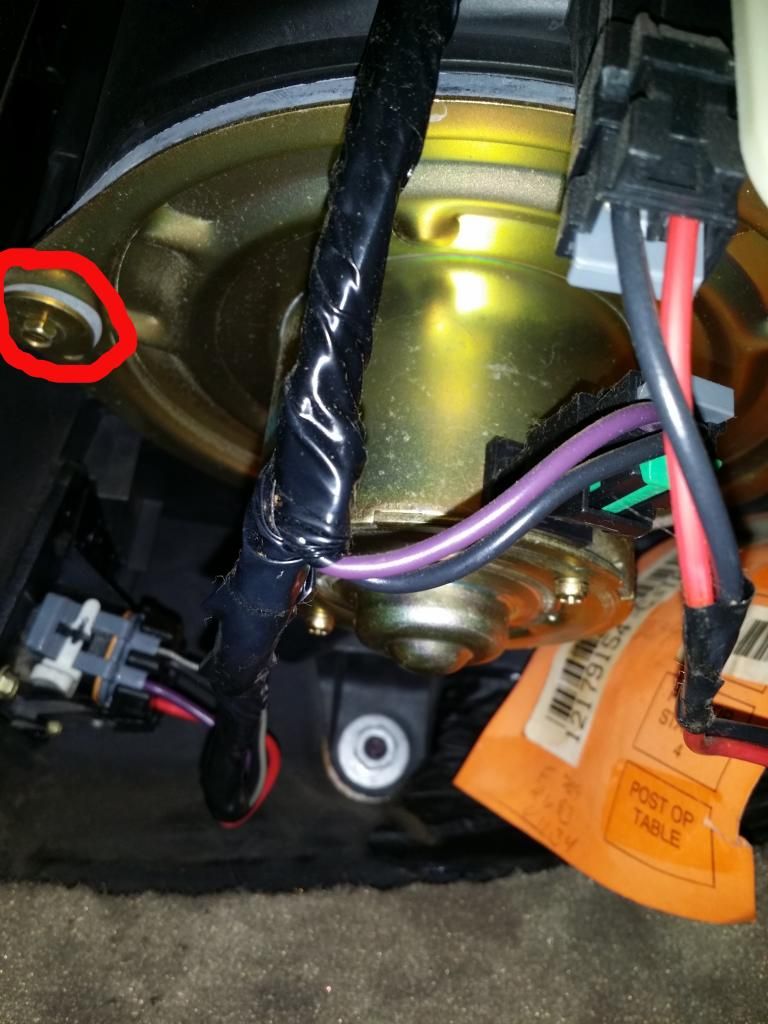
6. The blower motor will begin to come down once you've undone a couple screws, either get something to hold it up there or undo the screws evenly. It doesn't really matter. I used a short and medium socket extension during the course of the job, you will have to figure out what works best for you. There isn't a lot of clearance to get to the screw in the back without an extension. There is also a little rubber tube that fits around a little tube coming out of the duct behind the motor, just pull it loose. It won't be on there tight. Once you have all the screws out and the rubber tube unplugged the blower motor should be loose, if not just use a flathead screwdriver and break the seal. If it doesn't drop out easily go back and double check, something isn't right.
7. Snake the blower motor out past the wires to the control module. You don't need to remove them to get the motor out, just takes a little finesse.
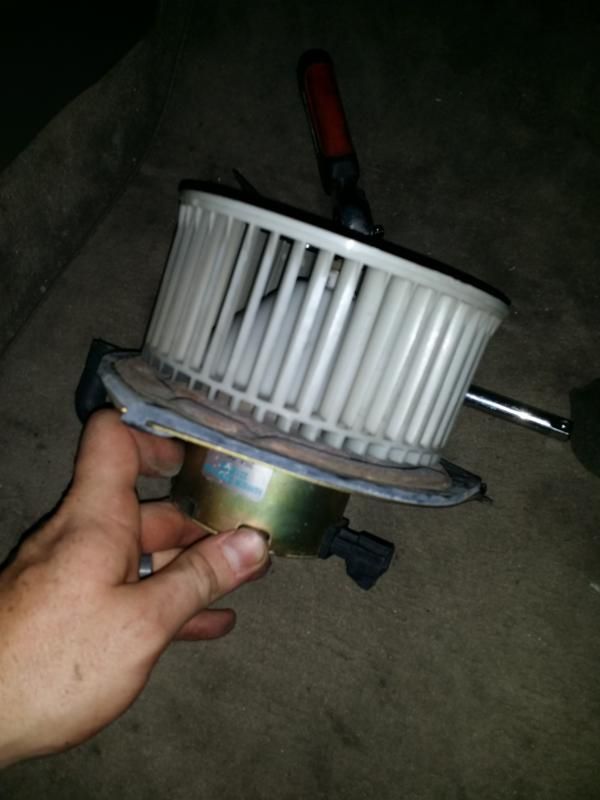
I replaced the blower motor in my 96 with the one from the 99, so they both had blower wheels on them already. If you buy one from an auto parts store they typically don't come with wheels installed, so be sure to save your factory one. it's just one bolt holding the wheel to the motor.
1. You will need a 1/4 ratchet, a 7mm(9/32) socket or Phillips screwdriver, and a 5.5 mm(7/32) socket. Also a small screwdriver or pick, and possibly a pair of needle nose pliers.
2. Remove your passenger side kick panel. That is the panel that is above your feet when you are sitting in the passenger seat. Two screws hold it in, 7mm or Phillips screwdriver. The panel will drop down, remove the light and remove the panel.


**If you are replacing the Blower Control Module**
3. Next unplug the module. To do that you must first remove the gray clips. There is one clip on each plug and there are two plugs. Use the small screwdriver or pick to gently remove them. You might have to force the back one out, it is harder to access. After the gray clips are removed unplug the two module plugs.


4. Remove the two screws from the module, 5.5 mm. Now it is ready to be removed. A lite tug will release it from the housing. Installation is the opposite of removal.

**If you are replacing the blower motor**
3. Once you have the panel removed, you can see the blower motor and control module. The blower motor is the circular gold part in the center.
4. There is one connector that you need to remove prior to pulling the motor out. The connector will be facing you, you need to pull the little green tab toward you (out from the connector, not down) with a pair of pliers and then squeeze the tab on the connector while pulling the connector out.

5. There are three hex head screws holding the blower motor into the duct. On my 99 (parts car) they were 7mm, on my 96 they were 7/32. Same screw, different size head. One of them is circled below.

6. The blower motor will begin to come down once you've undone a couple screws, either get something to hold it up there or undo the screws evenly. It doesn't really matter. I used a short and medium socket extension during the course of the job, you will have to figure out what works best for you. There isn't a lot of clearance to get to the screw in the back without an extension. There is also a little rubber tube that fits around a little tube coming out of the duct behind the motor, just pull it loose. It won't be on there tight. Once you have all the screws out and the rubber tube unplugged the blower motor should be loose, if not just use a flathead screwdriver and break the seal. If it doesn't drop out easily go back and double check, something isn't right.
7. Snake the blower motor out past the wires to the control module. You don't need to remove them to get the motor out, just takes a little finesse.

I replaced the blower motor in my 96 with the one from the 99, so they both had blower wheels on them already. If you buy one from an auto parts store they typically don't come with wheels installed, so be sure to save your factory one. it's just one bolt holding the wheel to the motor.




 Good to have the write-up around though seems like a "common" problem with control module. There was also troubleshooting about whether it was your control unit (dash) going bad or the module on the site I found, didn't book mark it. But here's what I quoted on my post:


