|
|
Post by blue97olds on Aug 22, 2005 16:40:40 GMT -6
Here are the steps required to swap out the radiator on a 97 with the engine oil cooler attached: Step 1: ALWAYS disconnect the battery when you work on a car. Short circuits & fires hurt! I always pull the negative lead from the battery. 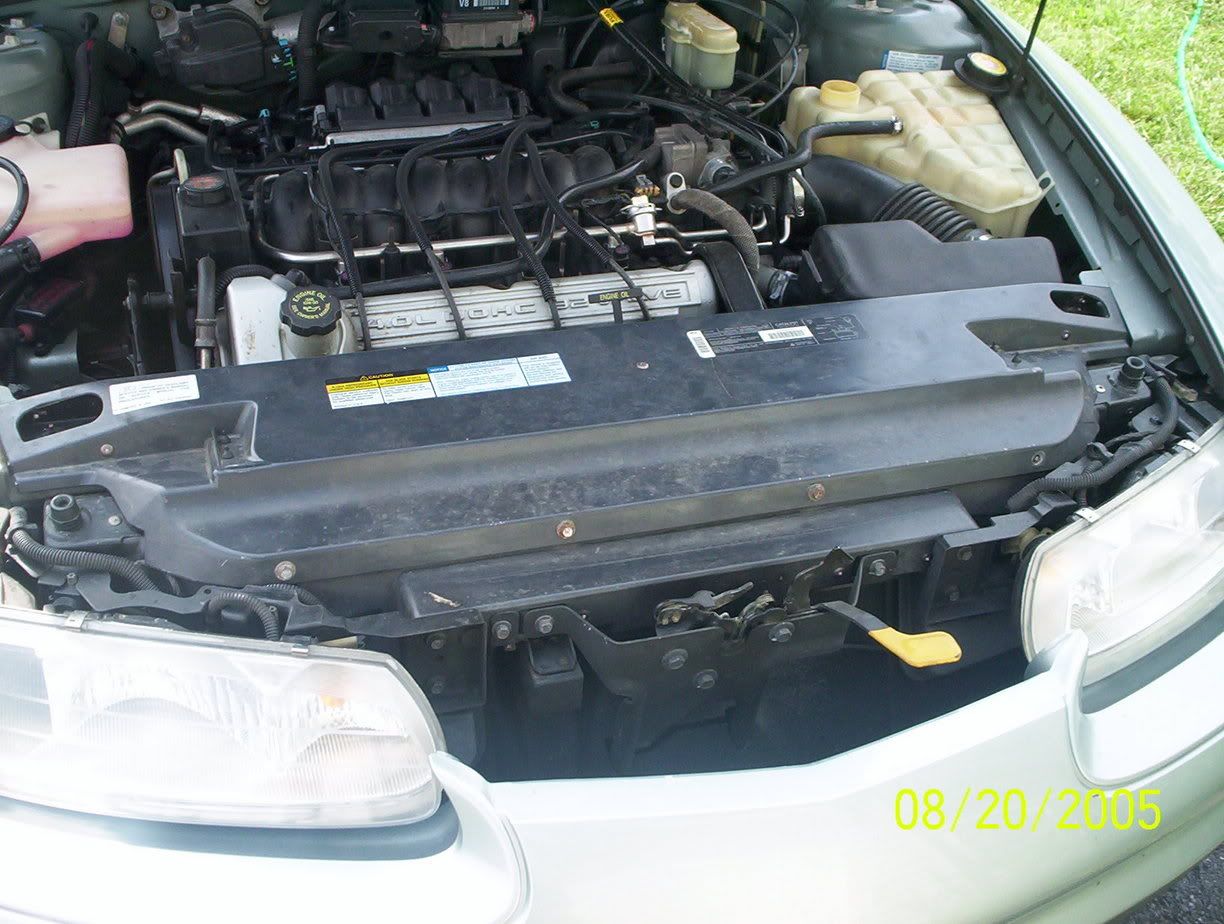 Step 2: Drain radiator. Drain plug is on the drivers side bottom of the radiator accessible thru a hole in the bottom plate (underneath the car), 15mm plastic bolt. Step 3: Remove the cover plate that holds the radiator & condenser down. There is 2 large 13mm bolds, several 10mm bolts, and 2 10mm nuts. 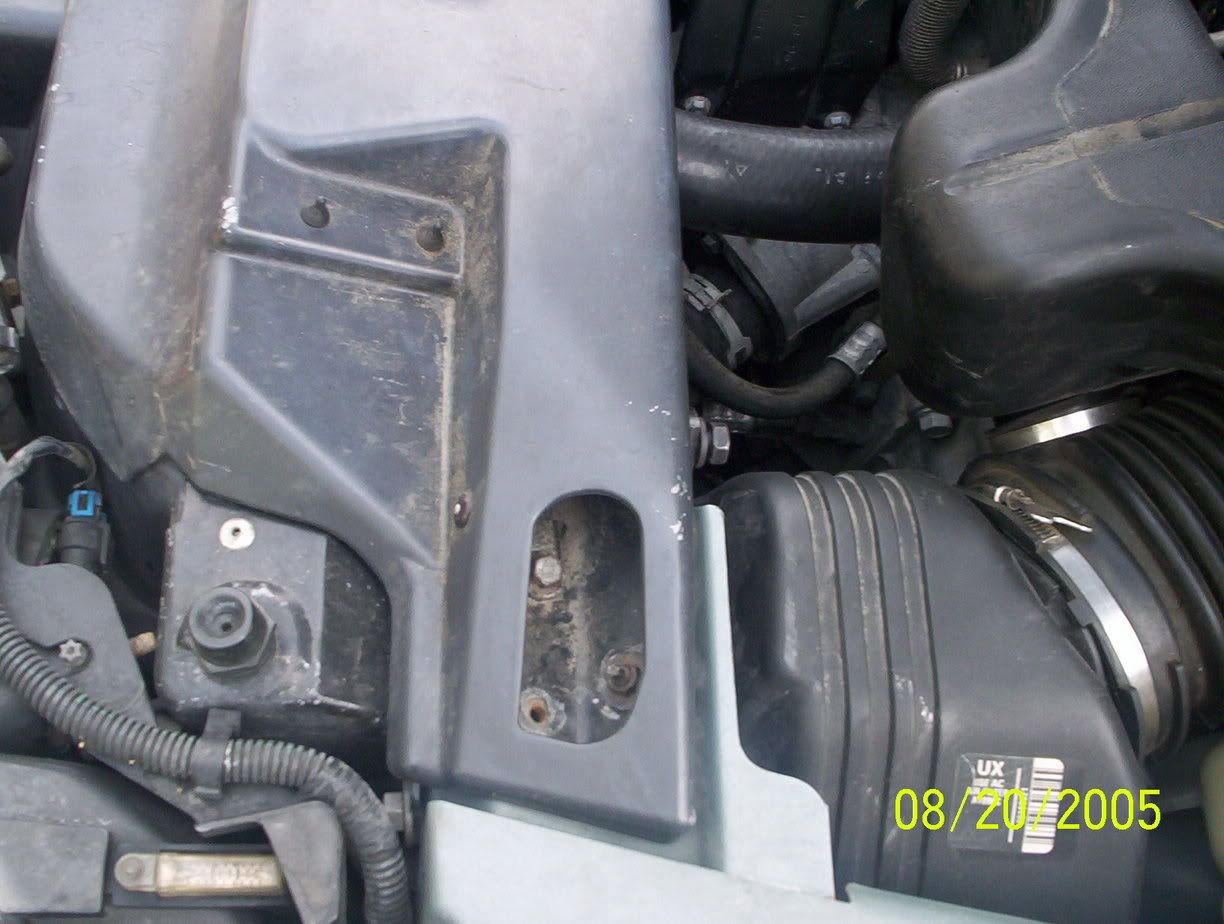 Note that before removing the cover plate, there is bracket that holds the upper radiator hose in position, you have to wiggle the plate to get it off. 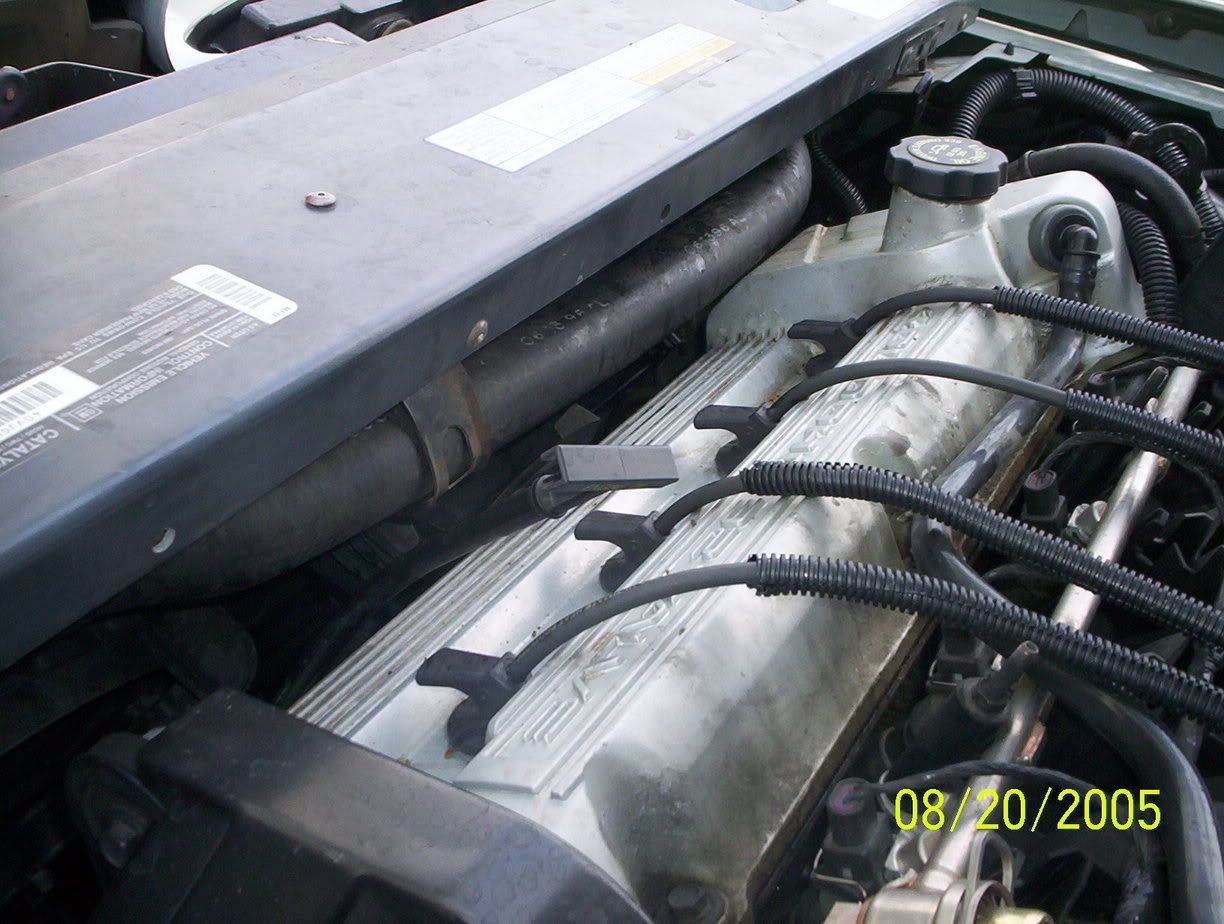 Plate off so you can see the bracket: 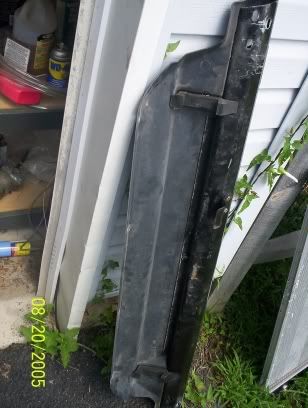 Note the decayed foam strips on top of the radiator. Most will need replaced. Pull them out of the way & set aside 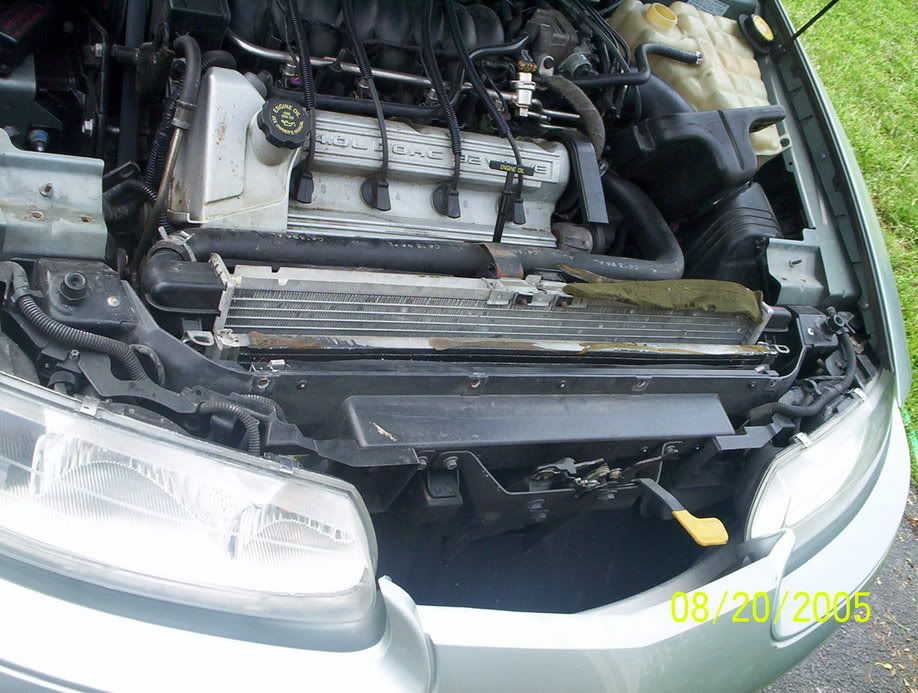 Step 4: unbolt the condenser from the radiator, 1-10mm bolt on each side of the radiator on the top. Make sure to hold onto the brackets, as they may come off when you remove the bolts. 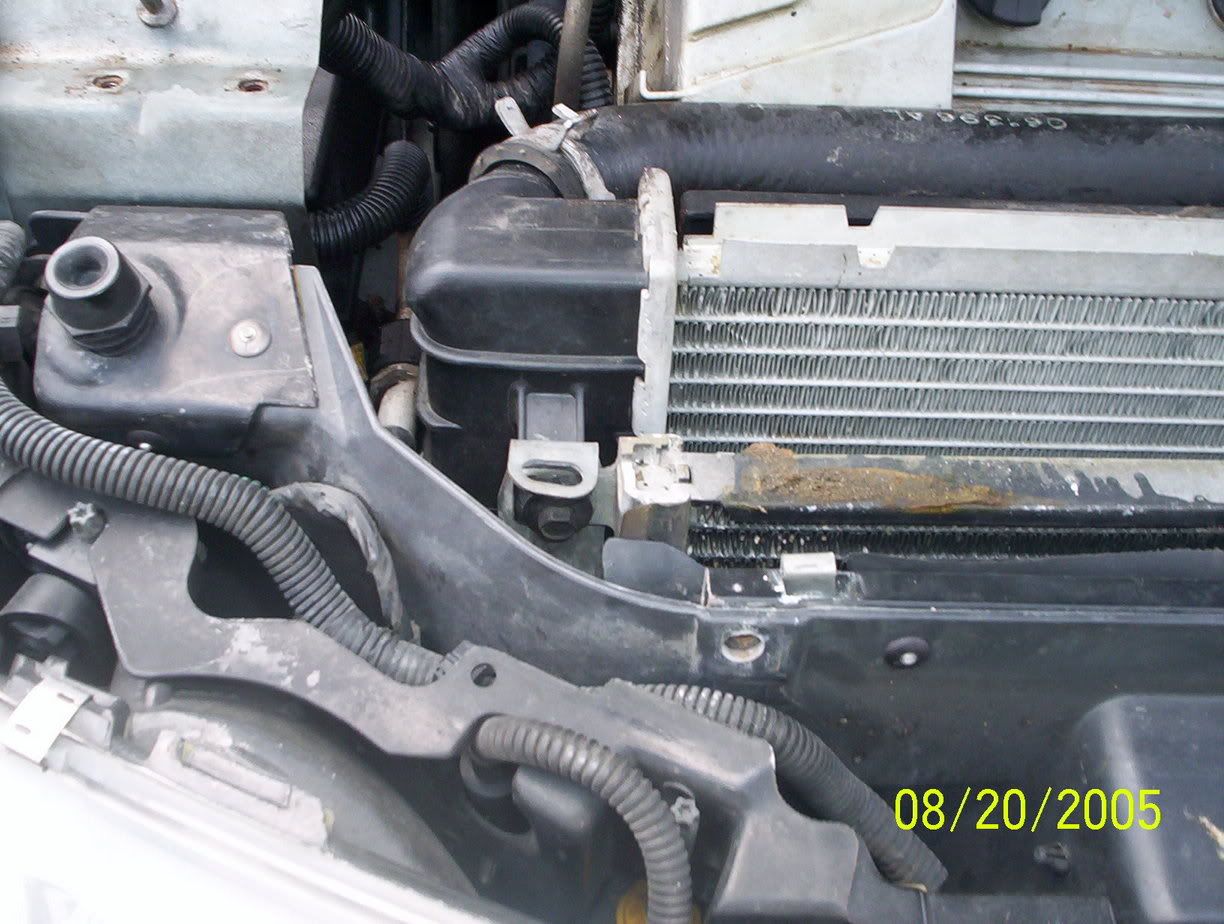 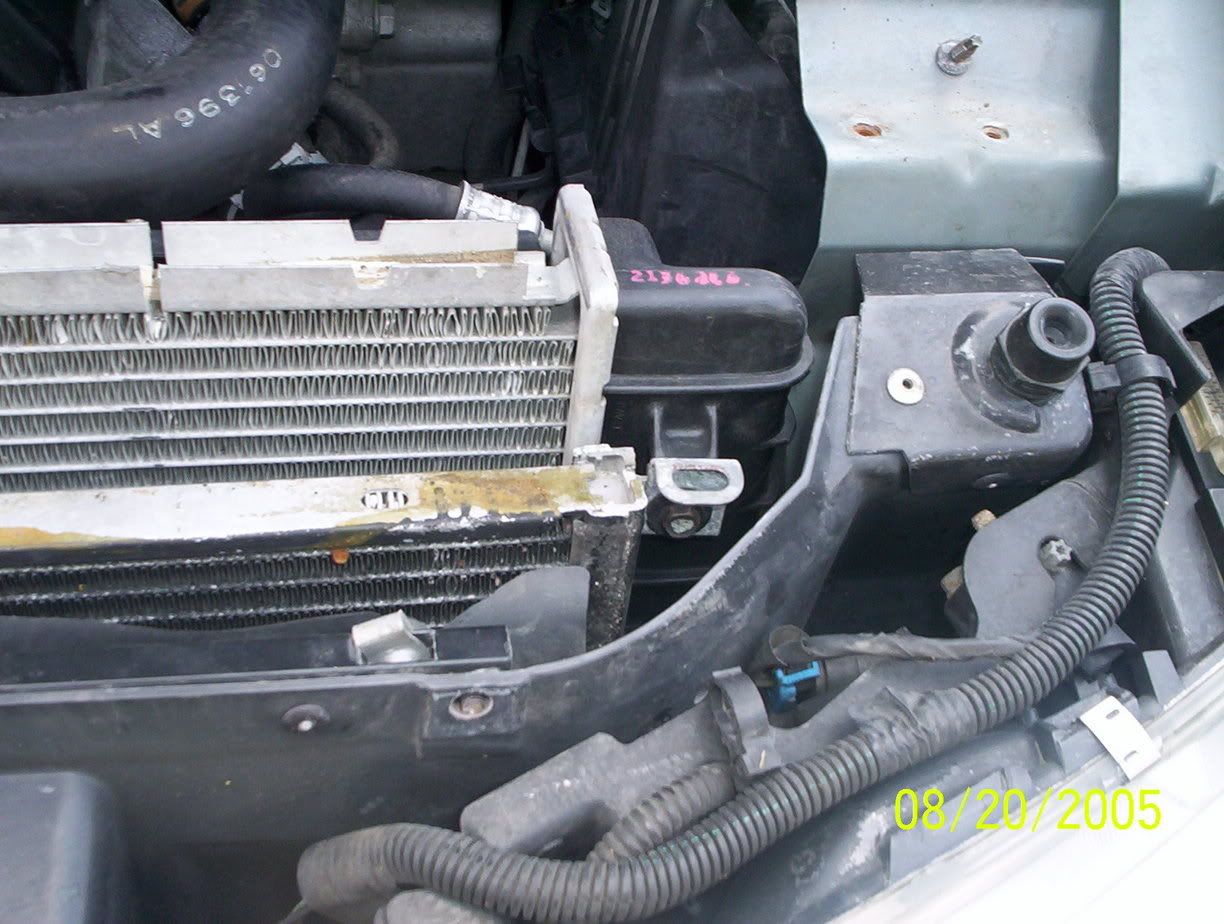 Step 5: Using a set of slip jaw pliers, remove the upper radiator hose from the radiator and the engine. Note: You will need to remove the squeeze clamp to pull it thru the bracket shown. 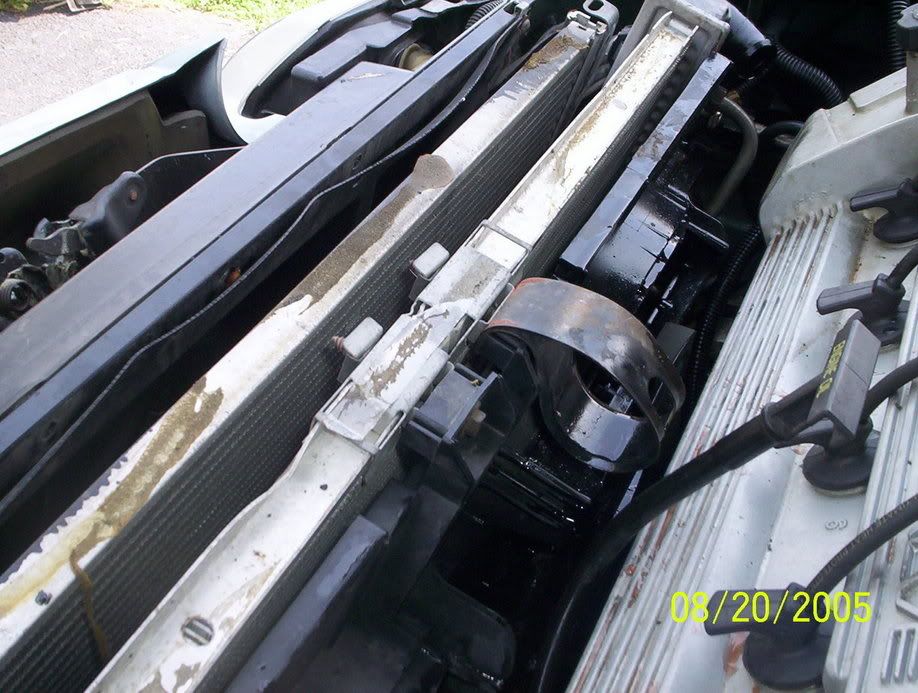 Step 6: Remove upper engine oil cooler line (if so equipped) using a 16mm line wrench (may have to correct this, will edit if needed) 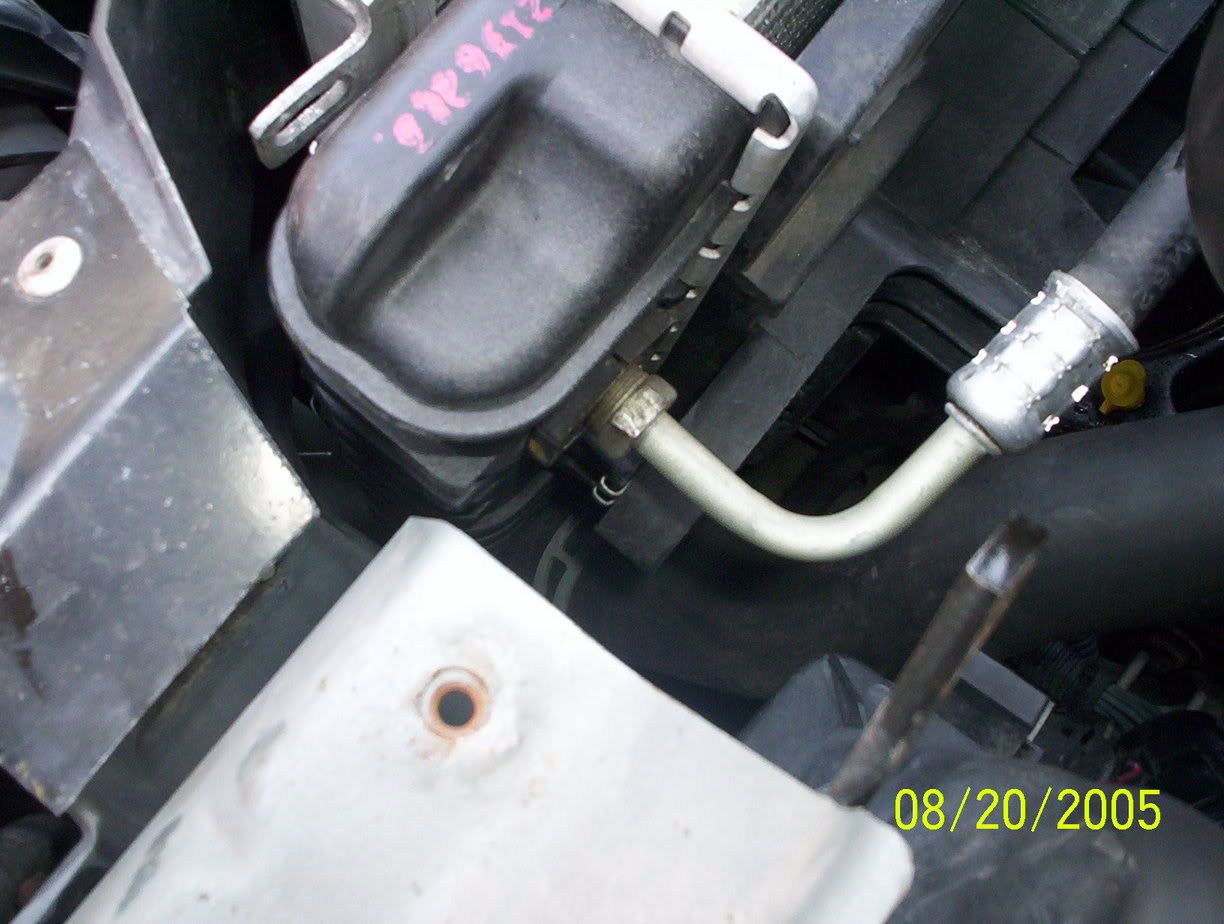 Step 7: Remove upper transmission oil cooler line. I didn't have the correct sized line wrench, so I used an adjustable wrench. 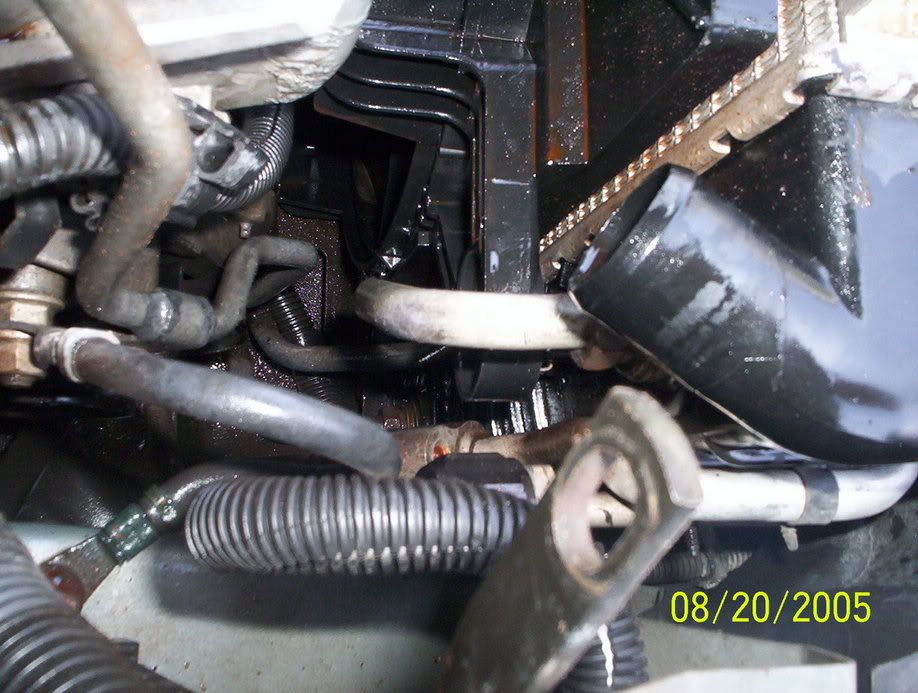 Step 8: Remove the upper fan bracket by removing the 2 long 10mm bolts, then prying the tabs open, then lifting the bracket up from the radiator. Note the orientation of the bracket, and the hold in tabs for when you re-install it. 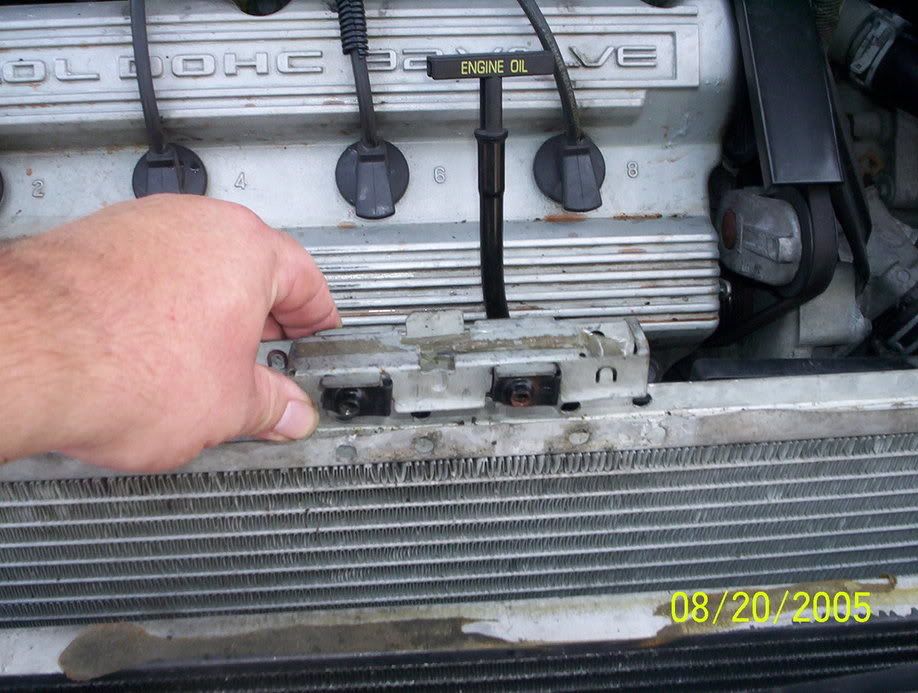 Step 9: Remove 10mm bolt holding passenger's side fan to radiator. In this picture, I hadn't yet undone the trans cooler line, it makes it much easier! 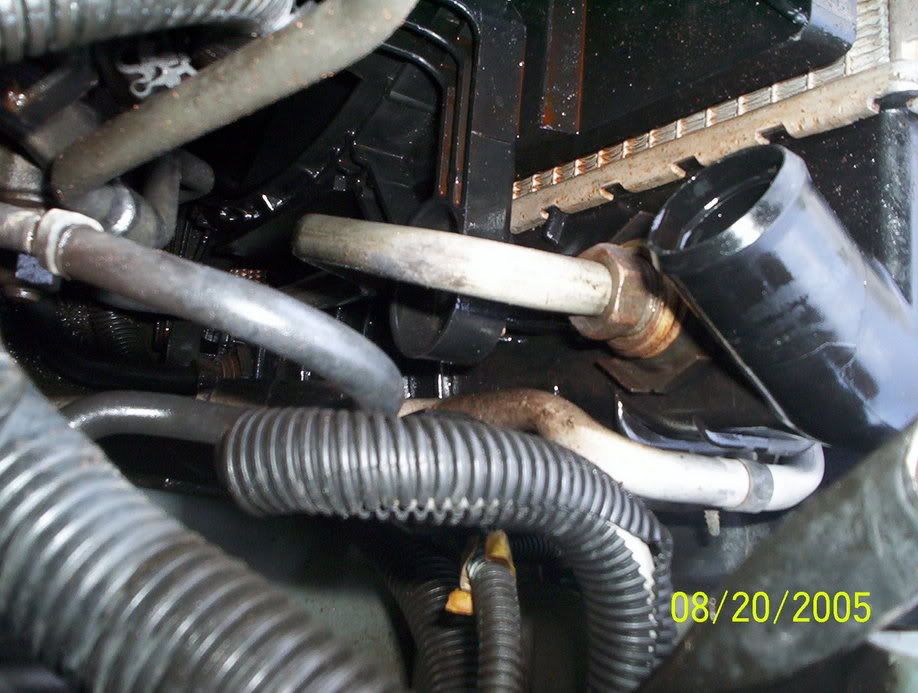 Step 10: Remove the 10mm bolt holding the driver's side fan to the radiator. Again, I hadn't yet removed the engine oil cooler lines, makes it much easier 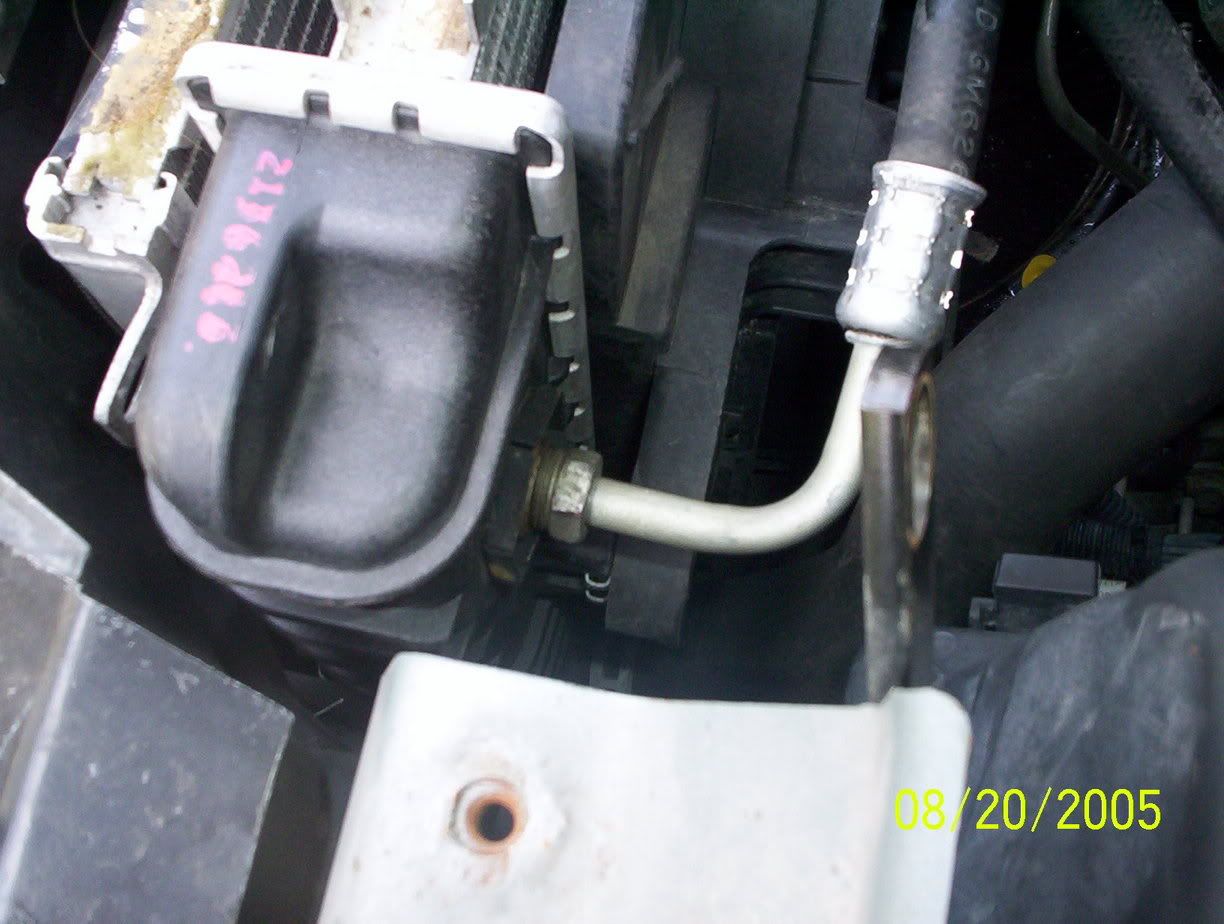 Step 11: Unplug power connector to fans by prying back gently on tab & pulling.  Step 12: Unplug clip holding wiring harness to fans. 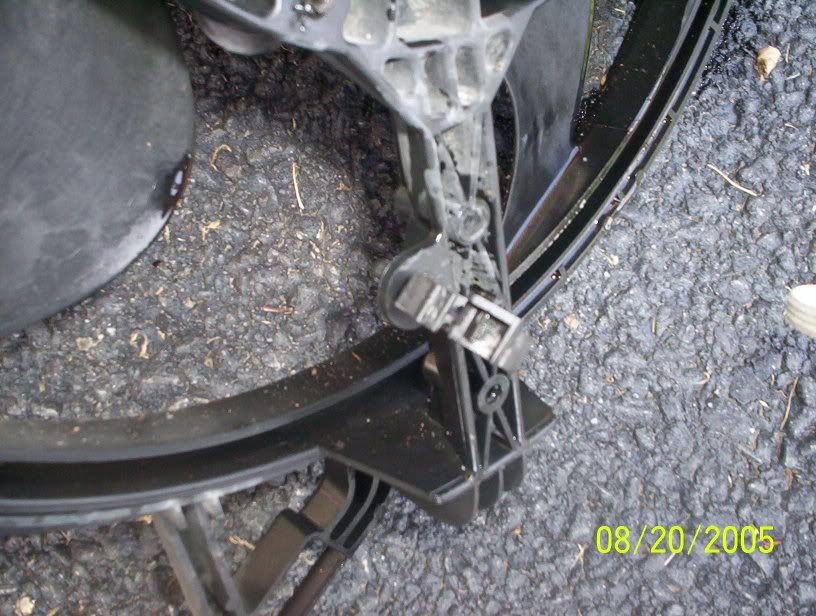 Step 13: Remove fans from car, make sure you keep track of which fan fits on each side. Step 14: Remove transmission oil cooler lower line (again, didn't have correct wrench, used an adjustable)  Step 15: Remove lower radiator hose from engine thermostat housing  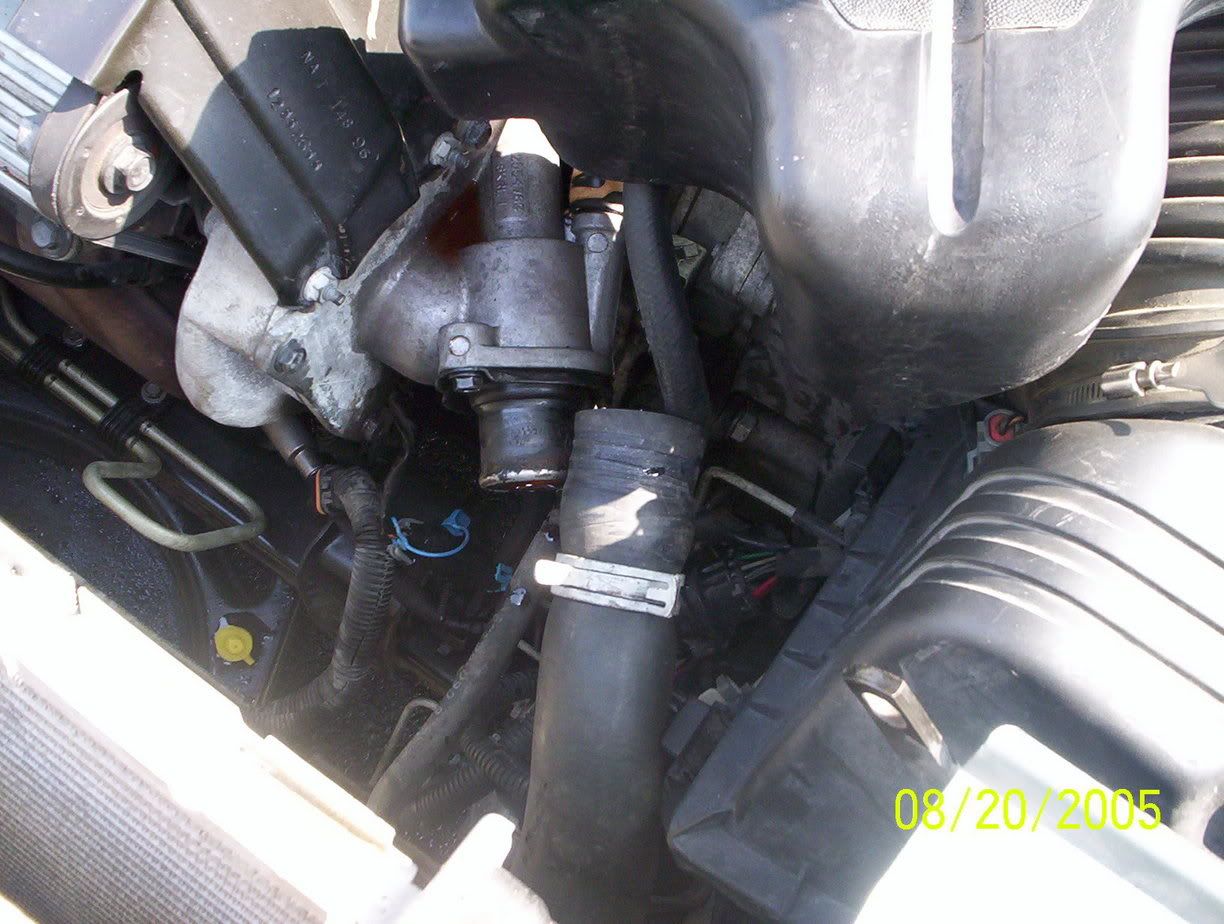 Step 16: Remove lower engine oil cooler line using a 16mm line wrench. Step 17: Gently remove radiator from the car, taking care to not strike the condenser. 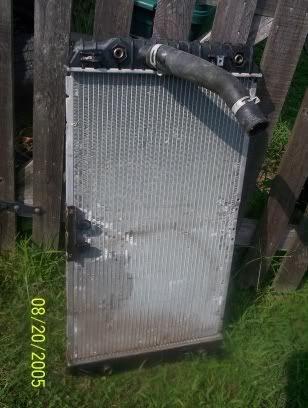 Step 18: Remove the black metal lower fan bracket by prying the tabs out of the holding holes and lifting off. Note orientation so you install it in the correct position on the new radiator. Also, note the tabs on the sides of the radiator where they rest on the condenser for when you reinstall it. Installation is the reverse of removal!! And make sure to have a bottle of Simple Green ready, it was really dirty down there. While the radiator's out, I spayed the condenser down with simple green (detergent cleaner) and also all the collected grease on the front side of the motor, under the radiator, p/s hoses, etc. I also changed out my O2 sensor, as it's real easy to reach with the radiator out, so if you may need to do that, it's a good time  Hope this helps someone! |
|
|
|
Post by blue97olds on Aug 22, 2005 16:46:01 GMT -6
If anyone wants to modify this so the pictures show, feel free  |
|
|
|
Post by BuccaneersFan on Aug 22, 2005 17:02:22 GMT -6
Great write up! Now time to clean your engine!  |
|
|
|
Post by oldsauroraman1 on Aug 22, 2005 20:12:19 GMT -6
Excellent Write Up and most helpful ~ Thank you!
|
|
|
|
Post by betonthis1 on Aug 22, 2005 22:06:28 GMT -6
excellent. you are the man. my kids will know of your greatness.
|
|
|
|
Post by oldsauroraman1 on Aug 23, 2005 16:38:11 GMT -6
And so will my grandchildren.
|
|
|
|
Post by blue97olds on Aug 23, 2005 16:57:39 GMT -6
Hehehe, thanks guys!
|
|
scottydl
Super Moderator      There's nothin' like an American V-8...
Posts: 7,373
Staff Member
|
Post by scottydl on Aug 23, 2005 21:19:47 GMT -6
If anyone wants to modify this so the pictures show, feel free  Done... you just have to put the [ img] [ /img] tags around your image links.  Topic sticked also. Great write-up! |
|
|
|
Post by stiches on Aug 27, 2005 13:17:18 GMT -6
I am just about to change the rad in my 98 and found this post extremely helpfull. Thanks for the pics and instructions blue97olds.
|
|
|
|
Post by oldsauroraman1 on Aug 27, 2005 13:23:01 GMT -6
Stiches, your rad leaking? How many miles?
|
|
Zipzag
Aurora Watcher
 96 Aurora , GM Collision Tech
|
Post by Zipzag on Aug 28, 2005 10:39:31 GMT -6
Accually I recommend removing the rad fans first there are only two bolts holding each at the top, once you remove the fans your will have complete and clear access to all hose;s and lines , and will save you about 10 minutes time ! ANd dont forget to check all your fluid levels after you are done IE: engine and tranny levels as well as coolant
|
|
|
|
Post by blue97olds on Aug 28, 2005 21:05:36 GMT -6
Good point on checking the levels after you're all done Zip, I should have mentioned that.
My fans were held on by 4 bolts: 2 at the top, 2 on the sides. That's why I said to remove the upper oil/trans cooler lines 1st so you could reach the side bolts. Maybe yours was different??
Good luck Stich!
|
|
|
|
Post by blue97olds on Aug 28, 2005 21:08:10 GMT -6
Stich, forgot to add this: Found a listing on Ebay and called them direct, they gave me a great deal! $159 for the 1 core, $191 for the H/D version. Their # is 800-223-2501 if anyone else needs one  |
|
|
|
Post by no1son1998 on Aug 29, 2005 0:02:16 GMT -6
Had new rad put in my '98 last week....drove it to the shop, went for a coffee, about 3 hours and $460 cdn later it was installed and I was on the road again!
|
|
|
|
Post by roarn95 on Oct 7, 2005 3:24:20 GMT -6
Thanks to blue97; your write up gave me the courage to tackle that job myself. It went off without a hitch, and was actually fun to do.
|
|
|
|
Post by oldsauroraman1 on Oct 7, 2005 8:13:17 GMT -6
Yes, this is an EXCELLENT write-up! Thank you!
|
|
|
|
Post by kavin5586 on Jun 4, 2007 22:10:27 GMT -6
I just swapped out the radiator in my 95. and it was a ***** to do. Removing the driver's side components was easy. but the passenger's side didn't go so easy. the two lines that run on that side were not an easy task to remove. but besides those two it went easy to remove and install thanx
|
|
|
|
Post by jeremy1980 on Jun 23, 2007 17:38:27 GMT -6
Good writeup. The pics help a lot with this type of thing!
I was wondering, when you change the radiator, do you end up losing a lot of the motor oil and tranny fluid when you disconnect those lines? Wasn't sure if it starts pouring out when you take them off, or if they're high up enough that you don't lose a lot.
|
|
|
|
Post by crashmedic on Jun 23, 2007 20:19:12 GMT -6
jeremy, you will lose some oil and tranny fluid but not a large amount. I had issues with the threads on the new one I got and lost about 1/2 quart onto the floor. There is 1 oil line and 1 tranny line high and 1 of each low. I lost most of my oil out of the top one since that is where the threads were screwed up.
|
|
|
|
Post by jeremy1980 on Oct 7, 2007 16:29:58 GMT -6
I finally did mine. Had a hell of a time with a few things, but just crossing my fingers that the new one doesn't leak. Biggest concern is I didn't keep all the bolts seperate, and kept mixing the ones for the cover up with the ones that hold the condensor and the fans to the radiator. Ended up using a screw on the condensor, which if it goes to far, will start digging into the plastic of the new radiator. Hopefully I didn't mess it up too much, and the screw didn't go all the way thru the plastic tank.
The write-up and pics were all a great help though, even if I still managed to run into my own problems. Just one of those days...
Anybody know where I could find some of those foam strips that go over the radiator?
|
|
|
|
Post by 63biscuit on Jan 27, 2008 17:46:45 GMT -6
Can't say enough good stuff about this post (well, the forum in general). Just got done replacing the (cracked) radiator, water pump, O2 sensor, thermostat and all related bits and pieces in 4 hours...flat....on my 97 with 118k on it. Thanks a ton to blue97!
|
|
|
|
Post by Cone Head on Sept 1, 2008 9:42:20 GMT -6
Just completed the radiator R & R on my '98 this weekend. The writeup was invaluable as was the help from a dentist buddy of mine in Santa Fe, NM. I purchased a heavy duty radiator from Rock Auto and, because the thickness of core is about 1/4" wider than the original, I had to modify the fan mounting brackets to fit. Otherwise the job was a snap. Also, I used a 3/4" socket to remove the drain plug as the recommended 15mm was too small.
|
|
|
|
Post by edge350 on Dec 12, 2008 13:43:23 GMT -6
Heads up on the installation of a new rad, or when you need to refill the coolant for any reason:
1998 Gm Service Manual for Aurora/Riviera...
Filling Procedure, (section 6-page 370) quick overview
1. Close drain cock, used Dex-cool no stronger than 70%
QUOTE: " This engine uses DEX-Cool and GM coolant supplement (sealant) P/N 3634621 specifically designed for use in aluminum engines. Failure to use the engine coolant supplement (sealant) and the approved coolant antifreeze could result in major engine damage. When refilling the cooling system, add three pellets of the engine coolant supplement sealer GM P/N 3634621 to the lower radiator hose."
|
|
Aurora Rancher
Aurora Groupie
 Owner of the Last Indy Racing League Pace Car 2001
|
Post by Aurora Rancher on Mar 25, 2009 13:25:23 GMT -6
 We changed out this is on our '95 Autobahn. We bought it with 99,340 miles, with a known small radiator leak for $1376 on ebay back in Nov.  We put 4500 miles on it before the leak got bad, 103,968.  Great set of photos. Our experience goes like this!!!!!!!  I and my son, Drew, changed out the Radiator, O2 sensor (as mentioned before this is a great time to change it at an extra $60 -$70 is all) and changed out the Alternator, as the leaking Radiator with cracked plastic around the Oil cooler outlet {top fitting below the long inlet radiator hose} had drowned out the alternator with antifreeze. This is also a good time to change out an alternator. IF I had known of some of those problems I would have written something up on that alone. The Radiator will need to be removed to change out the alternator. (Our problems were with the Bumper to Bumper Auto Store. The first Alternator given to us had the wrong pulley. Of course did not notice until Alternator & Radiator were back in and the engine was running.  Back to taking  out the radiator again. Once the right one from the warehouse got to Bumper to Bumper the exchange was made and in went the new one. About 30 miles later the pulley came off the 2nd one just replaced, now a tow back to the house was needed. This time it was Sat afternoon and Bumper to Bumper was closed, so off to PEP Boys. Got the right one the first time from them so out with the radiator again off with the bad alternator and all back together  Again. We are now very proficient at changing out these components, look at these times! ;D  1st time out and back in took about 5 hours (2 hrs Out on Wed evening and about 3 hrs In on Thurs noon time).  2nd time about 4 hrs (1.5 hrs Out on Thurs evening and 2.5 hrs In on Fri afternoon). ;D 3rd time (after the tow at around 1-2 pm Sat) about 3 hrs total (1 hour out and 2 hrs in). Got pretty good at this, with my sons help.  The Bumper to Bumper did replace the ruined serpentine belt and Anti freeze for free on the first change out (wrong Alt in box from warehouse, looked very much the same except the pulley was shimmed out about a 1/4 inch) and on the 2nd one they couldn't believe the pulley issue (must not have been torqued properly on the rebuild) and gave me another gallon of Dex-cool antifreeze for free. They were even going to pay for the tow, but I had AAA motor club (so it didn't cost me anything anyway.) Well have to say the wife has about 200 miles on the car since the final reassembly and no problems. Yes mileage did improve a little with the O2 sensor change out, too (about a mile to the gallon). Any questions drop me a line.
|
|
|
|
Post by postalc38 on Oct 2, 2009 18:36:11 GMT -6
Just wanted to say that this is a great write up! The only problem I had was my Oil Cooler line breaking, and then having to wait for the dealership to open to get another. Other then that, it was as smooth as can be!
|
|
|
|
Post by chaswi on Aug 4, 2013 16:06:58 GMT -6
This works great on a 1995 Aurora. The nuts on the driver side, the oil coolant i used a 5/8 wrench
|
|
RCA1186
Administrator      Rob
Go Pack Go!
Posts: 4,853 
Staff Member
|
Post by RCA1186 on Feb 5, 2015 17:15:05 GMT -6
Looks like I'll be doing this Saturday (supposed to warm up to 38 degrees....) Have a nice little split just below the upper hose. Oh joy.
|
|
|
|
Post by sall on Feb 5, 2015 19:19:35 GMT -6
It's easy! Just get yourself a set of line wrenches if you do not have them(transmission cooler lines). Also IRRC the '95-97(w/ oil cooler) radiator has a thicker core. I've had mine out(alternator) but never replaced.
BTW can't believe 10 year old pictures are still up!! Someone should really back up all these write-ups/pictures.
|
|
Randy T.
Administrator      ☯ AURORA GXP ☯
Posts: 3,758
Staff Member
|
Post by Randy T. on Feb 6, 2015 6:29:49 GMT -6
I think the '95s have a thicker radiator than the '96-'97, which also has a thicker radiator than the '98-'99. Make sure the 2 bolts that come out of the ac condenser go back in the same spot, they are a little shorter to make sure they don't poke your radiator, I was pulling a new radiator from a scrapyard and noticed someone had a wrong bolt in that spot and run one of those bolts through the tank.
IMO Don't worry about unhooking your battery cable unless you are pulling the alternator.
Don't worry about draining the radiator, that will happen on it's own when you pull the bottom hose.
The upper radiator strap in the pictures is a little different than what most Auroras have, most of them have a plastic push pin that holds it onto the top cover that you first remove, the one in the writeup had been altered.
IMO Don't worry about the foam strip, it's probably not there anyways.
If anyone gets a radiator for a 97-99, you may have oil cooler holes on your radiator, these are the hoses on the passenger side, if your car does not have oil cooler lines it is ok to leave the holes open, they usually come installed whether you have the lines or not.
|
|
RCA1186
Administrator      Rob
Go Pack Go!
Posts: 4,853 
Staff Member
|
Post by RCA1186 on Feb 6, 2015 9:59:34 GMT -6
Thanks for the info guys, off hand anyone know what size line wrench is needed? I'm not too scared of this job haha I'm only dreading it because the cold, but after doing the AC compressor this should be a breeze. I probably would have done it without the write up but since I can't get the radiator till today I decided to look it up. Very surprised the pics still work myself.
I have the radiator support off already, took it off to spot the leak, its split right below the upper hose, I was hoping it was just the hose but to no avail. Squirting out under acceleration right onto the serpentine belt, no bueno. Haven't lost too much coolant yet the reservoir is still pretty full. Noticed the leak when I saw the steam....One good thing about winter..
|
|





 We changed out this is on our '95 Autobahn. We bought it with 99,340 miles, with a known small radiator leak for $1376 on ebay back in Nov.
  Great set of photos. Our experience goes like this!!!!!!!
 I and my son, Drew, changed out the Radiator, O2 sensor (as mentioned before this is a great time to change it at an extra $60 -$70 is all) and changed out the Alternator, as the leaking Radiator with cracked plastic around the Oil cooler outlet {top fitting below the long inlet radiator hose} had drowned out the alternator with antifreeze. This is also a good time to change out an alternator.
 Back to taking
  2nd time about 4 hrs (1.5 hrs Out on Thurs evening and 2.5 hrs In on Fri afternoon).


