|
|
Post by vojtazbrna on Jan 21, 2006 9:07:38 GMT -6
Ok, so I finally got the time to post this write up. Let me start with saying that it really is very easy. I would rate it a 3 or 4 on a scale from 1 to 10. It took me little over an hour to do both shocks and that's because I'm an idiot and bought two left ones. So it took me a little while to figure out how to turn the mount on one of them. It shouldn't take more than an hour with proper tools. Here's what you will need: I went with OEM Ac Delco shocks from gmpartsdirect.com I got them both for $200 shipped. Part #'s are: 22064808 for the left one and 22064809 for the right one. Then, you'll need a ratchet, torque wrench, if I remember correctly then it's a 13mm socket for the top mount nuts and 7,8 or 10mm for the bottom(I forgot). If you have a deep 13mm socket it will be easier for you(I didn't). You'll need some di-electric grease, needle-nose plyers and obviously a jack with stands. 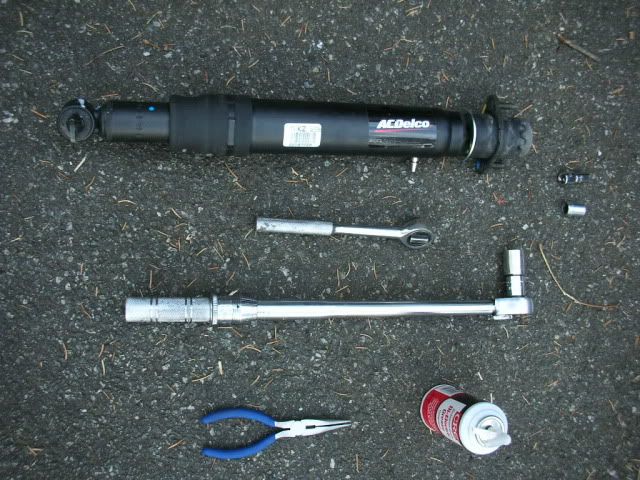 Here's the "before" pic. My left one was much worse(leaking). First step is to jack up the car and take the wheel off. 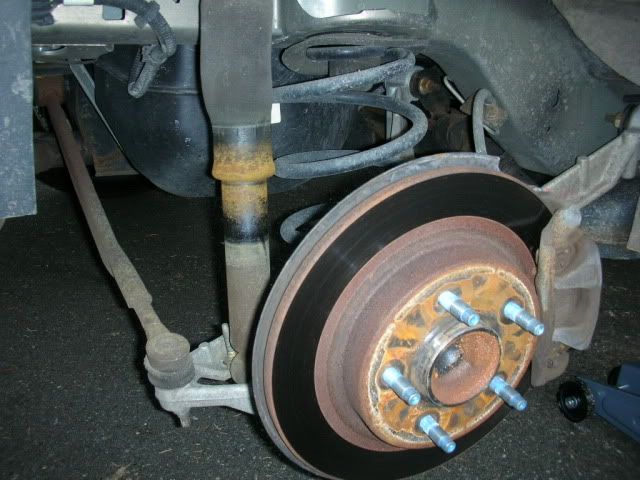 So you have the car up and wheel off. Then you disconnect the air hose. I used the needle-nose plyers. Don't damage the clip, you'll re-use it. Let it bleed out. 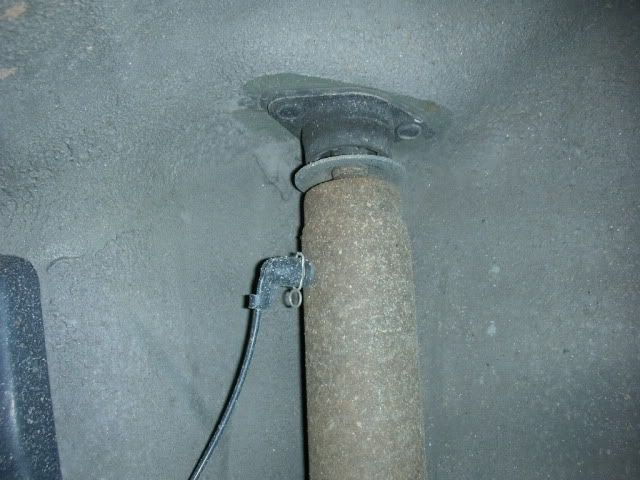 Make sure you support the whole arm with a jack or a stand(I used the jack). Now you start with the bottom mount. As I said, 7,8 or 10mm socket. The inner bolt is very long so it will take a minute. 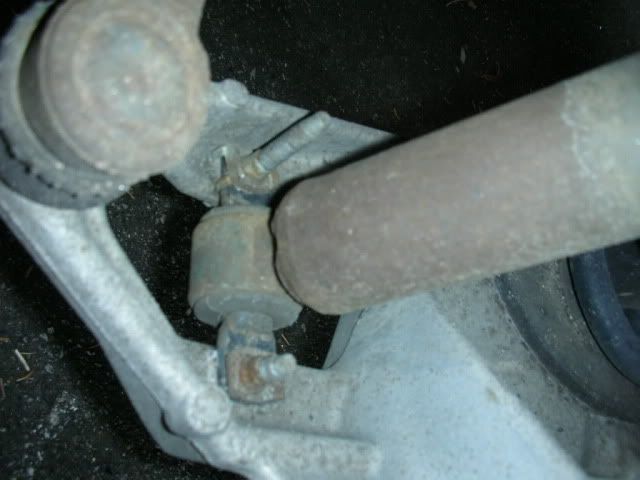 Now you can move on to the top mount. From inside of the trunk remove the carpeting on one side and you'll find the top mount. Take of the plastic cap and loosen up the two nuts(13mm socket). Please pardom my mess in the trunk and all the exposed audio wires(they're normally behind the carpeting) 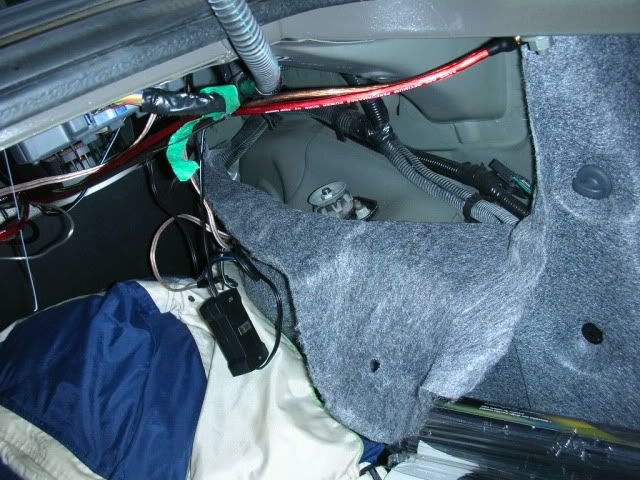  Now you just simply remove the shock from the outside. To put the new one on just follow the procedure backwards. First, the top mount. Tighten up to 18lb/ft(if I remember correctly) 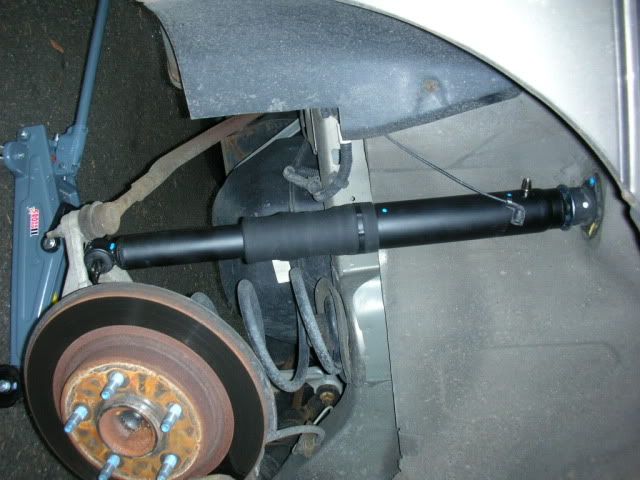 Then, the bottom. You will reuse the clips from the old shock. Don't lose them! Tighten up to 15lb/ft. 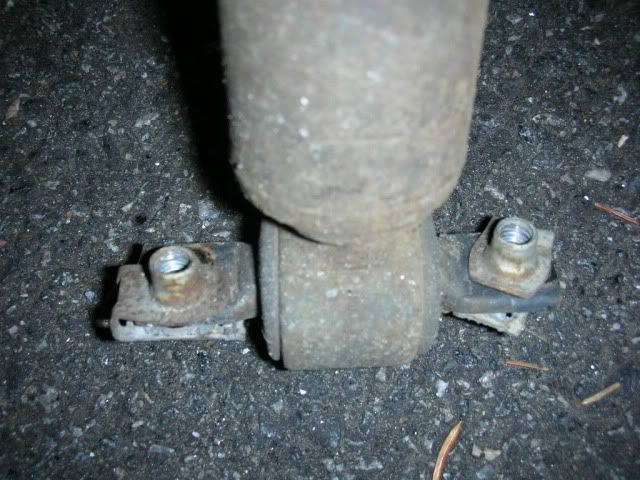 Now you re-connect the air hose. Here's where you use some of the di-electric grease. Again, reuse the clip. Don't lose it! 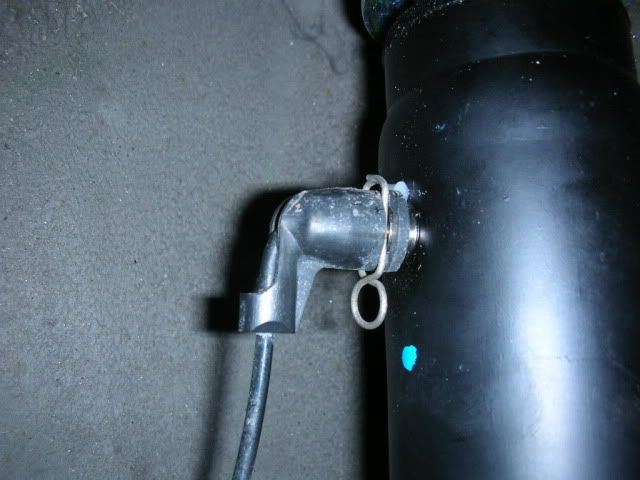 And you're all set! 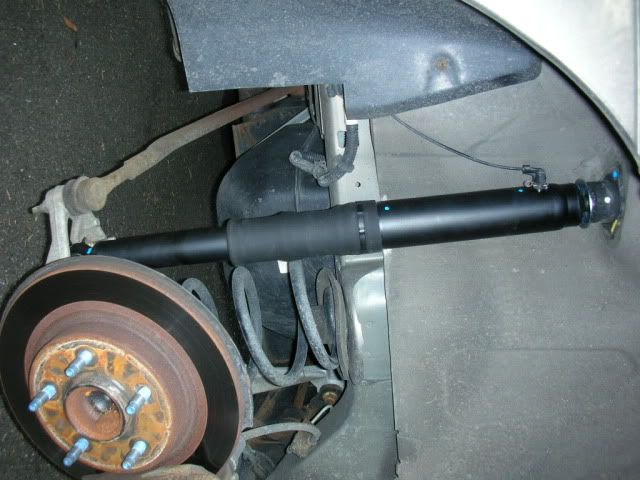 Put the wheel on, tighten up to 100lb/ft and go for a ride! If I forgot something(it's Sat morning and I just woke up a little while ago) let me know and I'll add it to it. Hope this helps. |
|
scottydl
Super Moderator      There's nothin' like an American V-8...
Posts: 7,373
Staff Member
|
Post by scottydl on Jan 21, 2006 16:09:45 GMT -6
Great! I will add this link to the collection of "How-to's" stickied at the top of this forum.
|
|
|
|
Post by Aurora40 on Jan 22, 2006 8:17:11 GMT -6
Hey, just FYI, you don't need pliers on the air-hose clip. You just rotate the clip 90-degrees by hand and you can pull the fitting off the shock.  |
|
|
|
Post by vojtazbrna on Jan 22, 2006 14:57:32 GMT -6
Hey, just FYI, you don't need pliers on the air-hose clip. You just rotate the clip 90-degrees by hand and you can pull the fitting off the shock.  ok, that's good to know. I had the pliers ready so I used them. It doesn't make much difference anyway. |
|
|
|
Post by erw38 on Jan 22, 2006 16:14:34 GMT -6
What's the ride difference like? How long did it take?
Did you replace only the back ones or the fronts too?
|
|
|
|
Post by luvmybravada on Jan 22, 2006 22:57:07 GMT -6
Yes, how does it feel with the new shocks?
|
|
|
|
Post by TJM on Jan 23, 2006 7:00:43 GMT -6
Great write-up
Note - the clips for the bottom can wiggle around a lot durring installation - tighten their grip on the shock with a pair of pliers and clip them back on so they stay snug durring assembly.
Looks like that inner bolt (bottom) may be a replacement - mine were all the shorter style
|
|
|
|
Post by vojtazbrna on Jan 25, 2006 22:23:07 GMT -6
sorry it took me a while to respond. been too busy.
anyway, it feels smoother and the ride is more under control. it was worth doing it. even my wife noticed the difference. as I said, it took me a little over an hour because I had to turn the mount on one of them(bought two left ones by mistake).
|
|
|
|
Post by TheLoveThatNeverDies on Jan 25, 2006 23:15:14 GMT -6
Thanks for the write-up, man. This project is definitely on my short-list  -Shawn |
|
|
|
Post by erw38 on Jan 26, 2006 15:56:18 GMT -6
Guess I need to do it too. Are the front ones spring over shock? Are the front ones DIY too?
|
|
|
|
Post by TJM on Jan 26, 2006 17:29:43 GMT -6
the front uses struts - DIY yes if you have the time, ambition, tools and an alignment shop nearby.
|
|
|
|
Post by kobalt on Jan 29, 2006 12:49:04 GMT -6
Great writeup and pics!
|
|
|
|
Post by fierak on Oct 22, 2006 15:42:56 GMT -6
I mount a pair of rear one too on my 1996 but my problem is that where is the valve that u need to put air in it 20 psi. i cant find it nowhere
|
|
|
|
Post by TJM on Oct 23, 2006 6:18:46 GMT -6
I believe the 20psi is automatically set by the innitial opperation of the on-board pump every time you start the car.
|
|
|
|
Post by centennialman on Oct 23, 2006 6:20:50 GMT -6
Great post with pics. Just FYI, you can get the same shocks for $110 a pair at rockauto. Maybe less at $92, because they list to types. Shipping in the US is around $7. IMHO, the Monroe air max shocks are better, and you can get a pair of those for $60. Installation is a breeze; it took me only about 20 minutes a side on a 2nd gen; don't believe the 1st gen is all that different.
|
|
|
|
Post by fierak on Oct 23, 2006 8:24:26 GMT -6
Ye i bought mine for $290 including tax Ac Delco at City Buick .
Can ANYONE TELL ME WHERE IS LOCATED THE SHOCK AIR COMPRESSOR ON1996 AURORAS
|
|
|
|
Post by aarcuda on Oct 23, 2006 8:38:25 GMT -6
behind the rear tire on the passenger side. its behind the quarter panel
|
|
|
|
Post by centennialman on Oct 23, 2006 13:49:05 GMT -6
I believe the 20psi is automatically set by the innitial opperation of the on-board pump every time you start the car. There's no doubt that the pump will run every time you start the car and level the rear if necessary. However, if you reattach the air hoses before you put the car back on the ground (there is more than enough room to remove, reattach the hoses even with the car on the ground), and since the shocks are already fully extended, they are going to compress the air inside as they collapse. If you jack up the car under the rear suspension arm, then I guess then you end up with the shocks installed in more or less a 'normal' position. Because I used the OEM jack, I was worried about that a bit, and hoped that the system would release air if they were overcharged. However, having done this twice, there has not been any problems; the air leveling system works as it always did. What happens if you have a heavy load, the suspension levels itself via the pump, and you remove the load while the car is idling? Will it let out air to compensate? |
|
|
|
Post by fierak on Oct 23, 2006 22:25:18 GMT -6
thx guys !
the shocks look pretty neat , i needed them couple a months ago , i can see a lot of deference when i drive.,plus i clean my throutlle body i made it shiny. lots of power
|
|
Randy T.
Administrator      ☯ AURORA GXP ☯
Posts: 3,758
Staff Member
|
Post by Randy T. on Aug 20, 2007 16:26:11 GMT -6
If you have an O'reillys they have these shocks for about 60 bucks. They are identical to the factory design and bolt right in. It took me about an hour to put them in. I got them from Auto Zone first, but they wanted you to change a spring in the compressor.
|
|
|
|
Post by Rasta Ride on Sept 21, 2007 8:04:30 GMT -6
I just replaced the rear shocks on my 98 and had some difficulty tightening the upper nuts without assistance. How did you prevent the shock from turning during tightening? I installed a set of Gabriels for now but will purchase a set of Monroes and keep them in reserve.
Has anyone replaced or repaired the auto leveling compressor? Any insight will be greatly appreciated.
Great post & pics!
|
|
|
|
Post by sall on Apr 26, 2012 16:54:42 GMT -6
Since this is the write-up with pictures, I'll post here. How many of you are replacing the shock mounts when installing the new Delco or Monroe shocks? I can get a pair of Monroe mounts for $21, $9 of which is shipping. Almost half what I payed for the shocks haha. I honestly have not looked at the mounts but I'm guessing 16 years and 100k aren't doing them any favors. Just thought I'd ask since no one has mentioned in this write-up or the other stickied one.
Just went ahead and ordered them. Local stores wanted $26.99 for on side. I gladly paid $21 for both sides. So due to shipping this gets put off for a couple of days. So, if you need shocks do it now and save some money the wholesale closeout on the monroe mounts will end soon only 15 available.
|
|
|
|
Post by nelson480 on Apr 26, 2012 19:39:44 GMT -6
I just replaced the rear shocks on my 98 and had some difficulty tightening the upper nuts without assistance. How did you prevent the shock from turning during tightening? I installed a set of Gabriels for now but will purchase a set of Monroes and keep them in reserve. Has anyone replaced or repaired the auto leveling compressor? Any insight will be greatly appreciated. Great post & pics! I know this post is 5 years old, but if you do replace the mounts separately and have this problem, usually the piston rod will have either a TorX or alan key in the center to hold it as you tighten it, same with the front struts. I used a 24mm for the front, i think the rear is the same |
|
|
|
Post by sall on Apr 26, 2012 20:03:58 GMT -6
It's a sticky, Nelson no worries. I wouldn't dig up a 5 year old thread for no reason haha.
|
|
RCA1186
Administrator      Rob
Go Pack Go!
Posts: 4,853 
Staff Member
|
Post by RCA1186 on May 26, 2015 10:00:49 GMT -6
I did this Sunday, one of the easiest jobs I've done on the car I think. I didn't replace the mounts, they looked pretty good upon my inspection. I was worried that those bottom bolts would be corroded in, but they came out like nothing haha
|
|


