Post by nvmyvettes on Feb 9, 2006 6:03:01 GMT -6
Here it is.
**Edit: pictures for this post were deleted, see end of post for some pictures by xjsman89 to augment this writeup**
Directions
If you want to tackle the job here are the directions. It's not a bad job other than the mess. If you want a shop to do it at least you can be informed so you won't get ripped for big dollars.
a) drop the pan, and careful removing the tranny gasket, it is steel and re-usable. Once you clean the pan, you can reset it with gasket sealer.
c) disconnect the solenoid electrical connectors and the mechanical linkage. The linkage has a metal clip you lift and slide.
d) remove the valve body screws, and drop the valve body.
e) place the valve body where you can afford a mess, it will continually leak. Best thing is to set it on cardboard on a bench. There is a valve spool that can be removed as well, careful it can slip out, you don't want to damage it.
f) remove the two clips holding the solenoids, careful they are spring-loaded and will fly
g) remove the screws holding the "large" portion of the valve body split, this is where the solenoids are incased. Remember the screw locations, there are about four different screw lengths
h) CAREFULLY remove split, there are 4 steel check balls loose inside the split (about 1/4" diameter, they will roll away)
i) inspect spacer plate, if the black coating is not chipping off you can re-use it, otherwise plan on spending another $ 70 at the dealership parts house. If you replace it you will have to remove the "smaller" split, as well. It also has three check balls.
j) replace the solenoids
k) now comes the fun,....you will note three holes in the spacer plate where three of the check balls reside, seat them there (appr. 3/16" diameter with a smaller relief hole next to it, as I remember). The fourth check ball will need to be inserted in a spherically-cast cavity which is near one the solenoids. You can set it with grease, I re-assembled successfully without using grease.
l) re-assemble valve body, carefully and equally torque.
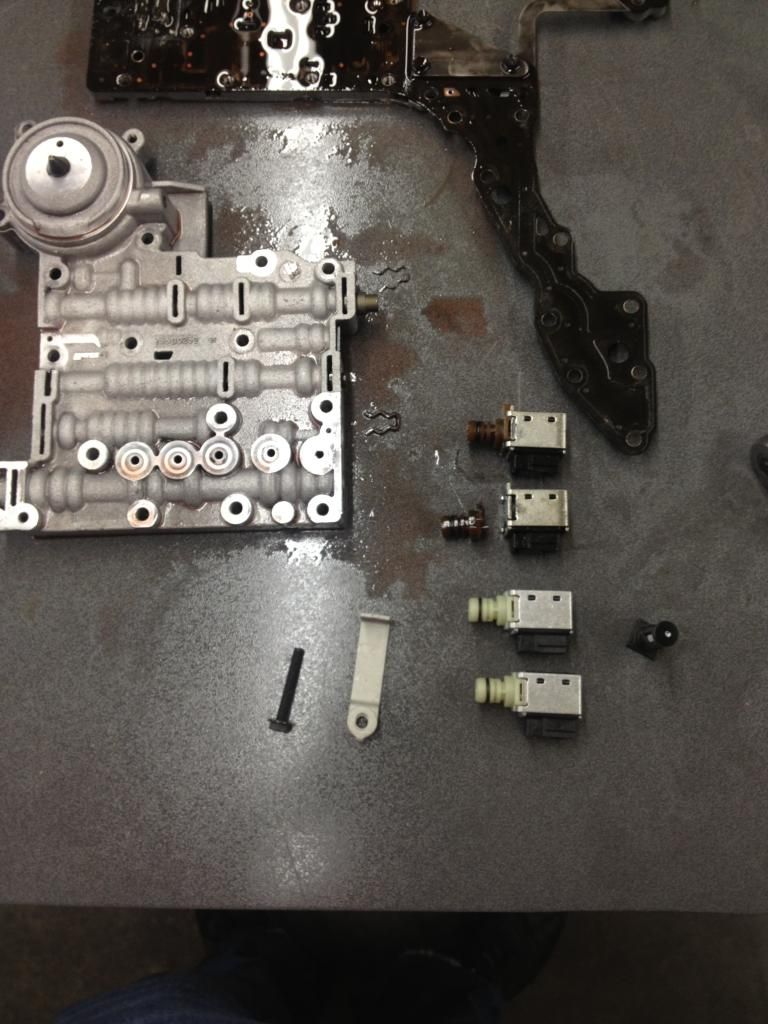
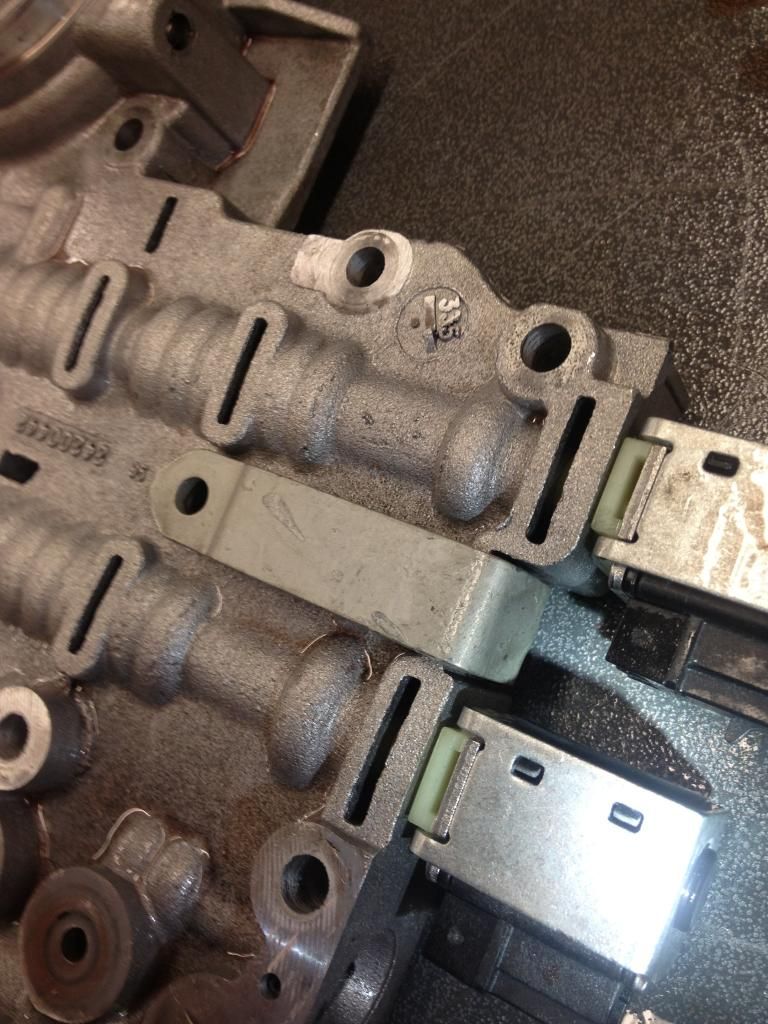
m) you will note a square black plastic item near one of the solenoids, on the end. Replace this plastic filter with the new filter in the solenoid kit. The kit will also come with an L-shaped bracket that is to be used to "capture" this filter and keep it from backing out. The kit also comes with a slightly longer screw used to mount the bracket to the valve body (discard the old screw).
m) re-assemble valve body to transmission, hook up linkage and electrical connectors
n) replace both tranny filters
o) replenish fluid
p) reset codes
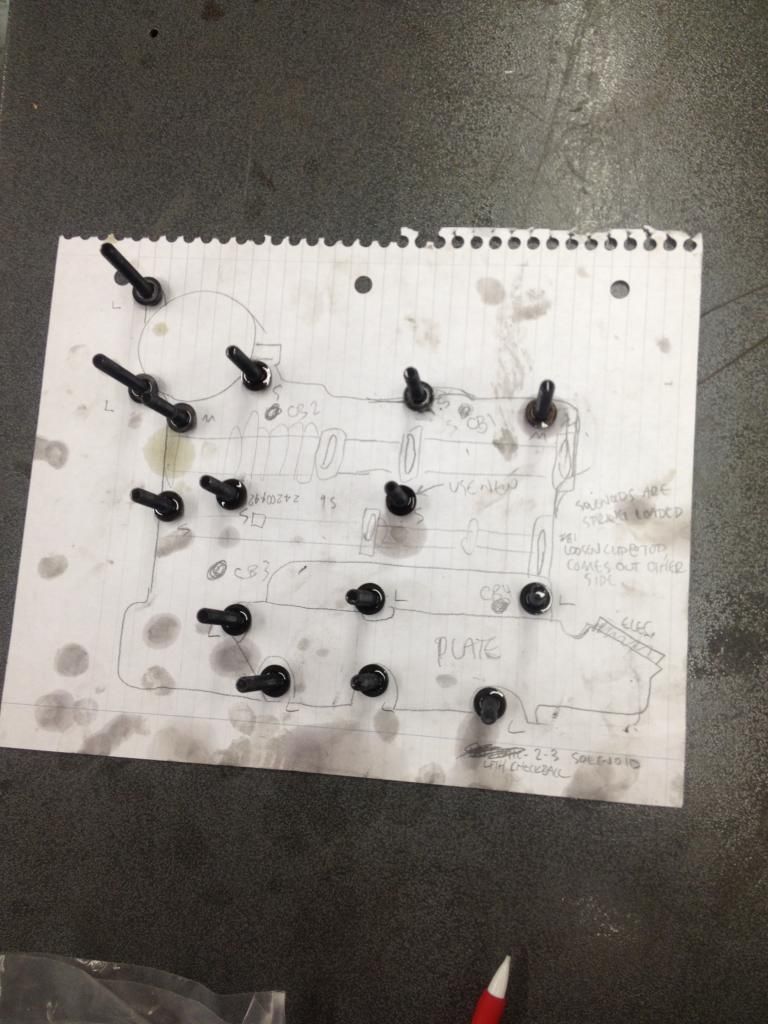
q) one more thing . when spliting the valve body its good to draw a diagram of it and set your bolts on the diagram (where they go) because the are dif lengths.
 I found mine at a local transmission shop. I'll look to see what the part number is, if I can find it. It was a delco part, one part number for both solenoids. I replaced mine and I was back on the road in short order.
**Edit**
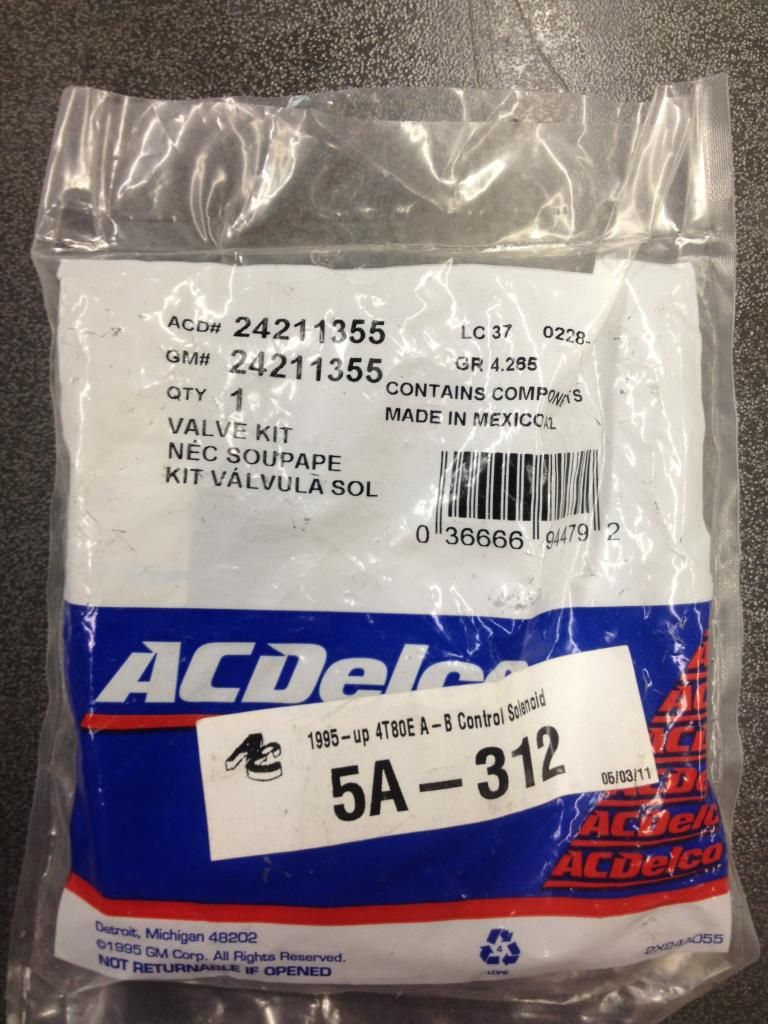
Found it. The picture of the part that I used is included. I uploaded these and never posted them, I guess. Here are some posts form my trans solenoid repair. All in all, the hardest part of the whole job was getting myself excited enough to pull the bottom of the case off. It wasn't a bad job at all, replacing the solenoids was easy, and I was back on the road a few hours from when I started.
Busted Solenoid:
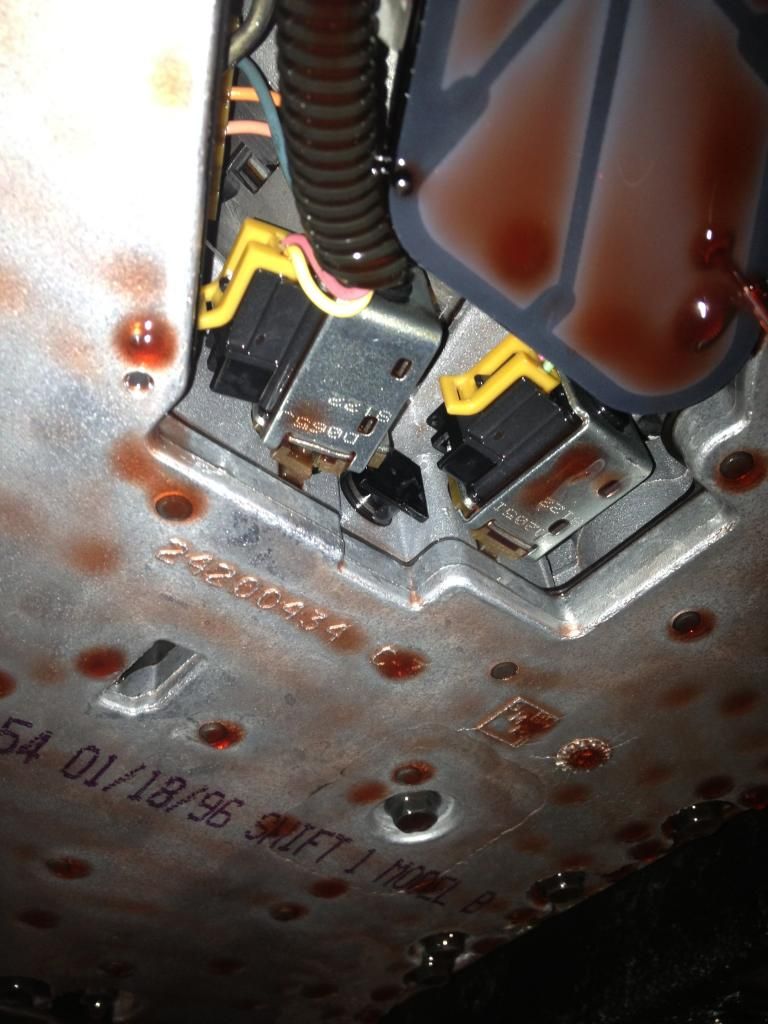
Bottom of case (be CAREFUL with those check balls! The locations are easy enough to find but it's a whole lot easier to not drop/move them in the first place.
Bolt map (Also very handy, there are many different lengths.
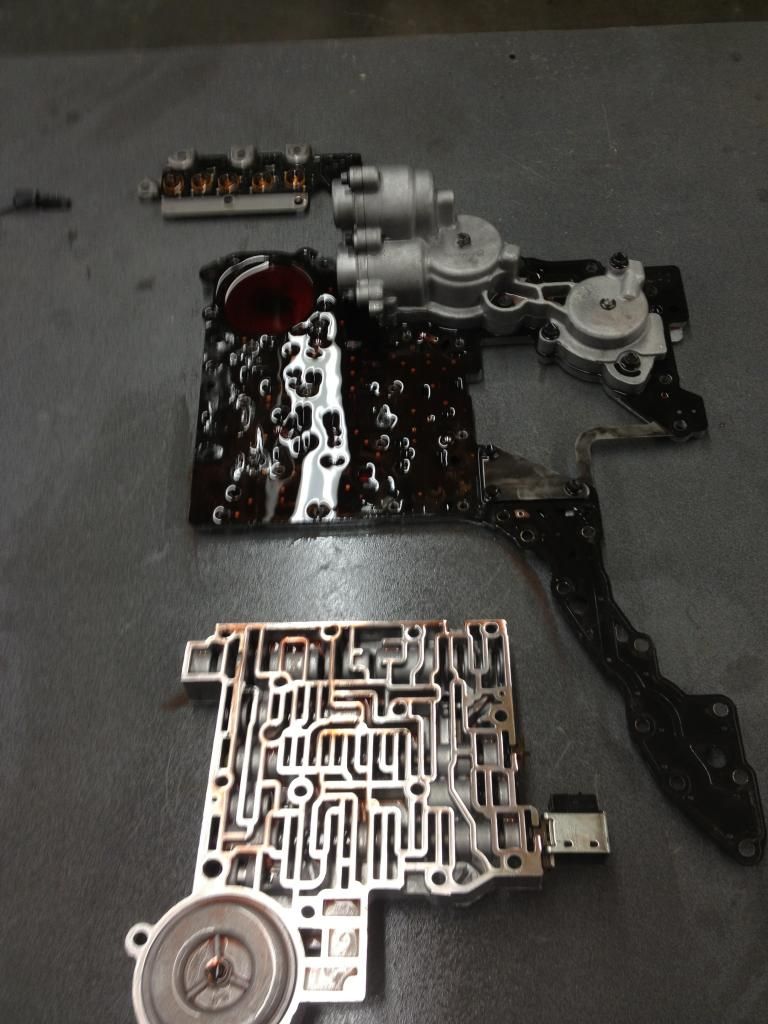
New replacement solenoids, AC Delco part.
Old parts and new parts
New solenoids mounted
**Edit: pictures for this post were deleted, see end of post for some pictures by xjsman89 to augment this writeup**
Directions
If you want to tackle the job here are the directions. It's not a bad job other than the mess. If you want a shop to do it at least you can be informed so you won't get ripped for big dollars.
a) drop the pan, and careful removing the tranny gasket, it is steel and re-usable. Once you clean the pan, you can reset it with gasket sealer.
c) disconnect the solenoid electrical connectors and the mechanical linkage. The linkage has a metal clip you lift and slide.
d) remove the valve body screws, and drop the valve body.
e) place the valve body where you can afford a mess, it will continually leak. Best thing is to set it on cardboard on a bench. There is a valve spool that can be removed as well, careful it can slip out, you don't want to damage it.
f) remove the two clips holding the solenoids, careful they are spring-loaded and will fly
g) remove the screws holding the "large" portion of the valve body split, this is where the solenoids are incased. Remember the screw locations, there are about four different screw lengths
h) CAREFULLY remove split, there are 4 steel check balls loose inside the split (about 1/4" diameter, they will roll away)
i) inspect spacer plate, if the black coating is not chipping off you can re-use it, otherwise plan on spending another $ 70 at the dealership parts house. If you replace it you will have to remove the "smaller" split, as well. It also has three check balls.
j) replace the solenoids
k) now comes the fun,....you will note three holes in the spacer plate where three of the check balls reside, seat them there (appr. 3/16" diameter with a smaller relief hole next to it, as I remember). The fourth check ball will need to be inserted in a spherically-cast cavity which is near one the solenoids. You can set it with grease, I re-assembled successfully without using grease.
l) re-assemble valve body, carefully and equally torque.
m) you will note a square black plastic item near one of the solenoids, on the end. Replace this plastic filter with the new filter in the solenoid kit. The kit will also come with an L-shaped bracket that is to be used to "capture" this filter and keep it from backing out. The kit also comes with a slightly longer screw used to mount the bracket to the valve body (discard the old screw).
m) re-assemble valve body to transmission, hook up linkage and electrical connectors
n) replace both tranny filters
o) replenish fluid
p) reset codes
q) one more thing . when spliting the valve body its good to draw a diagram of it and set your bolts on the diagram (where they go) because the are dif lengths.

**Edit**
Found it. The picture of the part that I used is included. I uploaded these and never posted them, I guess. Here are some posts form my trans solenoid repair. All in all, the hardest part of the whole job was getting myself excited enough to pull the bottom of the case off. It wasn't a bad job at all, replacing the solenoids was easy, and I was back on the road a few hours from when I started.
Busted Solenoid:

Bottom of case (be CAREFUL with those check balls! The locations are easy enough to find but it's a whole lot easier to not drop/move them in the first place.

Bolt map (Also very handy, there are many different lengths.

New replacement solenoids, AC Delco part.

Old parts and new parts

New solenoids mounted


