inno
Aurora Watcher

Posts: 46 
|
Post by inno on Jan 5, 2015 15:23:13 GMT -6
I finally have everything I need in order to start this nexus 7 install. It is a 2012 model. Here are a few pics to start with. It's actually not as hard as it seems. Here are some pics of the beginning of the install process. 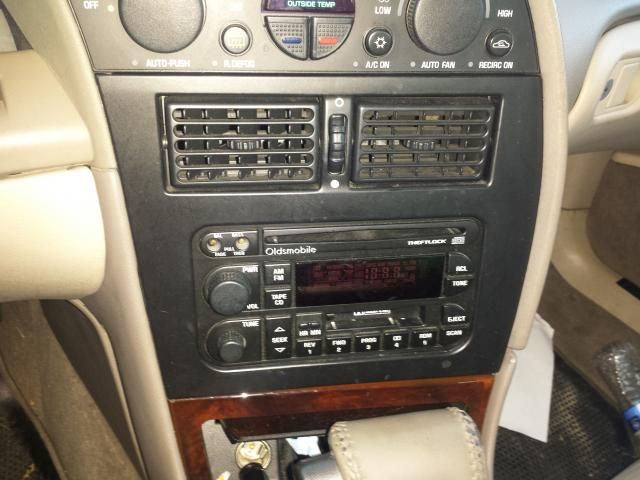 This is a test fit of the Nexus 7 without any modification at all. Would have been so much easier if it was not removable each time I got out of the car. Could have finished in a day. 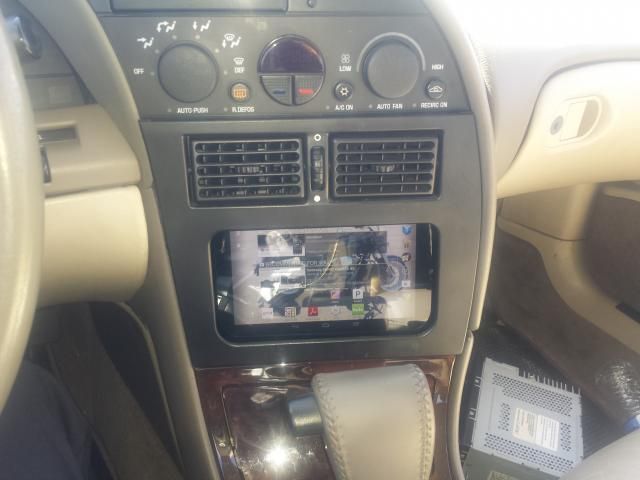 I will update this with current build pics later today or tomorrow. |
|
XJSman89
Administrator 
Posts: 6,309
Staff Member
|
Post by XJSman89 on Jan 5, 2015 16:01:41 GMT -6
This looks great! I'm excited to see how it works. I have one of these at home and would love to be able to put it in the olds!
|
|
inno
Aurora Watcher
Posts: 46
|
Post by inno on Jan 5, 2015 19:28:31 GMT -6
This looks great! I'm excited to see how it works. I have one of these at home and would love to be able to put it in the olds! Thanks. It's actually pretty straight forward. Just takes a bit of time/patience as with all car projects |
|
|
|
Post by sall on Jan 5, 2015 20:50:18 GMT -6
Contemplated tablet install for last couple years but they still do not do everything I can do with a PC. Full audio processing, relay boards, etc.  If you want quick mounting option for popping in and out look into custom molding and holding the tablet with strong rare earth magnets. Going 3.5mm to RCA splitter to a 4/5 CH amplifier, USB soundcard or bluetooth  ? Look forward to finished product! |
|
inno
Aurora Watcher
Posts: 46
|
Post by inno on Jan 6, 2015 8:25:50 GMT -6
Yep Sall. Already went that route. I made a fiberglass pan of the tablet, and then I added a small pocket for it to slide off the charger, and pivot. About to upload the pics now.
|
|
inno
Aurora Watcher
Posts: 46
|
Post by inno on Jan 6, 2015 9:06:19 GMT -6
Here are the specs of my setup so far
Nexus 7
JVC KD-X50BT
Kinetik HC1400 Battery
Clarion SRP1620M 6 1/2 Component Speakers (Front)
Pioneer TS-A6965R 6x9 Speakers (Rear Deck)
2 Audiopipe TS-PP2-12" Subwoofers (junk..I hate them LOL)
Clarion APX4241 400 Watt amp 4/3/2 Channel
Audiopipe 15001D Mono Amp for subs
Audio is routed from the Nexus to the head unit by bluetooth. I can also pair my phone to the JVC unit and take calls as well.
|
|
inno
Aurora Watcher
Posts: 46
|
Post by inno on Jan 6, 2015 9:14:16 GMT -6
And here are the tablet mount build pics. This is my first time using fiberglass for any type of project. Of course I could use a little more practice. Air bubbles were my downfall. All taped up. Used vaseline as a mold release 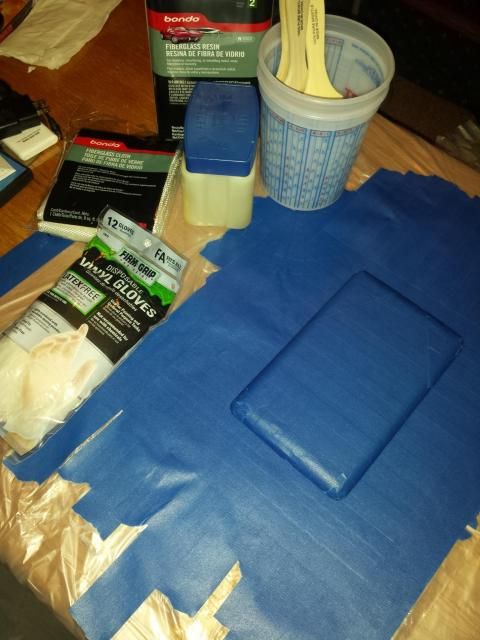 These are the first few layers. 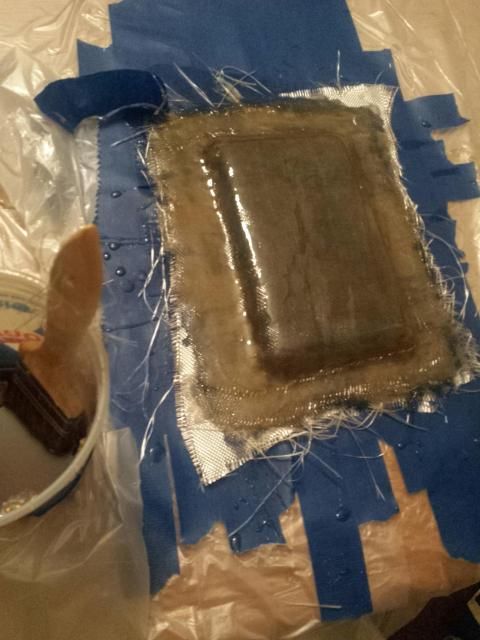 Here is where you can see the edge is not perfectly straight due to the air bubbles  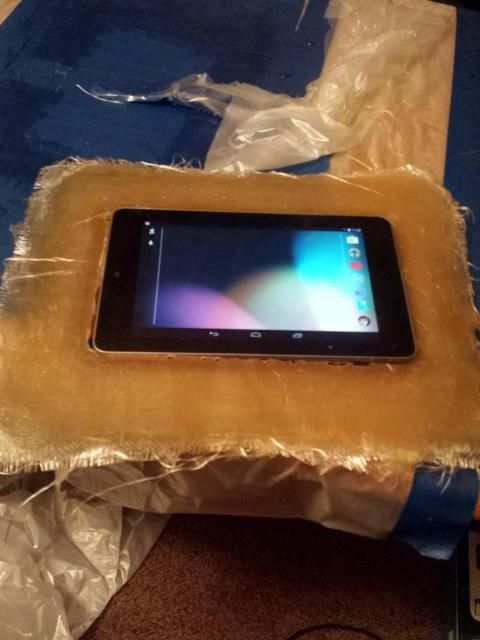 |
|
inno
Aurora Watcher
Posts: 46
|
Post by inno on Jan 6, 2015 9:24:46 GMT -6
Contemplated tablet install for last couple years but they still do not do everything I can do with a PC. Full audio processing, relay boards, etc. If you want quick mounting option for popping in and out look into custom molding and holding the tablet with strong rare earth magnets. Going 3.5mm to RCA splitter to a 4/5 CH amplifier, USB soundcard or bluetooth ? Look forward to finished product! Man that's a super clean install. I butchered my bezel on one side because of bad measurements lol. Didn't follow the measure twice, cut once rule. |
|
inno
Aurora Watcher
Posts: 46
|
Post by inno on Jan 6, 2015 9:43:50 GMT -6
Next up on the to do list was to make a little pocket for the tablet to slide off of the charger, and have room to pivot. I give slider idea credit to soundman of course. I did not think of this myself. But I've only seen the slider idea for iPad installs. And another guy on youtube for helping me out. His name is Cory Vaillancourt. Here is the start of the pocket. First I made a cutout. 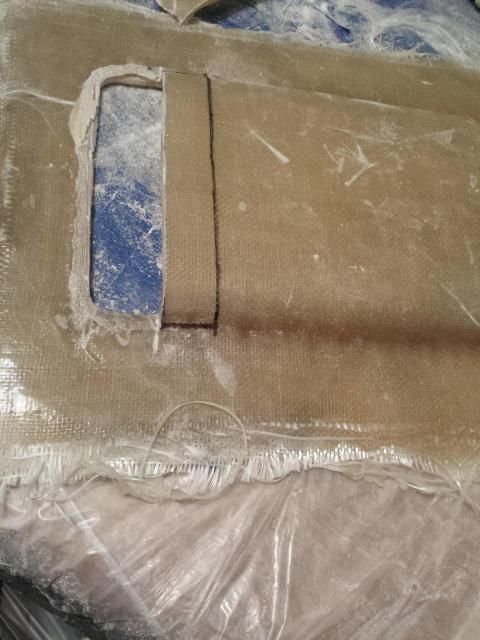 And here it is with the cutout and hole for the charger port 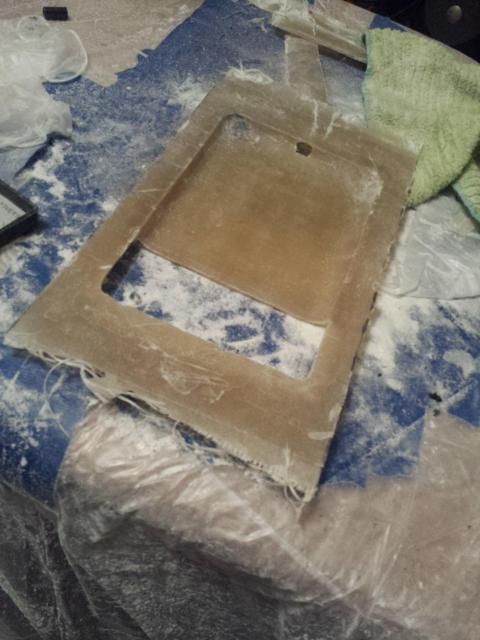 I used my box of magnets to prop up the tablet just enough to raise it past the edge of the bezel. 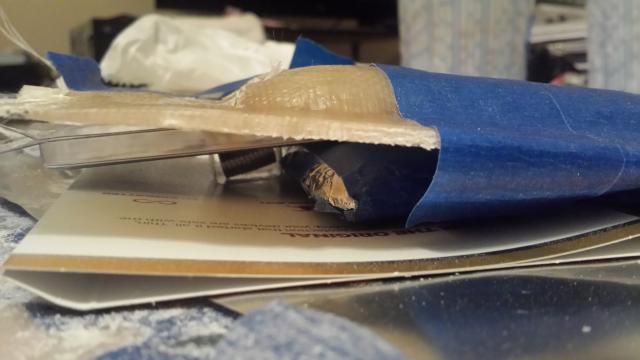 Taped up for the pocket glassing 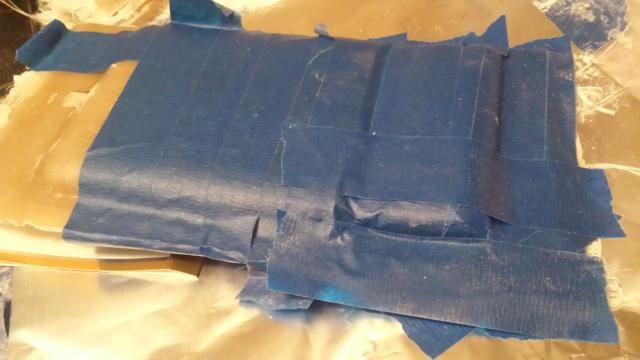 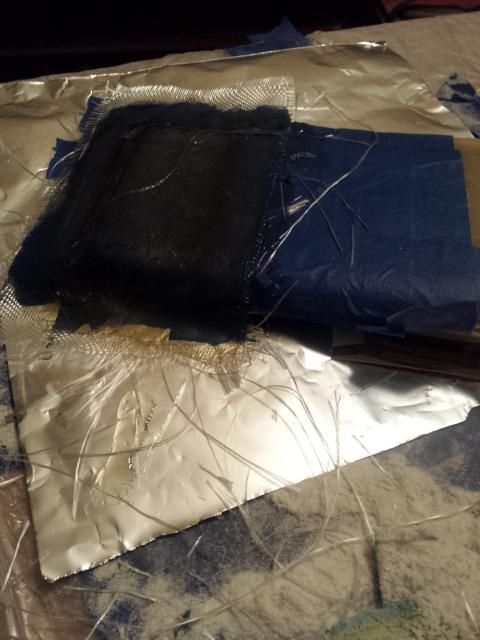 |
|
|
|
Post by sall on Jan 6, 2015 10:39:35 GMT -6
Haha yeah I know soundman from mp3car and hidp.
Consider remote mounting the headunit faceplate in the ashtray location? It's likely a little over-sized but with some work could be done. Also had the thought to mount face plate in the homelink area but the face plate was too wide.
Good work! Like seeing custom projects in a Classic!
|
|
inno
Aurora Watcher
Posts: 46
|
Post by inno on Jan 6, 2015 15:03:10 GMT -6
Haha yeah I know soundman from mp3car and hidp. Consider remote mounting the headunit faceplate in the ashtray location? It's likely a little over-sized but with some work could be done. Also had the thought to mount face plate in the homelink area but the face plate was too wide. Good work! Like seeing custom projects in a Classic! Thanks man. Yea I really wanted to mount the head unit right behind the fiberglass pan and integrate it, but there's a metal bar behind the factory radio that blocks the space needed. I installed the head unit in the glovebox for now. And I also relocated the factory radio in order to keep the DIC date. Your sticky came in handy there as well!! Glovebox head unit...sorry for the bad quality pic. Temporarily just thrown in there. I may make a fiberglass box for it now that I have a little bit of experience. 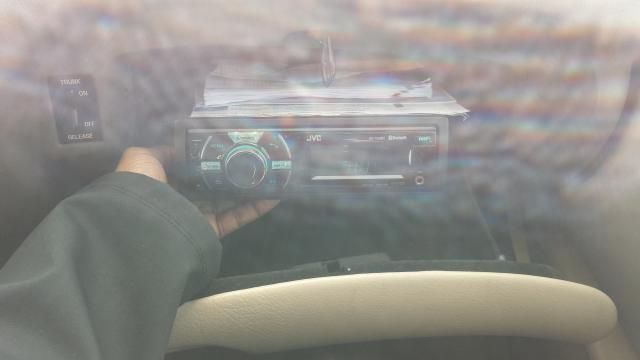 Factory radio in foot well in order to keep DIC date and ETA, etc. 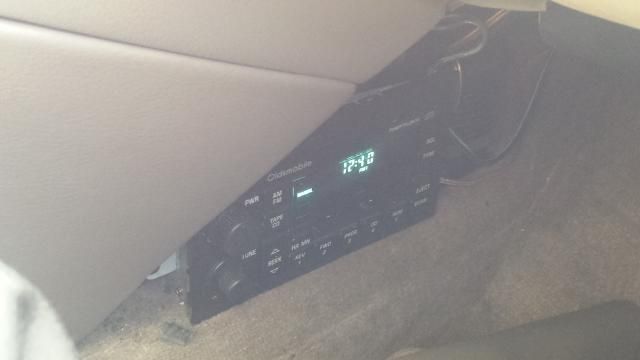 |
|
|
|
Post by sall on Jan 6, 2015 15:27:43 GMT -6
haha nice! What I mean when referring to remote mounting the face plate is. Literally separating the face plate form the main unit. With a soldered patch cord in between the face plate and wherever you mount the main unit. Like this:  So then you can remove the ashtray lid and custom mold just the faceplate in there. Advantage is if you forget the tablet, it breaks, etc you still have all the features of the headunit right there. I was just about to do this a couple weeks ago but opted for a line driver to solve some low pre-amp issues. |
|
inno
Aurora Watcher
Posts: 46
|
Post by inno on Jan 6, 2015 17:53:49 GMT -6
Man that's great!! Now you have me wishing my face was detachable.
|
|
inno
Aurora Watcher
Posts: 46
|
Post by inno on Jan 6, 2015 17:59:16 GMT -6
Here is the first test fit of the bezel. It was just taped up. Looks so good. Stay tuned and you will see where I went wrong with the dremel. 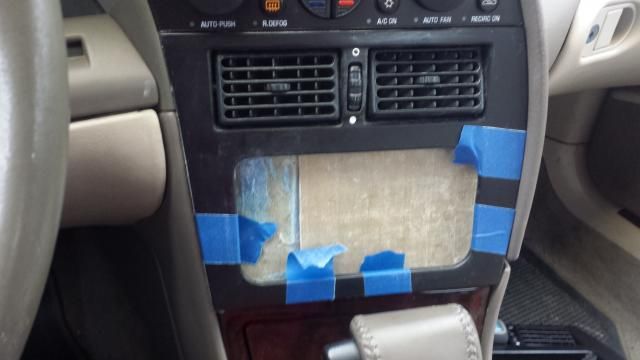 As you can see near the bottom, the fiberglass pan is hitting somewhere. So I trimmed off a little. I circled the areas in red  |
|
inno
Aurora Watcher
Posts: 46
|
Post by inno on Jan 6, 2015 18:20:20 GMT -6
Next up was to make sure the tablet was able to take going up hills and some good bumps without falling out. I honestly should have purchased the bigger magnet. But this will do for now. I think I will change this up, even though these are pretty strong. 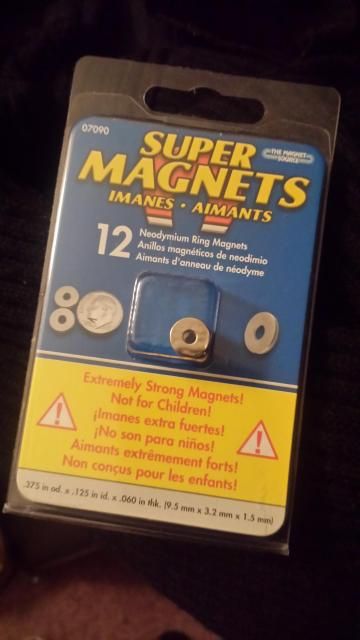 I used 4 magnets total. 2 hot glued to the back of the pan. And two on the front of the pan. What I did was dremel out enough so that they will be flat/even with the surface. They are held by the two on the back and a dab of hot glue as well. And on the left we have exhibit A. The part where using a dremel for the first time goes wrong on the bezel 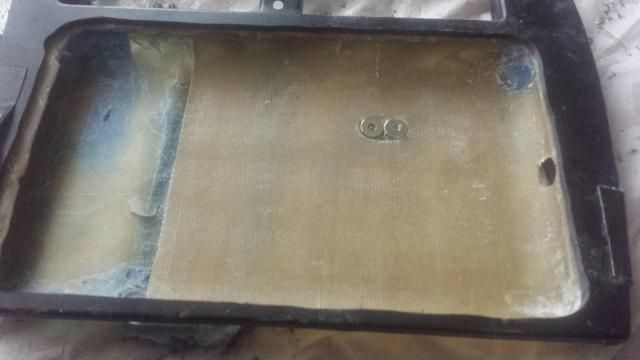 And I just gorilla taped a steel Stanley blade inside of the back of the tablet case to see if there was any strength to it. So far, it sticks pretty good. When I slide it in, there's even a small snap. The magnets pull pretty good.  |
|
98redaurora
Aurora Driver
 This is not your fathers Oldsmobile.
|
Post by 98redaurora on Jan 6, 2015 18:26:45 GMT -6
Nice!! Can't wait to see it completed.
|
|
|
|
Post by lkraft92 on Jan 6, 2015 19:56:38 GMT -6
very cool project. i have been throwing around this idea for a while. im glad to see somebody actually tackiling this in an aurora. good luck and keep us updated.
|
|
inno
Aurora Watcher
Posts: 46
|
Post by inno on Jan 7, 2015 11:47:07 GMT -6
Nice!! Can't wait to see it completed. Thanks. Pretty much all I have left to do is make the bezel pretty, and workout the power when the key is turned on and off. That's the easy part so I saved them for last. I have been riding around testing it, and pretty happy so far. It will be great once I finish the app side of things. |
|
inno
Aurora Watcher
Posts: 46
|
Post by inno on Jan 7, 2015 11:48:35 GMT -6
very cool project. i have been throwing around this idea for a while. im glad to see somebody actually tackiling this in an aurora. good luck and keep us updated. Definitely will keep you all updated with pics and youtube video |
|
inno
Aurora Watcher
Posts: 46
|
Post by inno on Jan 7, 2015 11:56:10 GMT -6
Here is the bezel installed after trimming the stock opening a bit. Here you can see the mistake, as well as the magnets. I will be laying a suede or some sort of fabric to the fiberglass area after I handle the bodywork 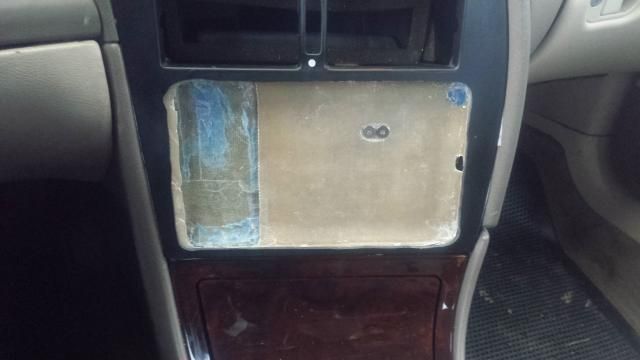 Daytime test fit. 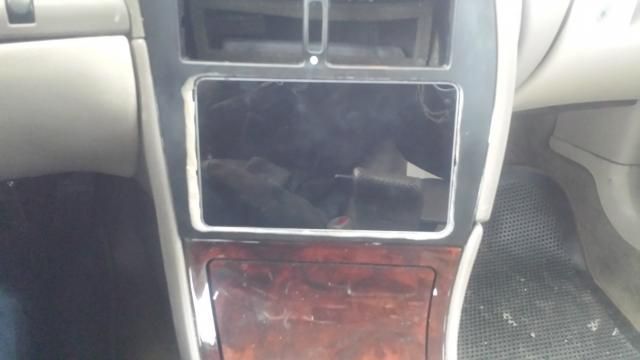 My first ride with the tablet at night. I was able to test how it functions while driving. I will make it more user friendly later on. Don't mind the blue light. Thats just my phone charger. 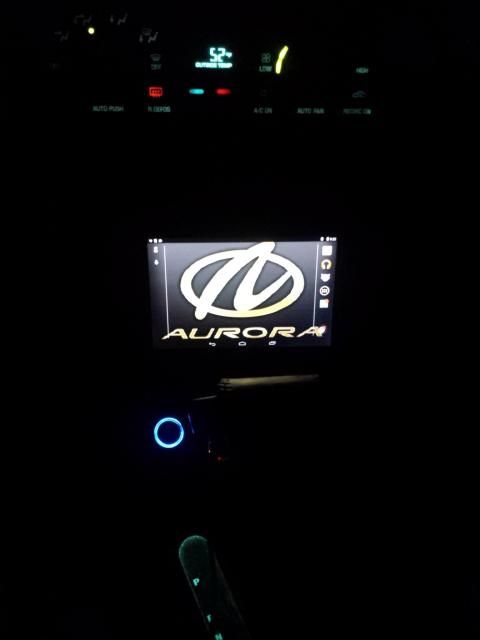 |
|
inno
Aurora Watcher
Posts: 46
|
Post by inno on Jan 7, 2015 12:01:42 GMT -6
Here is a short video of how it goes in and out. It slides to the left off of the charger, and then pivots out. I would have loved for it to slide to the right instead, but could not work out the clearance.
|
|
|
|
Post by sall on Jan 7, 2015 12:05:46 GMT -6
Now you need a dedicated 5v ~3A charger that turns on/off with vehicle and your set.
|
|
inno
Aurora Watcher
Posts: 46
|
Post by inno on Jan 7, 2015 14:33:44 GMT -6
Now you need a dedicated 5v ~3A charger that turns on/off with vehicle and your set. That's my next order of business. I was able to pick up this car charger. It's pretty much a knockoff of what many others use. Here is the best charger for nexus in car installs from the XDA forums. PowerGen Car ChargerAnd here is mine. I want to put it in one of these spare cigarette ports that will be hard wired to existing wires somewhere. I'm not sure which wire is used for our cars delay. You know the delay that cuts power to accessories after a few minutes. There's an app called Tasker that handles the software side of things. It cuts certain apps off, as well as puts the screen to sleep when power is cut/when power is applied. 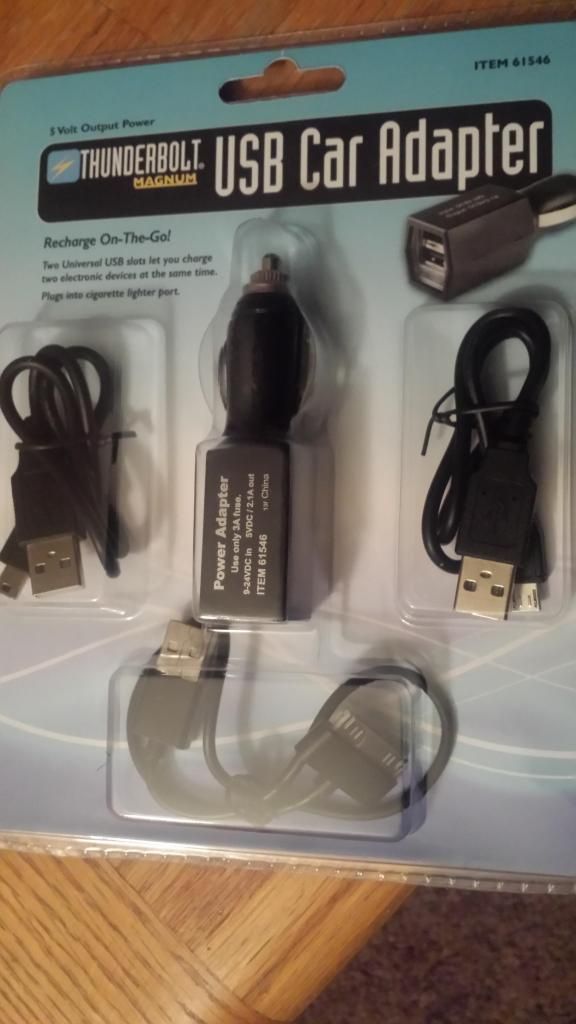 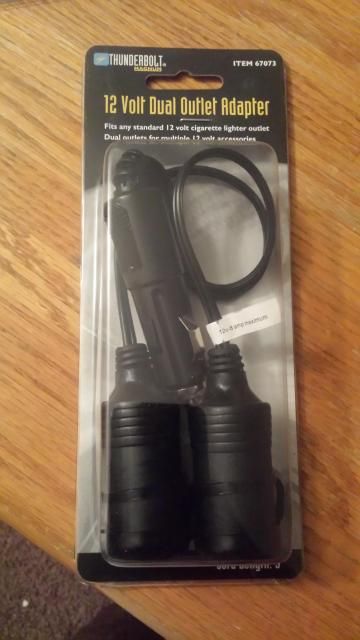 |
|
inno
Aurora Watcher
Posts: 46
|
Post by inno on Jan 7, 2015 14:37:15 GMT -6
Sall, I see your bezel is super clean. What kind of body filler did you use for the bodywork? And which paint would you recommend? I need it to close the gaps and finish my bezel.
Someone told me I would get by with autozone filler. Some say use some better quality filler. As you can see, I really don't need much.
Also, does it matter if its flex filler, or filler for plastics? Thanks again
|
|
|
|
Post by sall on Jan 7, 2015 14:47:52 GMT -6
|
|
|
|
Post by sall on Jan 7, 2015 14:58:44 GMT -6
Sall, I see your bezel is super clean. What kind of body filler did you use for the bodywork? And which paint would you recommend? I need it to close the gaps and finish my bezel. Someone told me I would get by with autozone filler. Some say use some better quality filler. As you can see, I really don't need much. Also, does it matter if its flex filler, or filler for plastics? Thanks again Thanks. Didn't see this before previous post. I used this stuff linked below which I already had on hand from a bumper repair. Filled any pinholes with glazing putty. Sand, sand, sand! I honestly do not remember what kind of paint I used on it. If you aren't happy with the body work consider wrapping the whole bezel in vinyl woodgrain. Again throwing you some ideas I considered myself! www.urethanesupply.com/Flex-Filler-1/Flex-Filler-Tube-Kit/ |
|
inno
Aurora Watcher
Posts: 46
|
Post by inno on Jan 9, 2015 11:54:58 GMT -6
Thanks for all of your input so far sall. I will also be running a USB Hub to connect mainly an external hard drive to. Of course, that will need a power source as well. I've heard good things about urethanesupply.com. Many of the pros turn to them. And yes, I REALLY considered the woodgrain kit. I will see after I finish going on my sanding spree.
Also, I've never worked with a relay. I am looking at the data sheet right now. I'm used to seeing 87, on relays. Which pins would I use? This idea is straightforward. Want to learn about it a little more before I dive in though.
|
|
inno
Aurora Watcher
Posts: 46
|
Post by inno on Jan 9, 2015 12:27:56 GMT -6
Small update. I have been working on the software side of things. I am running 4.4.4 AutoDroid v1.2 ROM This ROM basically allows OTG cable+charging function, and allows me to customize my buttons, enable gestures, etc. So many possibilities. It can be found here. XDA AutoDroid Thread
As you all know, storage for music and movies is not all that great on these tablet devices. My model is 32GB. To solve that, I will be running a powered USB Hub, and be able to plug in a flash drive or hard drive. Maybe even a backup camera later on down the line. Using an external hard drive was really my main purpose of buying a tablet. But I ran into a problem. I purchased about 4 total OTG cables, and all of them worked on my phone. However, they wouldn't work on the tablet. If any of you are planning on using an external drive or flash drive, please test this function out. My refurbished tablet, and a coworkers new tablet just will not recognize the cable or flash drive. You can also try a USB mouse. It should light up, or show a cursor on the screen after it is recognized. So I borrowed a friends Nexus 7, same year, and hers worked fine. Her firmware was older actually(4.4.2). Here are the OTG cables, and the OTG troubleshooter results. Both cables are fine, but one tablet does not recognize it at all. 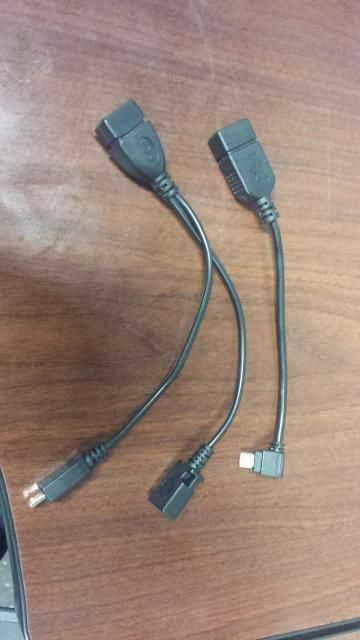 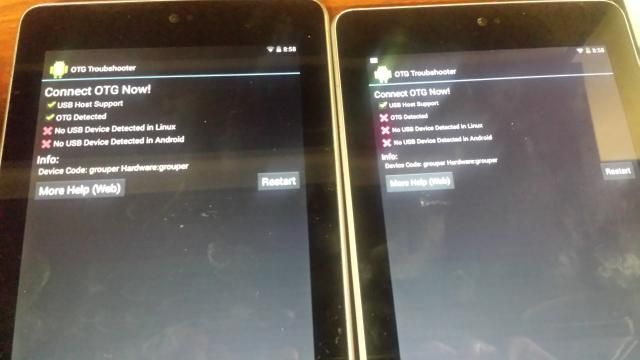 Long story short, she said she doesn't use that function anyway and KINDLY traded tablets!!!!! And without her, the project would have come to a halt for a while!! I was not under warranty, and most likely would have had to pay if I sent it in to Asus. The support actually wasn't that bad as I thought it would be. But who knows how much they were going to charge. |
|
inno
Aurora Watcher
Posts: 46
|
Post by inno on Jan 9, 2015 12:32:25 GMT -6
Adding to my good fortune lately, another coworker knew of my project. He had a Bluetooth OBD scanner lying around because he couldn't use it anymore. Thanks Doug!!! I owe you some cash and now TWO lunches. I am going to utilize the Torque app to monitor engine, diagnostics, code scanning, etc. Will be testing this soon 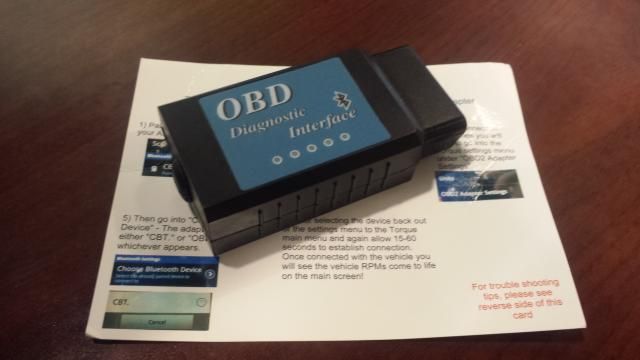 |
|
|
|
Post by sall on Jan 9, 2015 12:40:37 GMT -6
No problem! Yes you can combine the USB Hub,OTG and charging all in the same unit. Precisely, what I did for the other install. Just grab another 5v 3A stepdown and use it provide power to the USB hub. You can use a standard automotive relay if you're more comfortable with that. Those are relays I linked actually go on perfboard or custom pcb. I'll make you a better diagram when I get few moments.
OBDII diagnostics is a must! You will enjoy it!
|
|
 Forum")


 ? Look forward to finished product!


