|
|
Post by genedjr on May 5, 2015 8:33:43 GMT -6
I was able to remove all of the hardware from the Coil Pack. However, I am not able to remove the Coil Pack. Any secret to removing that Vacuum thing in between the Valve cover and the Firewall? Thanks. After you pull the large and tiny vacuum hoses off and the two 10mm bolts on the valve cover, you need to use a 10mm socket (I used a 6" extension+wobbly+4" extension+socket to get to it) and remove the two 10mm nuts that secure the smog nonsense to the exhaust manifold. It's very tight behind there and the engine needs to be cold. Be careful not to drop the nuts. The smog thing will then pull straight up and out. The coil pack is still a bit to handle requiring you to lift and twist it to get it out of there. And be careful, I broke the silly pack the first time trying to force it - and its very expensive. Putting the smog thing back is a bit tricky. Note that the studs sticking up do have a non-threaded bit allowing you to set the nut on it before tightening. I use a telescoping magnet so I don't drop the nuts. Since I have had mine off a number of times its fairly easy now, but I spent an hour retrieving that pesky nut the first time. enjoy. ...gene |
|
|
|
Post by ejohnson03 on May 5, 2015 8:51:01 GMT -6
Okay thanks Gene. I found an exploded view last night of that area. It really helped me to see those two nuts you mentioned.  So if there is no rain tonight I will tackle that part. Wonder if I can leave the smog thing of the car??? |
|
plato442
Aurora Driver
 Life, Liberty, and the pursuit of Oldsmobile...
|
Post by plato442 on May 5, 2015 9:35:22 GMT -6
It still has very little power, so I also did a fuel pressure test and got right under 40psi. Where did you get the required 41 to 47 psi? I tired looking it up and your reference is the only one I found. Thanks! So I will order a pump. BTW - did you order just the pump or the whole assembly? ...gene Gene, I found what the fuel PSI should be from my factory manual. Mine was 35-37 PSI and ultimately was starving the farthest injectors from the incoming fuel, (which caused me to buy several parts which did not fix it until i checked the fuel pressure!) I bought a brand new Delphi fuel pump assembly off of eBay for 120 or 150. I lucked out and found that for cheap, otherwise I would have ordered one from Amazon. |
|
|
|
Post by genedjr on May 5, 2015 12:53:13 GMT -6
It still has very little power, so I also did a fuel pressure test and got right under 40psi. Where did you get the required 41 to 47 psi? I tired looking it up and your reference is the only one I found. Thanks! So I will order a pump. BTW - did you order just the pump or the whole assembly? ...gene Gene, I found what the fuel PSI should be from my factory manual. Mine was 35-37 PSI and ultimately was starving the farthest injectors from the incoming fuel, (which caused me to buy several parts which did not fix it until i checked the fuel pressure!) I bought a brand new Delphi fuel pump assembly off of eBay for 120 or 150. I lucked out and found that for cheap, otherwise I would have ordered one from Amazon. OK, I looked further. I have the 3 "early service information" shop manuals, and I was testing it wrong. On page 6-1121 there is a procedure for testing the fuel pressure. I will do this again and see what I get. The entire testing process is pretty involved, but this manual says the 2001 4.0L should have a static pressure from 48 to 55 psi. I will update this thread when it stops raining long enough for me to try again. On the part. I have had very good luck with both junk yard parts and just the fuel pump replacements. I am thinking of getting a junk yard part and testing it and also using it to get a part number for just replacing the pump. More after I test. ...gene |
|
plato442
Aurora Driver
Life, Liberty, and the pursuit of Oldsmobile...
|
Post by plato442 on May 5, 2015 14:18:19 GMT -6
hmm, that's odd. my service manual has Fuel System Diagnosis starting on page 6-1833, and can find the fuel pressure value (41-47 PSI) on 6-1835. Its strange that my 01 book has different values than yours Attachment Deleted Attachment Deleted Attachment Deleted |
|
|
|
Post by genedjr on May 5, 2015 17:14:19 GMT -6
hmm, that's odd. my service manual has Fuel System Diagnosis starting on page 6-1833, and can find the fuel pressure value (41-47 PSI) on 6-1835. Its strange that my 01 book has different values than yours Interesting, as noted mine are early additions and chapter 6 only has 1272 pages. Anyway I also don't trust the HF pressure gauge so I will borrow the one from O'Reilly. Again when it stops raining.  ...gene   |
|
tigger
Administrator 
Posts: 2,844 
Staff Member
|
Post by tigger on May 5, 2015 17:34:53 GMT -6
Great... Now I have to check mine, lol!
|
|
plato442
Aurora Driver
Life, Liberty, and the pursuit of Oldsmobile...
|
Post by plato442 on May 5, 2015 19:22:31 GMT -6
hahahaha
|
|
|
|
Post by ejohnson03 on May 7, 2015 5:08:15 GMT -6
I applaud all here that have attempted the removal of the Rear bank Coil Pack.
Definately not for the faint of heart.
The knowledge provided within the posts on this forum gave me the courage to concur a task such as this.
One note going forward to those whom will be attempting this very feat:
- Keep track of the Spark Plugs and Boots that you remove
If for some reason, you end up with an extra New Spark Plug, during the replacement process.
It may be because an old Plug was re-installed.
Or worse yet, the Boot was installed without a new Plug in the cylinder.
LOL, hey at least I realized there was an extra Plug before I re-installed the Coil Pack and fired it up.
Amazingly enough, I did not loose any of the nuts or bolts during the rear bank proceedure.
However, I did manage to loose a 10mm Socket and Extension.
It will probably show up on one of the bumpy roads by my house.
cheers---
|
|
|
|
Post by genedjr on May 11, 2015 11:05:44 GMT -6
OK, initial test shows 37-38 psi and a rise to 40+ 10-15 seconds after fuel pump shuts down. "My"  shop manual calls for 48-55psi. I was unable to complete testing as the next test requires you to block off the return line. So back to you-pull-and-pay for a fuel line quick disconnect to make a tool Here are the results: The return quick disconnect is a smaller diameter so get both if you are unsure.  Then cut it down to a usable size. I chose to sand the end smooth and square. I used a bolt to plug the end as shown.  It's kinda hard to see in the image, but the bolt is "slightly" larger than the diameter of the tube so it fit very snug and required a wrench to screw it in. The finished plug.  Now I need to wait for a little help to continue testing. ...gene [EDIT] This leaked a little, but served the purpose. If you don't have a cold engine, I suggest a little sealant when assembling or adding a clamp. |
|
|
|
Post by genedjr on May 11, 2015 14:25:46 GMT -6
OK, second test, after blocking off the return (which my cheapo tool leaked a little) showed pressures out to 60psi. So its not the pump. The book says to replace the fuel pressure regulator, which fans of this thread know I did last November. My thoughts now turn to the injectors. I need to find a junk yard connector to make this easier - so back to you-pull-n-pay...
All in all it runs much better, just lacks power at times.
...gene
|
|
plato442
Aurora Driver
Life, Liberty, and the pursuit of Oldsmobile...
|
Post by plato442 on May 12, 2015 11:30:16 GMT -6
that still sounds like a fuel pressure issue when under a load!
|
|
|
|
Post by genedjr on May 13, 2015 8:28:15 GMT -6
that still sounds like a fuel pressure issue when under a load! Maybe, the new one might be bad. I am off to the Denver/Aurora junk yards as the Springs one does not have what I need. I will also get a regulator along with a injector connector. Once I get a connector I plan to test all the injectors and swapping out the fuel pressure regulator. ...gene |
|
|
|
Post by genedjr on May 15, 2015 10:49:03 GMT -6
Changed out fuel pressure regulator, no change, got a P305 (cyl 5 misfire) and P300 (random misfire). I also got a connector for creating a injector cleaner/tester. More later.
...gene
|
|
|
|
Post by valaden on May 16, 2015 22:43:44 GMT -6
Ok I've read through all your guys post which have been very helpful, I'm gonna trow out my issues and maybe someone can give an idea of where to go 2 weeks ago my wife's car had the fuel pump go out so I replaced it, the filterand everything was running fine then she calls me at lunch and tells me that the car is idling like crap, I scanned it and I'm getting a p0300 code I've checked for vacuum. Leaks as a quick fix, with no results, I replaced the Intake gaskets, plugs, and I have replaced both coil packs within the past year (packs). And after changing all this today it ran great better than ever but Once it warmed up it runs like crappie again and throws codes again. Am thinking of testing the fpr next but an not sure how to test it any ideas would be greatly appreciated also cleaned. Out the egr valve
|
|
plato442
Aurora Driver
Life, Liberty, and the pursuit of Oldsmobile...
|
Post by plato442 on Aug 8, 2015 11:39:05 GMT -6
Changed out fuel pressure regulator, no change, got a P305 (cyl 5 misfire) and P300 (random misfire). I also got a connector for creating a injector cleaner/tester. More later. ...gene Gene, well after leaving the Aurora in the garage since spring, I finally got around to changing a few things on it so we can start using it this month. Just changed the fuel pump and fired her up and shortly after idle it threw the P0300 code. remember, I've already changed most of the same parts you have as well. Any new news on your results? I'm gonna get another fuel filter (changed 7 months ago and have less than 1000 miles on it) and try another fuel pressure regulator (again). |
|
plato442
Aurora Driver
Life, Liberty, and the pursuit of Oldsmobile...
|
Post by plato442 on Oct 16, 2015 9:15:17 GMT -6
Well, I had to revisit this thread and post my findings. Just to be clear, i was having a P0300 code for a random misfire. So after reading several thread here and on the caddy forum, I had started with the usual suspects. Changed the fuel pressure reg. NO FIX. I ended up taking out my $15 Pulstar plugs from the rear and replacing them with new AC Declo plugs and new Bosch plug boots. NO FIX. I then bought a pair of crankshaft position sensors, was only able to change one, BUT i knew they were both new. NO FIX. I checked and checked and checked the fuel pressure, which was low as per manual. So, to fix the sporadic fuel gauge and hopefully this miss, I changed the fuel pump for a new Delphi. NO FIX. Cleaned my MAF and what little carbon was on my polished TB, added every intake and valve cleaner and fuel injector cleaner. NO FIX. Did countless vaccum leak tests, replaced PCV and tried to hone in on each individual injector. NO FIX. I purchased a new Delphi Coil pack, and replaced that on the rear, and checked new plugs and boots yet again. NO FIX. Swapped the front Coil Pack with the two coils. NO FIX. So, I thought i'd narrow it down to a slight vacuum leak and possible intake gasket & coupler leak, (although these were also NEW). while it sat on my bench, I decided to check the front plugs again. And noticed that on of the plugs still had fresh looking anti seize on its threads. So for the heck of it i pulled the $15 Pulstar Plugs out and ordered 4 new AC Delco plugs. Threw them in, installed the boots, slapped on the coil pack and plugged her in. F N A problem solved. So P.O.ed about the failed Pulstar Plug. a lot of head ache, money, parts, and no driving my Aurora since the spring (which hurts the worst almost!). Possible moral, don't always trust something because its new? Go with OEM? Start off with the easy fix ON BOTH SIDES OF THE ENGINE? Wow. So this has prompted me to but another 8 AC Delco plugs for my Yukon now too!! Lesson learned? Maybe not, but lesson understood...
|
|
RCA1186
Administrator
Rob
Go Pack Go!
Posts: 4,837
Staff Member
|
Post by RCA1186 on Oct 16, 2015 9:50:10 GMT -6
Just another example of what I've come to learn with these engines. They do not play well with non-OEM plugs. I could not tell you the very reason for that but I always buy factory replacements when I decide to change them, strictly from what I've seen on this forum.
|
|
plato442
Aurora Driver
Life, Liberty, and the pursuit of Oldsmobile...
|
Post by plato442 on Oct 17, 2015 9:58:22 GMT -6
|
|
skizo
Aurora Passenger
 WOT ... is there any other way?
Posts: 278
|
Post by skizo on Oct 17, 2015 14:43:55 GMT -6
i pulled the $15 Pulstar Plugs out and ordered 4 new AC Delco plugs. Threw them in, installed the boots, slapped on the coil pack and plugged her in. F N A problem solved. So P.O.ed about the failed Pulstar Plug. a lot of head ache, money, parts, and no driving my Aurora since the spring (which hurts the worst almost!). Possible moral, don't always trust something because its new? Go with OEM? Start off with the easy fix ON BOTH SIDES OF THE ENGINE? Wow. So this has prompted me to but another 8 AC Delco plugs for my Yukon now too!! Lesson learned? Maybe not, but lesson understood... That was almost painful reading what all you had to go through to basically replace a spark plug! What don't kill ya, makes ya stronger, but that just means bigger dents in the garage walls when you start tossing tools ... <G> Couple comments ... With all the work it takes to just get at the plugs in the first place, I figured go with the best and used AC Delco Iridium when I changed mine out. I also went with a complete new Belden wire set on my classic - always had good luck with those, and quite frankly, the AC Delco set that came off looked like shite. That was a couple years back and no problems. One caution ... the iridium tips are VERY fragile, so don't try gapping them, and be extremely careful not to knock them around during installation. Also - just did the crankshaft position sensor replacement here. That cured all sorts of codes in the DIC and added some pep as well as fixed a cold stalling issue. Somebody mentioned only being able to replace one ... No way the top sensor will clear the AC accumulator ... 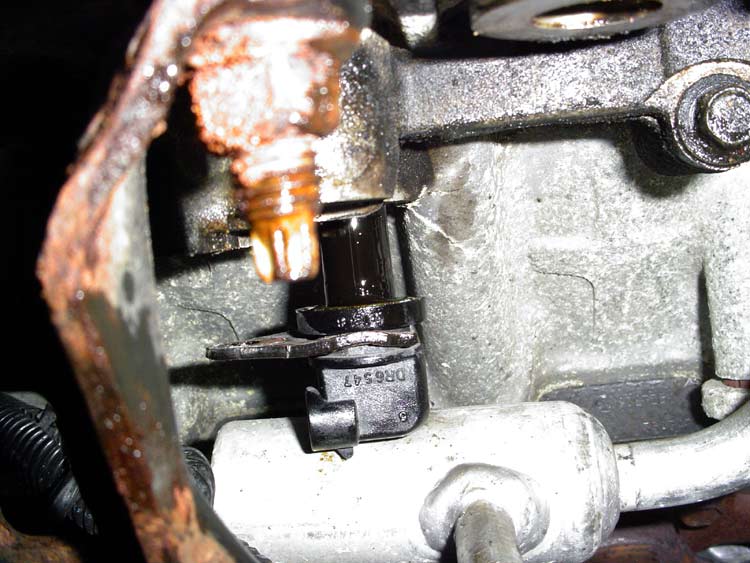 The secret is you have to dismount the AC compressor to be able to get access to the top sensor ... you DON'T need to break the system to do that. Peel back the inner fender to get at the front compressor mounts, and remove the rear bracket completely after taking the belt off the compressor pulley. That will allow you to swing the compressor out of the way enough to get the crank sensor out. I also put a bit of blue lithium grease on the o-rings to keep them in place while mounting the sensors. Something to keep in mind if yall dig in down there again. * It was also mentioned that there's a good chance you'll break the oil sender. Mine came through ok, but that could certainly stall a job if you're in a hurry. |
|
|
|
Post by genedjr on Oct 17, 2015 20:25:00 GMT -6
Well, unfortunately I think I have finally found the problem: head gaskets. The coolant is being consumed and its not on the driveway. It's not in the oil either. So that leaves the cylinders - what a crappy design. And to top it off, its throwing a torque converter control value stuck in open position code.  At 145K miles I am at a cross roads (currently have about $1K in repairs on a $2500 car). There are other misc things that need to be fixed (i.e. seat heat, shocks, tires and typical wear on the drivers seat - otherwise it's very sharp, body is great for its age (no rust)) that may amount to 100 hours and maybe $1000. But alas, I no longer have a empty garage to work in (long story) and I am just plain running out of patience. (and I also have a 93 grand am that needs a engine rebuild and a mystical mode door (heater) issues resolved.) SOOOOooo here are my questions: 1) with 145K I was thinking re-ring kit as well as the head stud ($700 for studs - any cheaper?) approach. But I can't find a complete re-ring kit. Anyone got pointers or a list? 2) with 145K and as a complete novice at auto tranny's (never done one) - the shop wants $1500 to rebuild. Can I do it, and where would I find a kit, instructions, detailed zillion hour video ? Side question - used tranny's - what will work? - the code.... is there an easy fix to the tcc issue that will last 50K miles? I have found a guy back east doing northstar (Cadillac) rebuilds for $2100 (so $3k with shipping back and forth, but $2400 for a 4.6 caddy no core - and with the inherit issues) to long block and my local tranny guy will do the rebuild for $1500. I expect another $1000-$1500 for misc stuff, but wow, that's twice what I paid for it and probably $2K+ over what its worth. Thoughts? (as an aside, I will be challenged to get the eng/tran assem (k-Member) out of the car, but I think I can...(toot toot) ...gene As Yogi said, "it ain't over till it's over..." But the fat lady is warming up |
|
plato442
Aurora Driver
Life, Liberty, and the pursuit of Oldsmobile...
|
Post by plato442 on Oct 17, 2015 22:19:19 GMT -6
Gene. I initially was in the same boat as you except I bought the from an auction sight unseen except for pictures. It couldn't make it 20 miles before it started to over heat with head gasket problems. So I was at a cross road or repairing the 4.0 or finding a 4.6 and complete the head stud kit in that, so I snagged an STS's 4.6 and started the transofmation. I didn't re ring it because the cylinders still showed a cross hatch. BUT I had my Dad in my back pocket, he's a master mechanic and did all the work!! After all was said and done I payed about $2500 for the car and a lot more in the engine, but after all the hassle, money, blood, sweat and tears, I wouldn't have changed a thing!
|
|
|
|
Post by ejohnson03 on Oct 19, 2015 4:21:57 GMT -6
I applaud all here that have attempted the removal of the Rear bank Coil Pack. Definitely not for the faint of heart. The knowledge provided within the posts on this forum gave me the courage to concur a task such as this. One note going forward to those whom will be attempting this very feat: - Keep track of the Spark Plugs and Boots that you remove If for some reason, you end up with an extra New Spark Plug, during the replacement process. It may be because an old Plug was re-installed. Or worse yet, the Boot was installed without a new Plug in the cylinder. LOL, hey at least I realized there was an extra Plug before I re-installed the Coil Pack and fired it up. Amazingly enough, I did not loose any of the nuts or bolts during the rear bank procedure. However, I did manage to loose a 10mm Socket and Extension. It will probably show up on one of the bumpy roads by my house. cheers--- These prior shenanigans resulted in verifying that the front coil pack, after moving to the rear, was in need of replacement. So I finally got around to buying a Coil Pack off E-bay for $89, yes it is new. Completed install of the NEW Coil Pack on the Rear bank, over the weekend. What an incredible difference it has made in the overall 4.0L engine performance! Now with new plugs and new coil packs the Aurora is very perky of the line... Prior to this latest upgrade, my 86 mile a day round trip to work was eking out a 19 mpg stat. The ride to work this morning provided a surprising 24 mpg. Watching the Instantaneous mileage, I managed to see a consistent 28 mpg at 70 mph. Best I have ever seen on this vehicle. So long story short, if your error codes are showing multiple misfires, then replace the plugs and coils. That is all... |
|
plato442
Aurora Driver
Life, Liberty, and the pursuit of Oldsmobile...
|
Post by plato442 on Oct 21, 2015 15:59:48 GMT -6
That's pretty good mileage!
|
|
|
|
Post by genedjr on Feb 8, 2017 17:08:35 GMT -6
OK, its been a year plus and the Aurora has been sitting. I have decided to fix it. I will probably start in May-June. The plan is to drop the drive train out the bottom so I have easy access to everything. The end goal here is to have a nice ride that I can get another 50K-75K miles out of before it dies again. First the transmission: - I have a TCC stuck open code - I had planned on just replacing all solenoids, but with 145K miles I figure rebuild or replace with a under 100K tranny. Or could that one change get me 50K+ more miles?
- How do I determine exactly what transmission I have. That is, if I go after a used one, how do I make sure all the gear ratios are correct and electrics are compatible?
- Can I upgrade to a 4T65E-HD? I have seen those around for less than $500 with under 100K miles.
- Or should I rebuild it myself? I have seen a couple of videos showing the rebuild process and I can probably do that. With a $350 kit and a $100 spring compressor I should have all the other tools. If I don't screw it up, could save $1000.
- Or should I play it safe and have it rebuilt?
- At any rate, a new torque converter is going in.
Now the Engine
- The easy route is to do the stud kit, main case gasket, crank seals - with that in mind - what else is "required"?
- The next level is to re-ring it as well. By that I mean replace all wear items in the engine with std sized new items (rings, bearings, seals, gaskets). I have not found a re-ring or complete rebuild kit for the 4.0 - there are plenty for the 4.6 - any pointers would be great.
- And of course there is the hot-rod option of putting in the 4.6 - not going there - unless it can be done cheaper.
Thoughts?
...gene
|
|
|
|
Post by Toronado3800 on Feb 8, 2017 21:38:21 GMT -6
Hello Gene,
If you really enjoy turning wrenches I think you are on the right track. If you are paying others I dunno.
Give a look about for a lower mileage wrecked donor car although these are all getting a little long in the tooth.
|
|
plato442
Aurora Driver
Life, Liberty, and the pursuit of Oldsmobile...
|
Post by plato442 on Feb 8, 2017 22:46:23 GMT -6
Gene, I had similar issues as well. I went the 4.6 route and also had the heads checked and a couple valves replaced, N*performance head stud kit, exhaust manifold cleanup, new diversion plate and seal, new main bolts (because they will snap) water pump, a few sensors, gaskets, belts, tb port and polish, new cat, new e-fans, larger radiator, and a PCM tune. I'm sure there's other stuff we had to do. No re-ring or bearings. Cylinders still had cross hatching alongs it's walls!
|
|
tigger
Administrator
Posts: 2,844
Staff Member
|
Post by tigger on Feb 8, 2017 23:07:09 GMT -6
Well, the 4.0 uses a 4T80E, so a 4T65E/4T65E-HD would actually be a downgrade, haha! At that mileage, if you are indeed "going in", might as well do the full rebuild and be done...
As for the engine, get a junkyard 4.6 and rebuild and stud that. (Like Plato)
At least, that's what I plan to do... when the time comes...
Guess it boils down to how long you plan to keep it and how much you consider 'too much'. Keep us updated!
|
|
plato442
Aurora Driver
Life, Liberty, and the pursuit of Oldsmobile...
|
Post by plato442 on Feb 9, 2017 11:24:32 GMT -6
Yeah definitely stick with a 4T80E!! I think there's a company in California that builts performance 4T80 trannys also. Worth a Google search
|
|
|
|
Post by genedjr on Jan 20, 2019 21:55:54 GMT -6
I am resurrecting this old thread because I have simply lost interest. My life has moved on and I no longer have time, or mostly interest, in bringing this car back.
I will be offering this car up on craigslist as a parts car for $500 starting Monday Jan 28. $300 (and you come get it) for anyone on this forum. The car is in Colorado Springs. It runs, but has the issues noted in this thread. I ran it around the block today and even with 2 year old gas it ran fairly well. But it will overheat and it sucks coolant into the cylinders...
and...
Broke windshield (long cracks, no holes)
Paint clear coat wear just forward of sub roof in the middle (about the size of a piece of paper).
Drivers seat heat does not work.
There may be other stuff not obvious, after all it has 145K miles - send PM, respond here, like reach out.
On February 11, I will donate the car to the ARC (which will give me $750 donation credit).
It's gotta go.
...gene
Well - I finally did put this up on craigslist and its now in the hands of another.
|
|
 Forum")


 shop manual calls for 48-55psi. I was unable to complete testing as the next test requires you to block off the return line. So back to you-pull-and-pay for a fuel line quick disconnect to make a tool Here are the results:


