Post by luvmybravada on Sept 6, 2006 22:23:56 GMT -6
First of all, this job is not as daunting as it may seem. It's actually quite easy but it takes longer than most belt changes.
Tools Needed:
Heavy Duty sissors or utility knife
4" socket extention rod for 1/2" socket
1/2" socket ratchet
Long standard screwdriver
Hydraulic Jack
Pliers
The new belt!

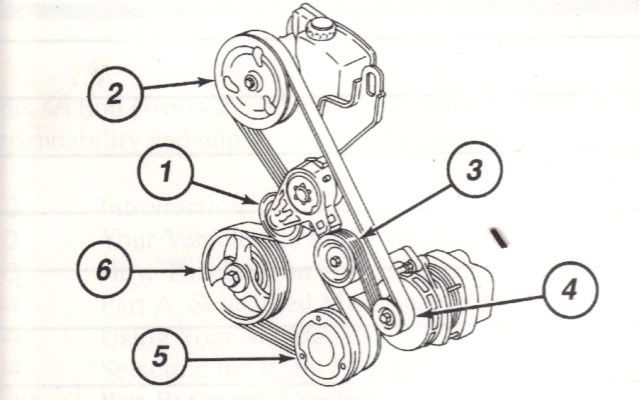
Before you start, become familiar with the shop instructions. (Thanks TLTND) Look at your belt and familiarize yourself with where and how it is wound. (There is no belt diagram under the hood like most cars.)
First, turn on your car and turn the steering wheel to the extreem right, turn off the car. Then, with the knife just cut the old belt and pull it out. This will save you half the time of what the shop manual says to do. Good thing you turned the wheel before you cut the belt as now you have no power steering.
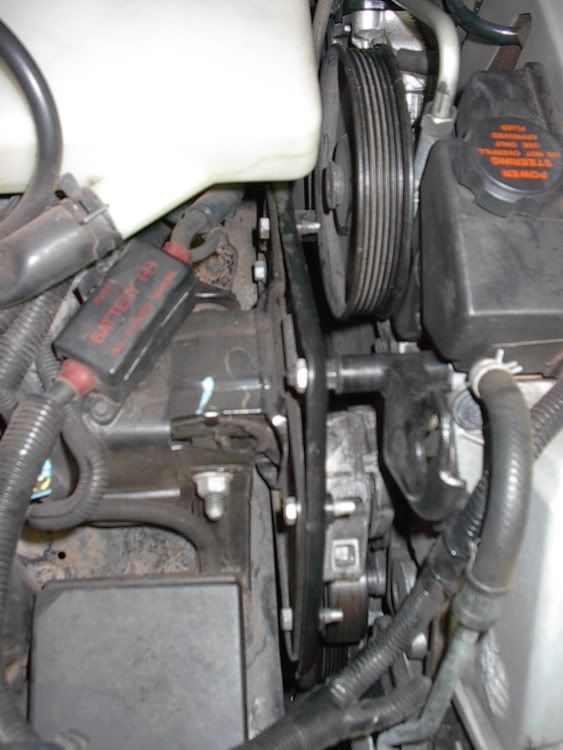
Check all the pulleys to make sure they turn freely. I believe they should all turn except the driveshaft pulley. (This is the one that drives the belt.)
Next, route the new belt over the power steering pump on the top of the engine. Then stretch the belt around the alternator and the idler pully located toward the front of the car. You'll have to twist it to slip it around the idler pully. Take the excess belt near the steering pump and tuck it down through the engine bay to the bottom of the car. You may need the long screwdriver to help.
Place the jack under the front cross member located right behind the radiator. Lift the car. You should support the car with the proper jack stands for saftey.
Now remove most all the plastic body rivets holding the splash guard inside the wheel well. There are a lot. Pull on the small knob with the pliers and use the screwdriver to help pry as well as pushing on the big half of the rivet. Now, pull out the splash guard and push it to the side. (You don't have to remove the entire panel, just the front part- enough to access the lower pulleys.
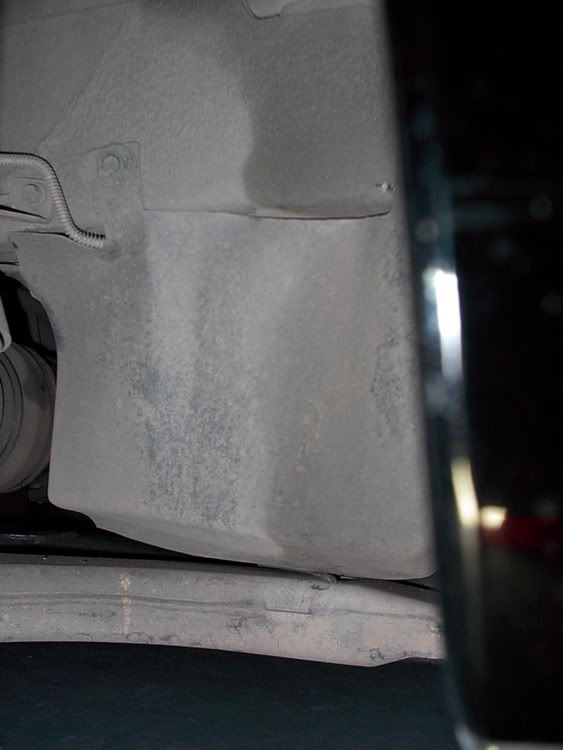
The splash panel
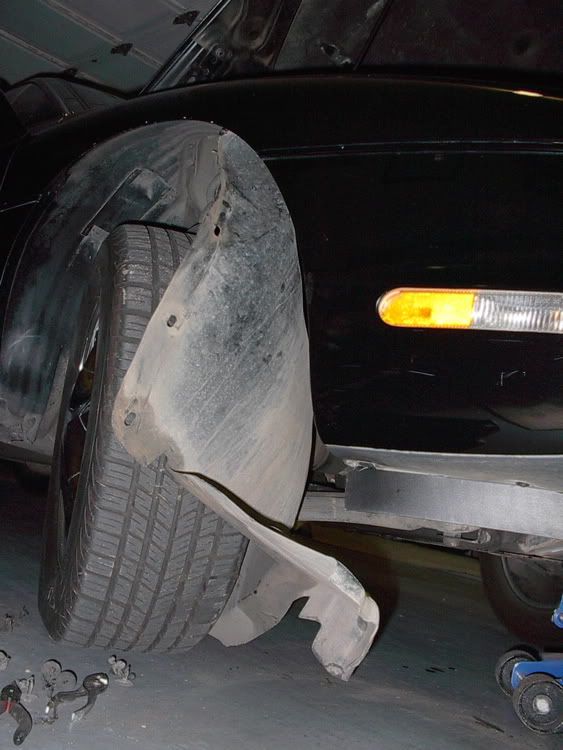
Only half the plastic rivets removed.
Behind the splash panel
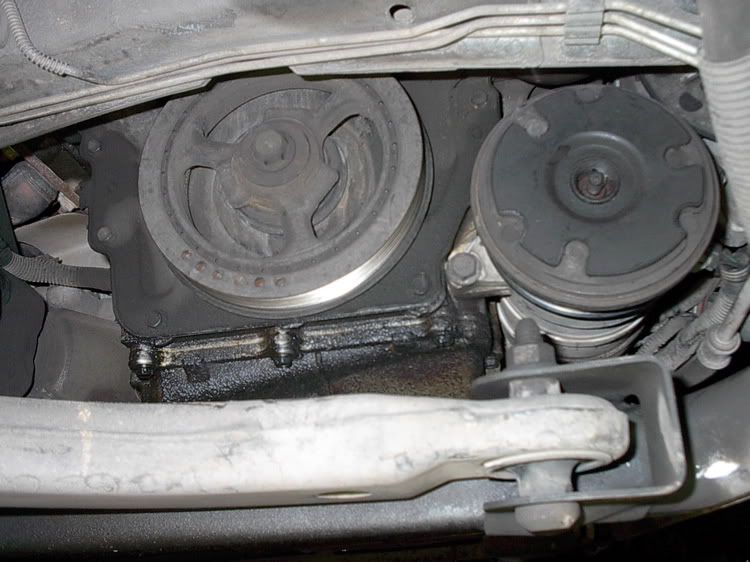
Grab the belt which should be hanging down below and wrap it around the drive shaft and AC pulley.
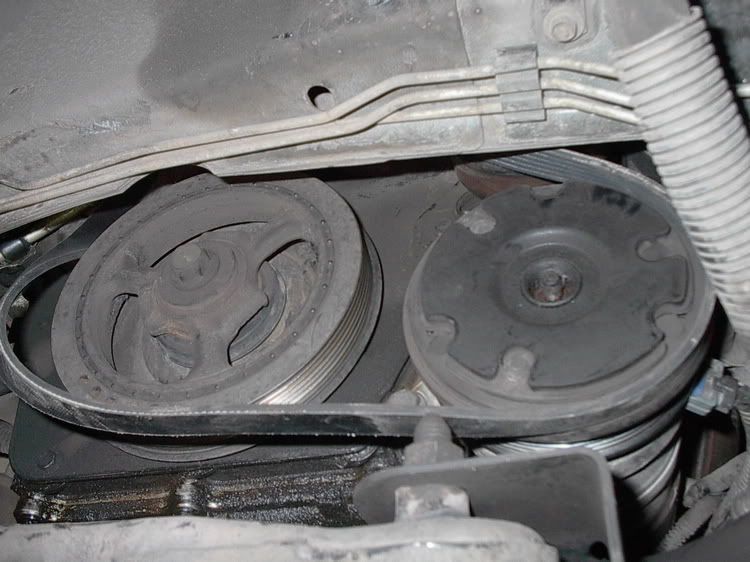
Now this is where it get's a little harder. Remove the belt from the steering pump at the top and wind it around the tensioner pully. To do this, you must slip the belt between the pully and the big metal plate. It's tricky because it gets caught up on the tensioner pully nut.
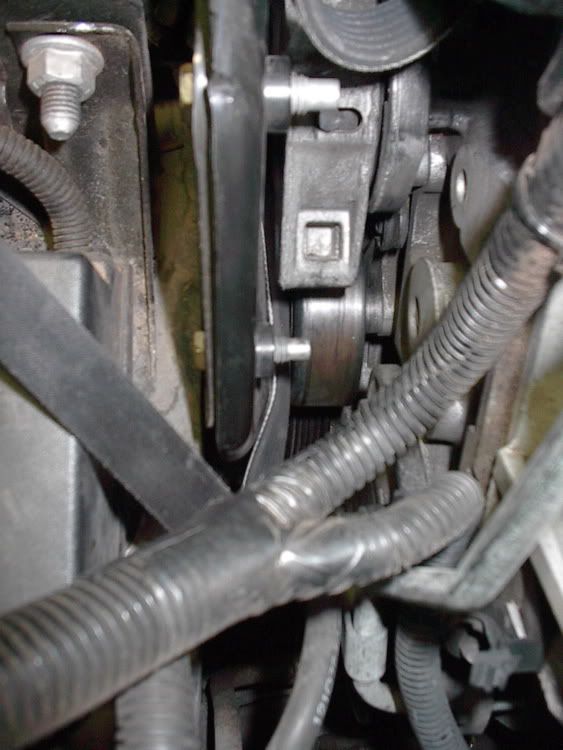
Now, put the 4" socket extension in the small square on the tensioner pully and attach the socket wrench to it sticking up towards the cabin of the car. Pull on the socket wrench giving slack in the belt, and wrap the belt back over the steering pump at the top of the engine. Release the tensioner pully.
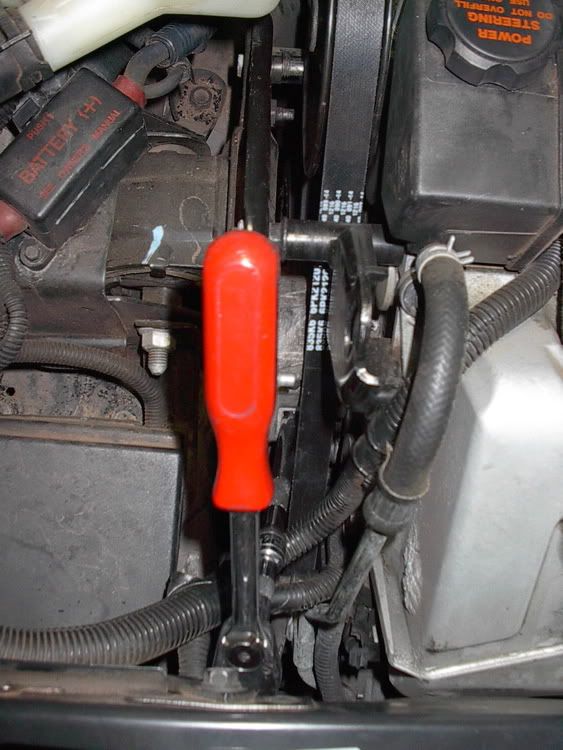
Check to make sure the belt is fully and securely around each pulley. Go start the car. If you did it right, put the wheel well back together and lower the car. Go drive to Sonic and get some ice cream because you just saved yourself a lot of $$ in labor costs.
It would also be a good time to replace the water pump belt on the other side of the engine. I'll add the pics and write up on that one when I get to it this weekend.
Tools Needed:
Heavy Duty sissors or utility knife
4" socket extention rod for 1/2" socket
1/2" socket ratchet
Long standard screwdriver
Hydraulic Jack
Pliers
The new belt!

Before you start, become familiar with the shop instructions. (Thanks TLTND) Look at your belt and familiarize yourself with where and how it is wound. (There is no belt diagram under the hood like most cars.)
First, turn on your car and turn the steering wheel to the extreem right, turn off the car. Then, with the knife just cut the old belt and pull it out. This will save you half the time of what the shop manual says to do. Good thing you turned the wheel before you cut the belt as now you have no power steering.


Check all the pulleys to make sure they turn freely. I believe they should all turn except the driveshaft pulley. (This is the one that drives the belt.)
Next, route the new belt over the power steering pump on the top of the engine. Then stretch the belt around the alternator and the idler pully located toward the front of the car. You'll have to twist it to slip it around the idler pully. Take the excess belt near the steering pump and tuck it down through the engine bay to the bottom of the car. You may need the long screwdriver to help.
Place the jack under the front cross member located right behind the radiator. Lift the car. You should support the car with the proper jack stands for saftey.
Now remove most all the plastic body rivets holding the splash guard inside the wheel well. There are a lot. Pull on the small knob with the pliers and use the screwdriver to help pry as well as pushing on the big half of the rivet. Now, pull out the splash guard and push it to the side. (You don't have to remove the entire panel, just the front part- enough to access the lower pulleys.
The splash panel

Only half the plastic rivets removed.

Behind the splash panel

Grab the belt which should be hanging down below and wrap it around the drive shaft and AC pulley.

Now this is where it get's a little harder. Remove the belt from the steering pump at the top and wind it around the tensioner pully. To do this, you must slip the belt between the pully and the big metal plate. It's tricky because it gets caught up on the tensioner pully nut.

Now, put the 4" socket extension in the small square on the tensioner pully and attach the socket wrench to it sticking up towards the cabin of the car. Pull on the socket wrench giving slack in the belt, and wrap the belt back over the steering pump at the top of the engine. Release the tensioner pully.


Check to make sure the belt is fully and securely around each pulley. Go start the car. If you did it right, put the wheel well back together and lower the car. Go drive to Sonic and get some ice cream because you just saved yourself a lot of $$ in labor costs.
It would also be a good time to replace the water pump belt on the other side of the engine. I'll add the pics and write up on that one when I get to it this weekend.


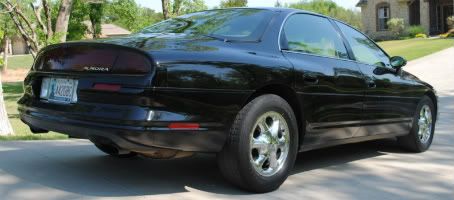


 1999 Oldsmobile Aurora Autobahn

