 Forum")


Post by genedjr on Oct 29, 2014 13:49:49 GMT -6
On the 2nd Gen 4.0 the crank position sensors are fairly easy to change. Yesterday I replaced both with a pair of junk yard ones. I saw one video where the guy removed the oil filter and adapter, but this is not necessary on the Aurora.
Here is what I used:
Here is how to do it:
EDIT: Added Pictures. This third time counting the junk yard removal took about 30 minutes including taking pictures. Enjoy.
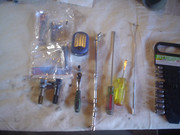
Here is what I used:
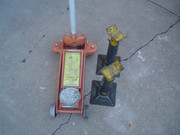
- Jack to put car on jack stands - I have a floor jack
- Jack stands that get the car high enough you can roll over while under the car.
- 1/4" socket wrench, 15" of extension, universal joint, and a 10mm socket.
- 16" long thin straight blade screwdriver.
- Light source.
- Telescoping magnet to pull and push the sensor bolts.
- Regular flat screwdriver to help with plastic push pins.
- Also shown are the original and new sensors.
Here is how to do it:
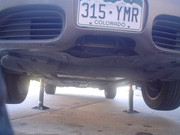
- Place the car on jack stands. I placed the stands under the back engine cradle mount bolts. Make very sure its stable. I had mine up 15" and at 6'4" and 210lbs I had plenty of room using a creeper.
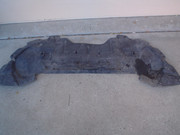
- Remove the splash under cover (or whatever it's called). Be careful with the plastic push pins as they break very easily. You can get new ones from the local parts store or just pull a few when at the junk yard. You'll need at least 4 good ones to secure the cover. But more are recommended. Also be careful where you set this cover as it will bend and crack fairly easily.
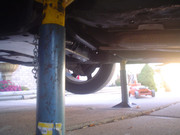
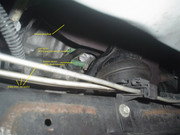
- The Crank Position Sensors are almost directly behind the front motor mount and exhaust manifold. If that area is a oily mess, with the front cover off, go out to the car wash and hose it down. You really don't want greasy dirt to fall into the engine. If you do need to run out and hose it off, you are done for the day as it gets extremely hot behind the front exhaust manifold.
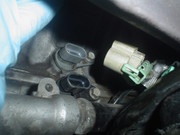
- Using a light to see, each sensor has a connector that needs to be removed. These are the only connectors directly behind the front motor mount. On the bottom sensor the release is on the bottom, you need to pinch the tab and pull the connector. The release was pretty stiff and this was hard to push. The top sensor has the tab on the top. Pinch and pull.
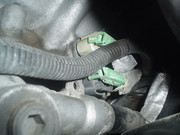
- To make it easier I pushed these wires out of the way. Make note of the color of each connector, where it goes, and write it down. I am not sure if they can be reconnected backwards, but that would be bad.
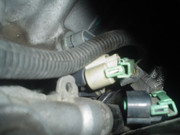
- Also note that the top sensor is grey and the bottom sensor is black. The sensors appear to be mirror images of each other. Again putting them in wrong hole would be bad.
- I used 1/4" ratchet, 15" or so of extension, a universal joint, and a 10mm socket. Even with my size 3x hands I was able to guide the socket to the bolt loosen and remove. The path was over the cross member that has the brake lines running across it. I took both bolts out first as it's a bit hard to get my hand up in there. (If you have smaller hands you can probably just use the ratchet and socket - there is alot of room up there.)
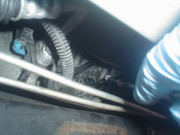
- Now using a 16" thin flat blade screwdriver I was able to gently pry (by twisting the screwdriver) the sensor out twisting at the mounting tab of the sensor and the engine. If you have smaller hands you can probably just twist the sensors out. They use O-rings for the seal and that is all that is holding them in.

- Sensors out

Reassembly is just reversing the above. Remember the O-ring is the seal so you only need to snug the bolts tight. Remember the color of the connectors, even time helps here as my connectors just lined up correctly.
One side note: The sensor should be a little hard to push in. My top was way to easy and I noted that it had the wrong o-ring (smaller). I put another on and it fit tightly like the bottom (sorry the pictures to not show the 1/2mm difference but its obvious to the naked eye.
On a scale from 1 (easy peasy) to 10 (need a pro and full shop) this is a 2 if you have the tools listed above.
Enjoy.
EDIT: Added Pictures. This third time counting the junk yard removal took about 30 minutes including taking pictures. Enjoy.


 I need to change out the crank sensors on my 03 tomorrow. Thanks!


