|
|
Post by tipsymcstager on Mar 5, 2011 12:54:15 GMT -6
welp, i've got a list a mile long of things to do with the 97' i'll start with the recovering of the inner post panels (nelsons idea) what a PITA to get the old glue off! i tryed enamel reducer, brake cleaner, TB cleaner, gasoline, goo-gone, pain thinner! all useless! (really just made it worse) man that sh8t's tuff! end'ed up just scraping it off, first dry then with dish soap (strait) then hot.hot water on a good knife.! first scraping (backside & dry)     2nd scraping with dish soap (just to keep it from gooing up & less sticky   an hour later.........................    not too bad, then recovered it that was easy with the 3M glue (20 bucks a can)! came out nice,  one side installed look's way better then that cloth thats on their now!   next was the wood grain for the dash and such! i only ordered 12x15 samples, as tests for application technique and look's. from a new company (this is a 3M product so you know it's good) i like the burl wood, don't like the others! and looking to get yet another sample of something i think will be nicer, this product is really nice, easy to apply, and will cover anything (complex shapes too) as you can see again just samples to see what i'll want as final, and to get application technique down (easily removed and applied with a heat gun) 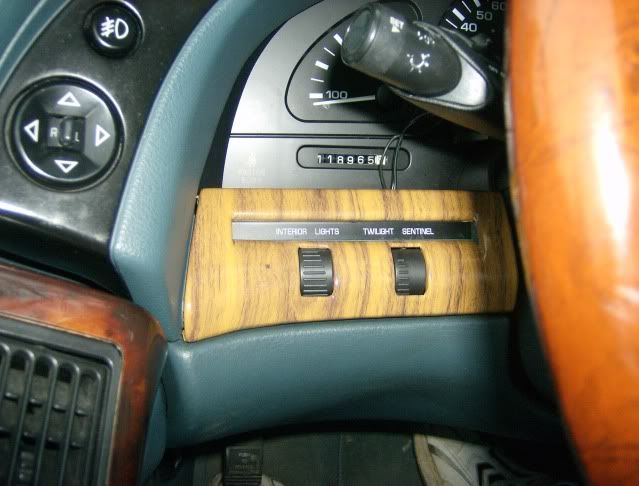 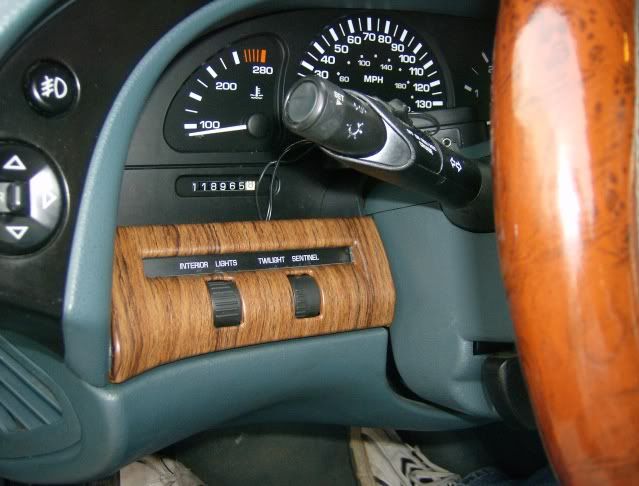 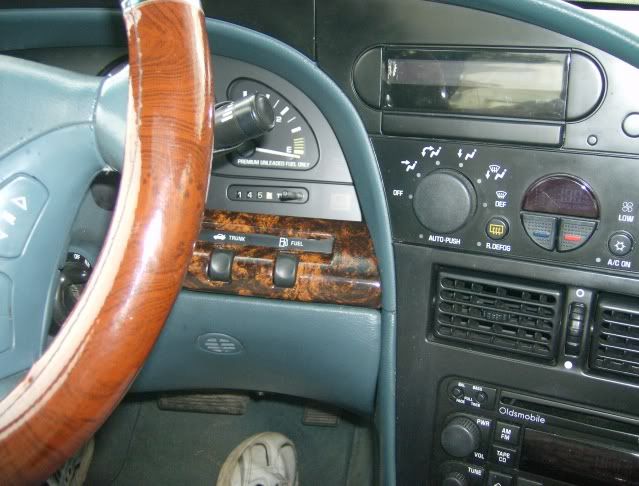 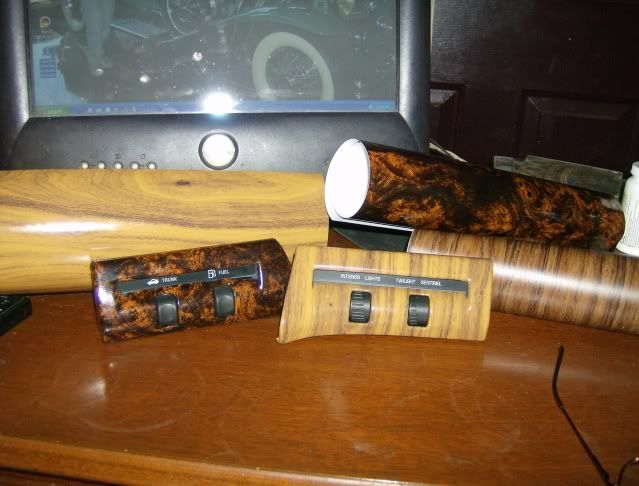   this is NOT just some cheap shelf contact paper! it 3M for auto, and way better then even the kit in the 01 as you can do anything with it! next is a true CAI, home made for about 45 bucks (pic's to come) thanks for looking |
|
|
|
Post by nelson480 on Mar 5, 2011 13:33:49 GMT -6
Yes liquid removers make that glue worse! lol
my panels are black, and yours are white, wonder why that is
Does the burled walnut look better in person to match the factory wood in the car?
|
|
|
|
Post by kyngofpop on Mar 5, 2011 15:05:50 GMT -6
Gonna be honest man, that wood trim reminds me of the wood from my old 83 Caprice. It's missing depth or something, maybe it's the angle. Luv the pillars, what material did ya use on them?
|
|
|
|
Post by roara on Mar 5, 2011 16:27:32 GMT -6
Way to go tipsy, pillars look great. Nice DIY on the "wood" too!
|
|
XJSman89
Administrator     
Posts: 6,309
Staff Member
|
Post by XJSman89 on Mar 5, 2011 18:23:40 GMT -6
I've done the home-made CAI. It's actually not that hard. Let me know if you would like any pointers from what I did! It all looks great, tipsy! What material is on the pillars now? Is that leather? Cloth?
|
|
|
|
Post by nelson480 on Mar 5, 2011 18:26:57 GMT -6
Whats a CAI?
|
|
XJSman89
Administrator     
Posts: 6,309
Staff Member
|
Post by XJSman89 on Mar 5, 2011 18:31:38 GMT -6
Cold Air Intake.
|
|
|
|
Post by nelson480 on Mar 5, 2011 18:41:06 GMT -6
oh duhhh haha i must be tired
|
|
|
|
Post by tipsymcstager on Mar 5, 2011 19:54:20 GMT -6
Gonna be honest man, that wood trim reminds me of the wood from my old 83 Caprice. It's missing depth or something, maybe it's the angle. Luv the pillars, what material did ya use on them? ya, it looks a little better in person, but honestly not much better! the burl walnut look's the best out of the three, and i'm still holding off till i can get some of this (Bubinga) from another site (much cheaper by the way) www.customautotrim.com/vinyl/wood_grain_vinyl.htm |
|
|
|
Post by tipsymcstager on Mar 5, 2011 20:07:11 GMT -6
Way to go tipsy, pillars look great. Nice DIY on the "wood" too! THANK'S! |
|
|
|
Post by tipsymcstager on Mar 5, 2011 20:30:13 GMT -6
|
|
|
|
Post by tipsymcstager on Mar 5, 2011 20:43:50 GMT -6
What material is on the pillars now? Is that leather? Cloth? it's leather, in fact it's factory manufactured! ;D guy down the street from me can order any stock color for our cars!!!!! J&J AUTO UPHOLSTERY INC 212 S.glenwood Ave columbus OH www.jandjautoupholstery.com/tell'm tipsy sent ya  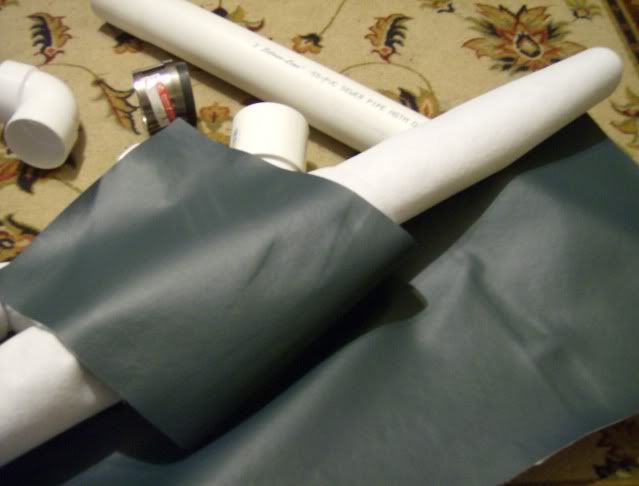
|
|
|
|
Post by tipsymcstager on Mar 5, 2011 21:06:36 GMT -6
ROTFL..............this is what i'll be useing for my cold air intake (here comes the laughter) i'll have less then 50 bucks into it ($24 for the spectre filter) sanded and painted body color, 4" tubeing! 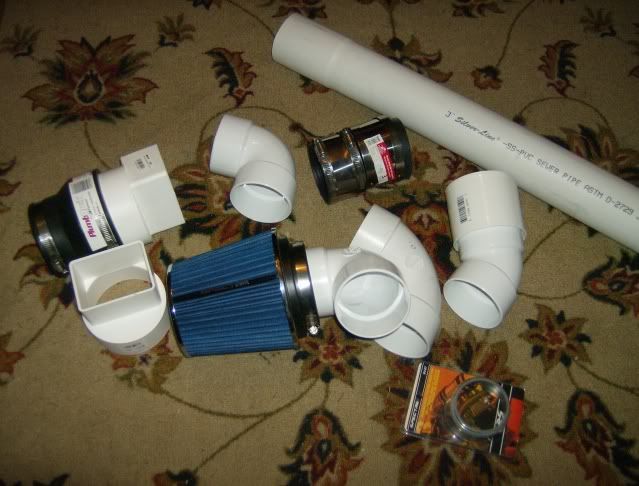 see these sleeves couples? spectre / K&N $19.99 home depo? $4.89..............LOL 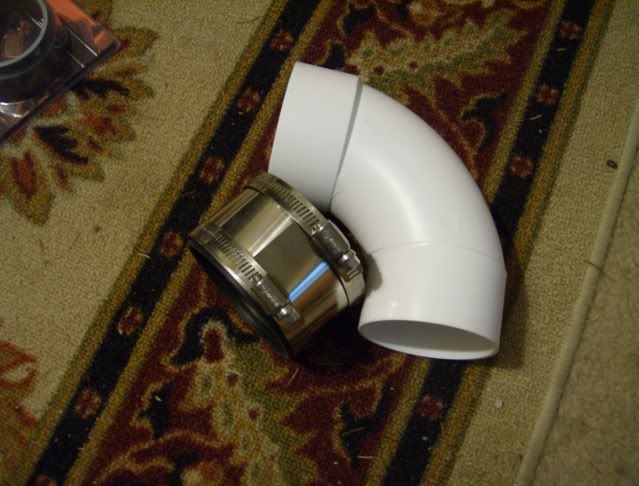 and these gutter down spouts? 4x3 1/2, these are a perfect fit to drop through the fender hole under the old air box, so the filter can sit under in front of the wheel well, with outside air channeled to that! 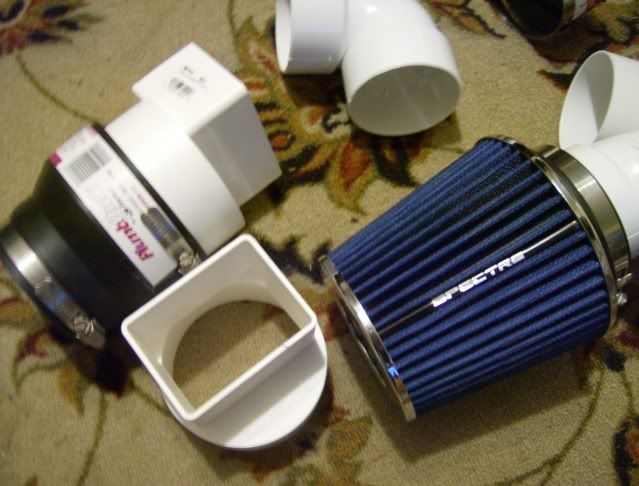 have fun laughing, i did ;D A PLUMBING WE WILL GO -moe,larry,curly |
|
|
|
Post by roara on Mar 6, 2011 1:50:11 GMT -6
Paging doctor Howard, doctor Fine, doctor Howard...nyuck nyuck nyuck.
Tipsymcplumber!
|
|
|
|
Post by nelson480 on Mar 6, 2011 1:52:54 GMT -6
hahaha
|
|
|
|
Post by tipsymcstager on Mar 6, 2011 9:55:34 GMT -6
Paging doctor Howard, doctor Fine, doctor Howard...nyuck nyuck nyuck. Tipsymcplumber! yup, i work for the automotive group "dewey cheatem and howe" LOL |
|
|
|
Post by tipsymcstager on Mar 6, 2011 14:50:21 GMT -6
|
|
|
|
Post by roara on Mar 6, 2011 14:56:57 GMT -6
Wow! You don't screw around you get right after it! ;D Looks functional to me!  ...now some paint and you're g2g. |
|
|
|
Post by roara on Mar 6, 2011 15:03:57 GMT -6
What about the air temp sensor?
|
|
|
|
Post by tipsymcstager on Mar 6, 2011 15:15:30 GMT -6
Wow! You don't screw around you get right after it! ;D Looks functional to me!  ...now some paint and you're g2g. lol, no too cold out to play anymore! still have to sand off the flashing/lettering, drill for the air temp sensor! haha, even comes with little boss's for it ;D 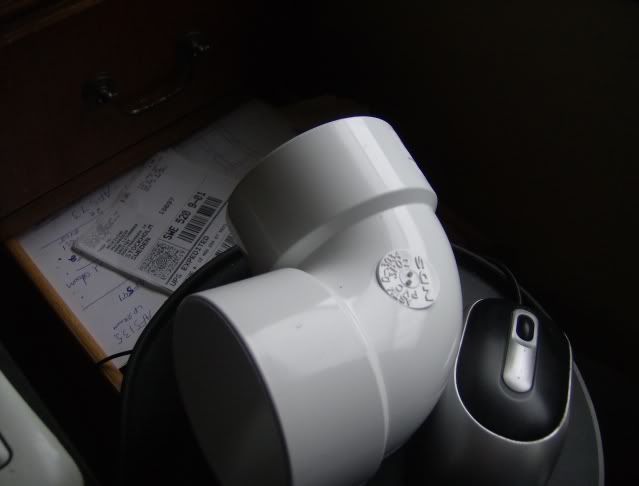 pull the wheel well cover and rig up the filter, while it's all out claen up the bay, and find some nice blue wire wrap to cover what ya can see now that big ulgy air box is gone. |
|
|
|
Post by oldsmobile99 on Mar 6, 2011 18:25:47 GMT -6
looks good !! like the intake setup too
|
|
|
|
Post by oldwino on Mar 6, 2011 18:29:45 GMT -6
Real nice job on the intake.
|
|
|
|
Post by tipsymcstager on Mar 6, 2011 21:08:11 GMT -6
thank's, just not sure were to install the flush handle......  |
|
|
|
Post by roara on Mar 6, 2011 23:14:12 GMT -6
LOL...tween the seats like an e-brake  |
|
|
|
Post by pureinsanity on Mar 7, 2011 16:38:31 GMT -6
Nice work! Pillar cover looks great. When I did mine (as you saw) I just used a metal bristle brush to get the excess foam off but left all the glue and stuff that you scraped off. Does the texture of the fine grit show through the leather? Seems like you could save youself some energy if thats's the case.
|
|
|
|
Post by tipsymcstager on Mar 7, 2011 17:44:30 GMT -6
Nice work! Pillar cover looks great. When I did mine (as you saw) I just used a metal bristle brush to get the excess foam off but left all the glue and stuff that you scraped off. Does the texture of the fine grit show through the leather? Seems like you could save youself some energy if thats's the case. no, in fact the material has a very thick backing, thats just me taking things to an extreme. (as i do, way too often) to be honest, with the glue i have. i probably could have just pulled the cloth off, sprayed it, and put the leather on and it would have been fine. |
|
|
|
Post by nelson480 on Mar 7, 2011 18:08:11 GMT -6
Nice work! Pillar cover looks great. When I did mine (as you saw) I just used a metal bristle brush to get the excess foam off but left all the glue and stuff that you scraped off. Does the texture of the fine grit show through the leather? Seems like you could save youself some energy if thats's the case. no, in fact the material has a very thick backing, thats just me taking things to an extreme. (as i do, way too often) to be honest, with the glue i have. i probably could have just pulled the cloth off, sprayed it, and put the leather on and it would have been fine. After completely stripping mine i still had issues getting mine to stick... |
|
|
|
Post by tipsymcstager on Mar 7, 2011 23:51:18 GMT -6
i finished all 6 post panels today, might get around to covering them today. way to cold to go out and mess with the CAI "plumbing" my Sequential turn/brake light module's showed up today, look's like a breeze to wire up, but i'll have to hit the boneyard first for some new sockets, then i can start cutting up one of the rear "light" bars i've got stashed, for a new mod ;D  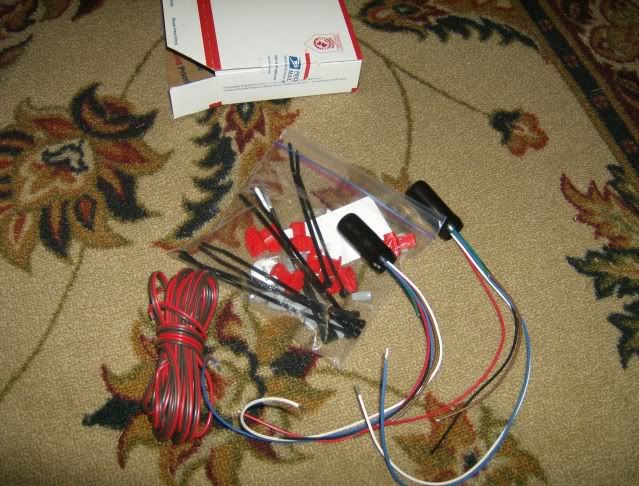 |
|
|
|
Post by tipsymcstager on Mar 8, 2011 18:26:23 GMT -6
sush a nice day today, i went out and did a final markup on the CAI, and let the rest of the world drift away  started by pulling the wheel well cover, and test fiting the air filter. the fender bracket and horn had to go! as did the square portions of both down spouts.   had to get fancy and put an L bracket on the side's to sure them up, and seal between the two (used clear aquarium sealer)  set in place  time to locate the exterior air charge hole, run ducting, and attach     made sure there was a high 90 at the top, and poked a small weep hole in both bottom 90's  tightened every thing up down there, seeing it'll be coverd no need to pretty it up any. 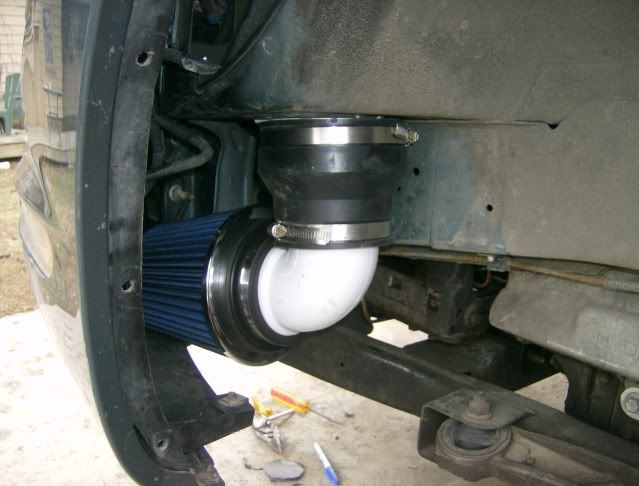 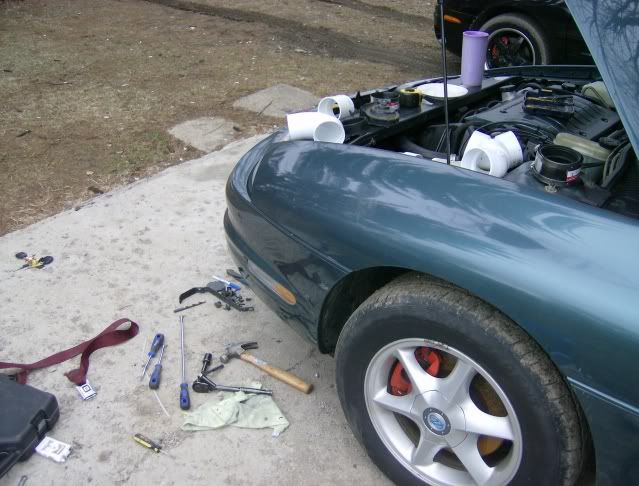  had to change the top plumbing a little, because it seemed it'll be more serviceable this way. and i had to spin the down spout 180 deg's for a better fit. 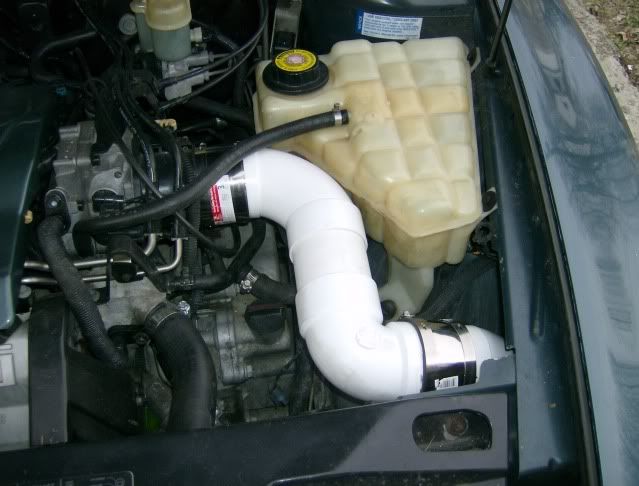 now i'll just relocate the horn/and fender bracket. a little sanding and pant the top side tubeing, drill for the ATS and it's done! |
|
|
|
Post by nelson480 on Mar 8, 2011 18:36:52 GMT -6
Looks like the 3.5 went muddin  that brake line looks a bit sad there tipster |
|