pitt
Aurora Groupie
 DIY
DIY
|
Post by pitt on Jan 20, 2010 9:23:36 GMT -6
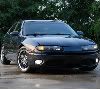
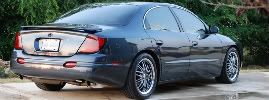
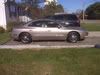
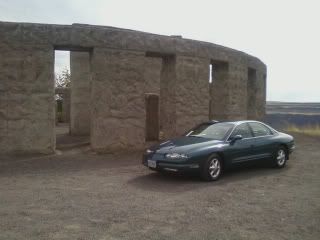
I work with a couple of guys who drive Pontiac GTO's and I really like the way the headlights look on them, so I decided to crack open the headlight assembly (which was easier than I expected), and paint all the chrome black. I know it wouldn't look right on most colors but I really like the way it turned out. I get alot of questions like "what kind of car is that?" and I always answer "It won the Car & driver award for best car ever made...its an oldsmobile aurora." Here are some pics... 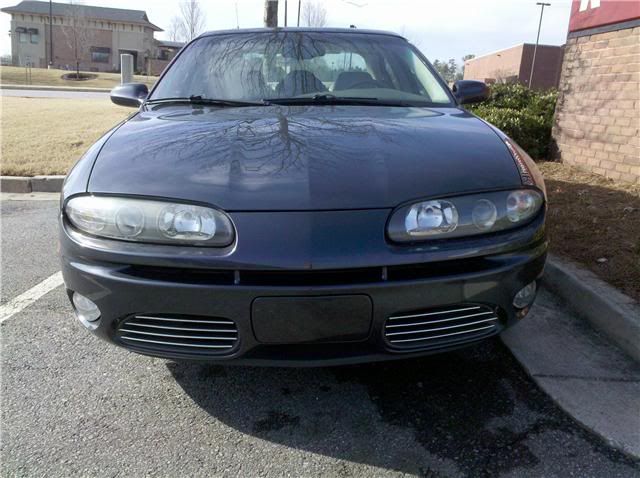 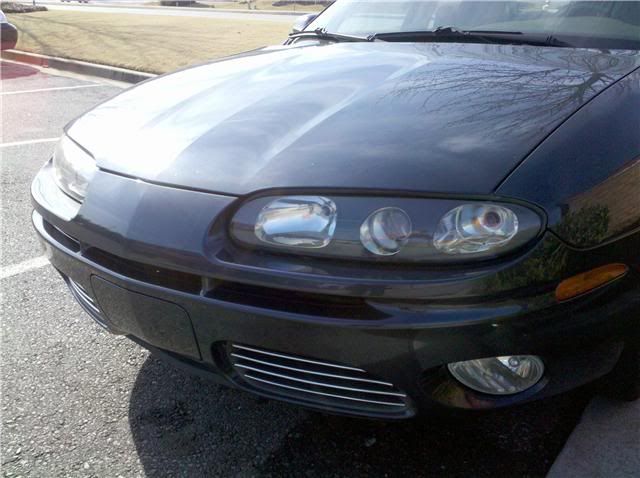 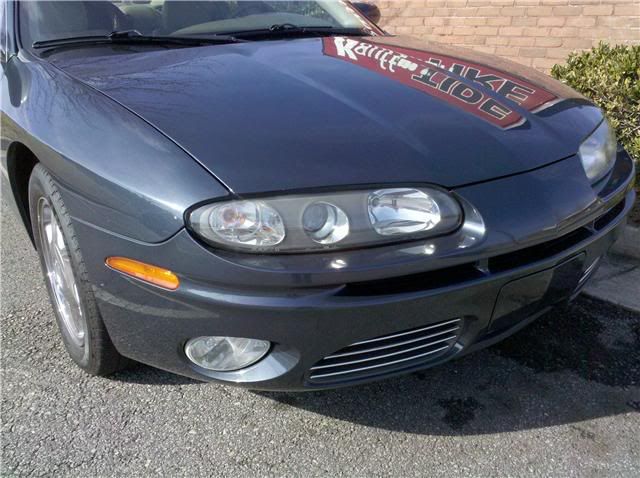 If anyone is interested in how I did it, I'll be glad to do a write up. |
|
RCA1186
Administrator  Rob
Go Pack Go!
Rob
Go Pack Go!
Posts: 4,837 
Staff Member
|
Post by RCA1186 on Jan 20, 2010 12:16:31 GMT -6
Looks cool, I don't think it would work on a classic.
I think OldsNut did the same thing to his alero if I'm not mistaken
|
|
|
|
Post by lanceslambos on Jan 20, 2010 12:39:31 GMT -6
sure your talking about the classic not the 2nd gen? ...1995 popular mechanics winner of the design & engineering award, named best luxury car by motor week 1995, named best in class by kiplingers magazine 1995... so the 2nd gen won best car ever made by car & driver ? lol
|
|
XJSman89
Administrator
Posts: 6,309
Staff Member
|
Post by XJSman89 on Jan 20, 2010 14:50:43 GMT -6
It was a joke, Lance. ;D
I like it! Oldsnut did this to his 2G also. Very sharp.
|
|
bobsblue95
Super Moderator  Scars of pleasure, scars of pain. Atmospheric changes make you sensitive again.
Posts: 3,125
Staff Member
|
Post by bobsblue95 on Jan 20, 2010 16:19:00 GMT -6
I like it! Makes me wonder if 2nd gen headlight assy would fit in a classic. They look pretty similar in shape, but only one way to find out. (I won't be finding out any time soon.)
|
|
|
|
Post by hiphophead on Jan 20, 2010 16:23:14 GMT -6
Yes that has been up for debate. There is a pair of OK condition 2g lenses on ebay now for $100. I would like to have the projectors to go along with the HIDs.
|
|
bobsblue95
Super Moderator
Scars of pleasure, scars of pain. Atmospheric changes make you sensitive again.
Posts: 3,125
Staff Member
|
Post by bobsblue95 on Jan 20, 2010 17:30:07 GMT -6
If I ever make it to the salvage yard (it's just out of my car's driving range) I'll see if I can find one for testing. Maybe I can get a broken one for free or cheap.
|
|
bobsblue95
Super Moderator
Scars of pleasure, scars of pain. Atmospheric changes make you sensitive again.
Posts: 3,125
Staff Member
|
Post by bobsblue95 on Jan 20, 2010 17:48:38 GMT -6
There is a pair of OK condition 2g lenses on ebay... Got a link? I can't seem to find them, just lots of classics and "hid" bulbs. Trying to compare pictures to look for obvious differences. |
|
|
|
Post by oldsmobile99 on Jan 20, 2010 18:10:00 GMT -6
looks good!!
|
|
|
|
Post by robaurora01 on Jan 20, 2010 18:13:53 GMT -6
looks good, not sure if I would do it however
|
|
|
|
Post by hiphophead on Jan 20, 2010 19:08:40 GMT -6
|
|
|
|
Post by vinnyk88 on Jan 20, 2010 22:12:05 GMT -6
I like the way it looks, nice. What type of paint do you use on that?
|
|
bobsblue95
Super Moderator
Scars of pleasure, scars of pain. Atmospheric changes make you sensitive again.
Posts: 3,125
Staff Member
|
Post by bobsblue95 on Jan 21, 2010 16:40:14 GMT -6
Some cars it might look better color matched instead of black. Ah well.. not going to bid anyway, just wanted to see the pics of the mounting. Unforch there's no good pic of the whole assembly from behind, just a few close-ups that don't help. How hard is it to remove the assembly anyway? |
|
|
|
Post by oldwino on Jan 21, 2010 17:01:18 GMT -6
On a 2gen, remove the 2 bolts and the headlight assembly slides forward and it's out.
|
|
pitt
Aurora Groupie
DIY
|
Post by pitt on Jan 21, 2010 19:38:39 GMT -6
I like the way it looks, nice. What type of paint do you use on that? I had some flat black wheel paint left over from a previous project when I painted my brother's wheels on his truck, I figured it might hold up better and not fade as fast as regular paint would. |
|
RCA1186
Administrator
Rob
Go Pack Go!
Posts: 4,837
Staff Member
|
Post by RCA1186 on Jan 21, 2010 19:46:12 GMT -6
I would LOVE the 2nd Gen. headlights on my classic. They are the ONLY thing that I like on the 2nd Gen better.
|
|
|
|
Post by CaseAce on Jan 24, 2010 18:31:39 GMT -6
I think I like it, I think it would also look good color matched to the car. Clear turn signals are nice too
|
|
mattliston
Aurora Newbie
Cars and computers are my hobbies
|
Post by mattliston on Jan 26, 2010 14:44:29 GMT -6
pitt, could you post a write up concerning removing the headlights and taking them apart? my buddy wants to remove the amber lense and is thinking about following your paint scheme as well.
Thanks
-Matt
|
|
pitt
Aurora Groupie
DIY
|
Post by pitt on Jan 26, 2010 20:26:20 GMT -6
Step One: Remove Headlight Assembly from vehicle.
Step two: Remove Rubber Weatherstripping seal that surrounds the edges of the headlamp.
Step Three: There are six metal "c" clips that must be popped off with a small flat blade screw driver. These clips help hold the lens tightly against the housing, there are three on top and three on the bottom.
Step Four: This could be done before step one actually...Set your oven to its lowest setting like 120-150 degrees or close as possible. Once its preheated put the headlamp inside for about 8 minutes...you basically just want to get it hot like it would be on a hot summer day so that the glue will loosen up around the lens enough so you can pry it away from the housing.
Step Five: Once the lens assembly is hot enough, gently pry little bit by little bit (baby it) all the way around the housing. If it seems difficult, put it back in the oven for a couple more minutes between tries so the glue will stay melted. Once you get it loose gently pry it away from the housing by hand careful not to break it.
Step six: Use a small flat blade screw driver and pry the amber lens cover away and remove it.
Step Seven: Tape off and paint it to the color of your choice.
Step eight: When finished drying, put the housing in the oven for another few minutes and get it hot then remove it and press the lens back onto the housing, put "c" clips back around lens to hold it in place against the housing, re-install the rubber gasket around the headlamp. You're finished, now reinstall in the car.
|
|
mattliston
Aurora Newbie
Cars and computers are my hobbies
|
Post by mattliston on Jan 28, 2010 16:16:32 GMT -6
Thank you!
|
|
|
|
Post by hiphophead on Jan 28, 2010 17:21:48 GMT -6
Ah, just remember those assemblies are not cheap! Be careful!
|
|
|
|
Post by roara on Jan 30, 2010 15:07:33 GMT -6
Looks good pitt!
|
|
 Forum")