Forum")


Post by XJSman89 on Mar 19, 2009 17:42:14 GMT -6
***This how-to is for all 96-99 Classics. 95 Auroras don't have DRLs.***
Upon installing the new HID lights in my 96' I noticed that they flickered on and off during the day due to the reduced voltage from the DRLs, thus the need to disable them. It's a pretty simple process, it took me 20 minutes from start to finish and I took longer b/c I was being extra careful. Here's how I did it:
Step 1: Detatch the rubber intake tube from the airbox. All you need is a screwdriver. Loosen the hose clamp and it should pop right off. It isn't necessary to completely remove it, only detach it. You can remove it if you wish, it will make it easier to get the airbox out if its removed. It will be easier to remove the tube with the top of the airbox gone. (I didn't remove mine.)
Step 2: Remove the top of the airbox. (I had an aftermarket inverted filter at the time so mine was done differently.) Just press the plastic tabs on the sides to remove the top of the airbox from the bottom.
You'll need to unplug the air temp sensor as well. Gently pull the little plastic tab on the side of the sensor out away from the airbox and you can slide the connector off. You can let it hang, it won't hurt anything. It isn't necessary to take the entire sensor out of the top of the airbox as long as you disconnect it, but you may do so if you don't want to remove the connector... just turn it (counterclockwise I think?) and pull it straight out.
Be sure to remove the filter and the little extra plastic box (it's actually a resonator for the intake) too. Note that it has channels on the side that one of the radiator tubes fit in, be sure to put it back in these channel upon reinstallation. It isn't held in or anything, just lift the tube right out of the channel.
(Step 2b: Detatch and remove the rubber intake tube from the engine if you wish. Again, it isn't necessary to do so.)
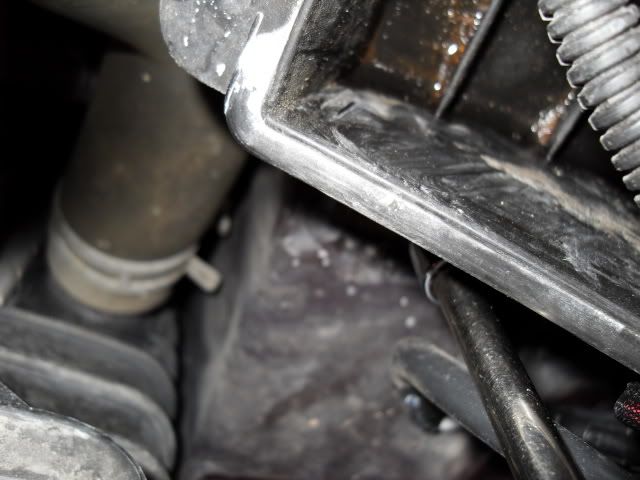
Step 3: Detach and remove the bottom of the airbox from the frame. Mine was only held on by two bolts that thread into holes in the frame itself. One took either a 5/16 or 7/16 socket- I'm not positive which one it is. The other took a 10mm socket (3/8 would probably work, I didn't have one at the time.) It's easy for these to fall down into the bay and get lost, especially the smaller bolt. Be careful when removing them so that you don't accidentally drop one.
The larger bolt is the one closest to the coolant tank:
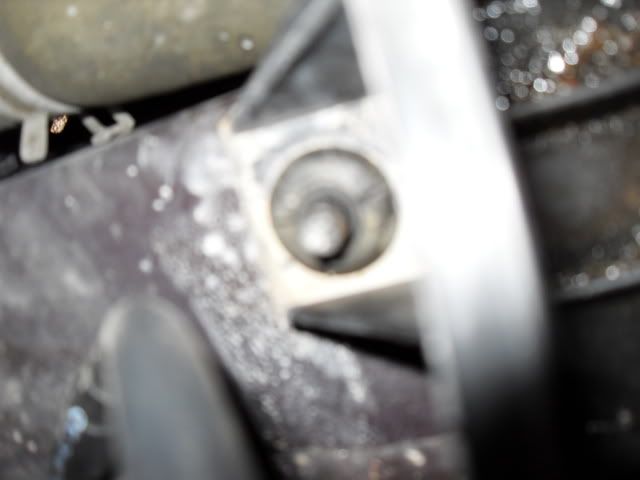
The smaller bolt is at the same place on the other side of the airbox (you can see where the socket extension is going in the first pic, not the actual bolt):
Step 4: Muscle the bottom of the airbox out of the engine bay. This took some phenagling to get out, just be patient and be careful how you do it. It is necessary to remove the small duct attached to the inner part of the airbox before you remove bottom completely. It pops right out, it's not bolted together or anything. Detatch it from the bottom of the airbox, but leave it in the bay for now. You will remove it next.
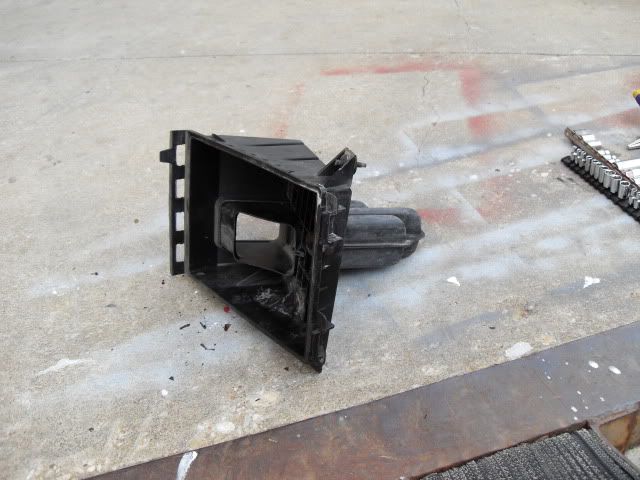
This is what the bottom part of the airbox looks like when its assembled:
...And here it is with the ducting piece detached.
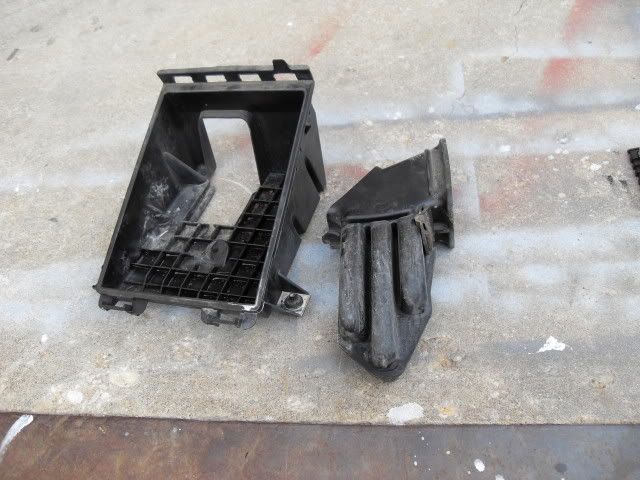
Step 5: Remove the ducting piece from the engine bay. It extends down into the bay a little bit so you have to play with it to get it to come out as well. Note that the larger opening faces toward the fender, and the smaller opening feeds into the airbox.
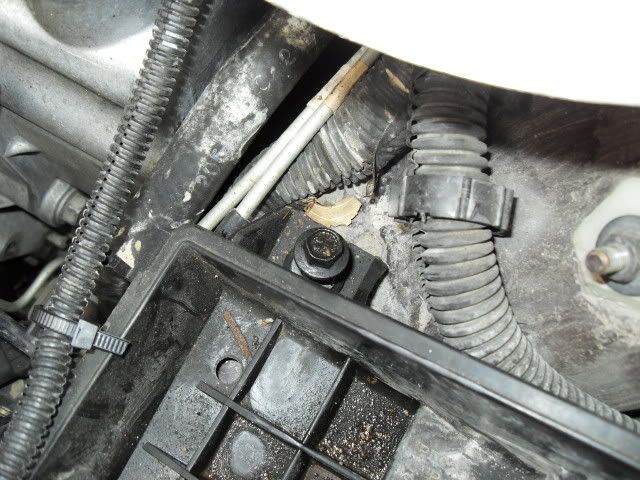
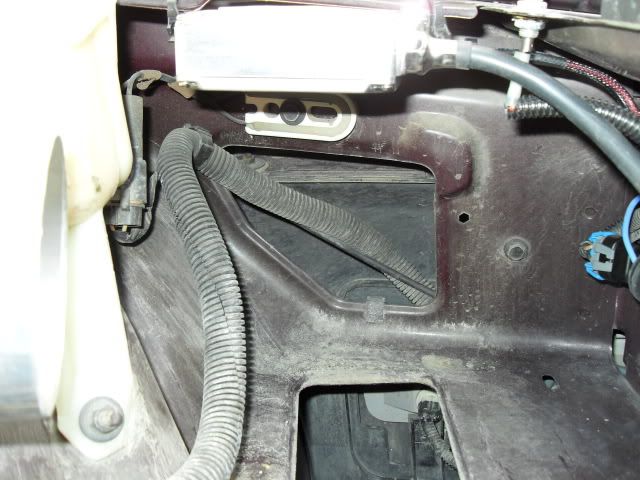
Step 6: Locate the DRL resistor. It's hard to miss it, it's a big white U-shaped magnet mounted on the outside wall of the engine bay right behind the back of the airbox.
You can see it towards the top middle of the picture here. Ignore the aluminum box attached to the upper part of the fender, that's the HID ballast for my driver's side headlight.
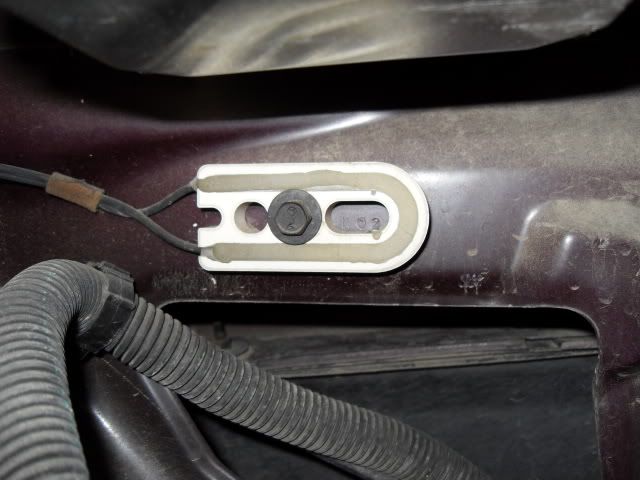
Close up:
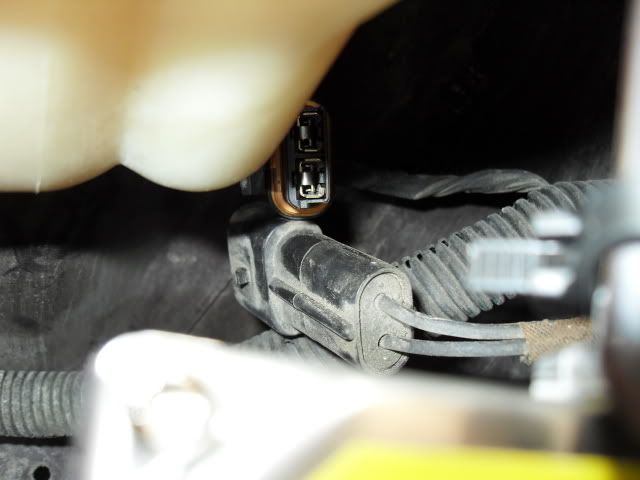
Step 7: Unplug the connection between your Aurora and the DRL resistor. The connectors are attached to the resistor, obviously. It's a few inches along the wire that comes from the resistor itself. Unplug it and bingo, no more DRLs!
A picture of it unplugged:
Step 8: Check to make sure your DRLs don't work anymore. Detaching the resistor's connector worked for me, but it's always good to make sure it's functioning how you want it to before you put everything back together. Just leave the resistor where it is so that you don't lose it. If you ever want to enable your DRLs just plug that baby back in.
Step 9: Seal off the connectors so that water doesn't get in them. Make sure both ends of the connector are clean and then seal them somehow, I just used duct tape.
Step 10: Reinstall the airbox assembly in reverse order:
Congratulations, you just disabled your Daytime Running Lights! Your headlights will still function like usual, they just won't come on at a reduced brightness during the day anymore. I wish I could've kept mine but the HID flicker needed to go away. If anyone has further questions just shoot me a PM!
Upon installing the new HID lights in my 96' I noticed that they flickered on and off during the day due to the reduced voltage from the DRLs, thus the need to disable them. It's a pretty simple process, it took me 20 minutes from start to finish and I took longer b/c I was being extra careful. Here's how I did it:
Step 1: Detatch the rubber intake tube from the airbox. All you need is a screwdriver. Loosen the hose clamp and it should pop right off. It isn't necessary to completely remove it, only detach it. You can remove it if you wish, it will make it easier to get the airbox out if its removed. It will be easier to remove the tube with the top of the airbox gone. (I didn't remove mine.)
Step 2: Remove the top of the airbox. (I had an aftermarket inverted filter at the time so mine was done differently.) Just press the plastic tabs on the sides to remove the top of the airbox from the bottom.
You'll need to unplug the air temp sensor as well. Gently pull the little plastic tab on the side of the sensor out away from the airbox and you can slide the connector off. You can let it hang, it won't hurt anything. It isn't necessary to take the entire sensor out of the top of the airbox as long as you disconnect it, but you may do so if you don't want to remove the connector... just turn it (counterclockwise I think?) and pull it straight out.
Be sure to remove the filter and the little extra plastic box (it's actually a resonator for the intake) too. Note that it has channels on the side that one of the radiator tubes fit in, be sure to put it back in these channel upon reinstallation. It isn't held in or anything, just lift the tube right out of the channel.
(Step 2b: Detatch and remove the rubber intake tube from the engine if you wish. Again, it isn't necessary to do so.)
Step 3: Detach and remove the bottom of the airbox from the frame. Mine was only held on by two bolts that thread into holes in the frame itself. One took either a 5/16 or 7/16 socket- I'm not positive which one it is. The other took a 10mm socket (3/8 would probably work, I didn't have one at the time.) It's easy for these to fall down into the bay and get lost, especially the smaller bolt. Be careful when removing them so that you don't accidentally drop one.
The larger bolt is the one closest to the coolant tank:
The smaller bolt is at the same place on the other side of the airbox (you can see where the socket extension is going in the first pic, not the actual bolt):
Step 4: Muscle the bottom of the airbox out of the engine bay. This took some phenagling to get out, just be patient and be careful how you do it. It is necessary to remove the small duct attached to the inner part of the airbox before you remove bottom completely. It pops right out, it's not bolted together or anything. Detatch it from the bottom of the airbox, but leave it in the bay for now. You will remove it next.
This is what the bottom part of the airbox looks like when its assembled:
...And here it is with the ducting piece detached.
Step 5: Remove the ducting piece from the engine bay. It extends down into the bay a little bit so you have to play with it to get it to come out as well. Note that the larger opening faces toward the fender, and the smaller opening feeds into the airbox.
Step 6: Locate the DRL resistor. It's hard to miss it, it's a big white U-shaped magnet mounted on the outside wall of the engine bay right behind the back of the airbox.
You can see it towards the top middle of the picture here. Ignore the aluminum box attached to the upper part of the fender, that's the HID ballast for my driver's side headlight.
Close up:
Step 7: Unplug the connection between your Aurora and the DRL resistor. The connectors are attached to the resistor, obviously. It's a few inches along the wire that comes from the resistor itself. Unplug it and bingo, no more DRLs!
A picture of it unplugged:
Step 8: Check to make sure your DRLs don't work anymore. Detaching the resistor's connector worked for me, but it's always good to make sure it's functioning how you want it to before you put everything back together. Just leave the resistor where it is so that you don't lose it. If you ever want to enable your DRLs just plug that baby back in.
Step 9: Seal off the connectors so that water doesn't get in them. Make sure both ends of the connector are clean and then seal them somehow, I just used duct tape.
Step 10: Reinstall the airbox assembly in reverse order:
- Ducting piece, larger opening toward the fender.
- Bottom part of airbox, bolt down to the frame.
- Filter. Make sure its seated properly in the bottom of the airbox. The little fins face downward.
- Reattach rubber intake tube to engine. (If applicable, not necessary if you didn't remove this tube.)
- Reattach the top part of the airbox. Be sure to get all four corners down. Pull up on it gently after you get it put back on just to be sure.
- Reattach the resonator and place the radiator tubes into the channel on the side.
- Either plug your temp sensor back in or reinstall it in the top of the airbox. It depends on whether or not you just unplugged it or removed it completely.
- Reattach rubber intake tube to the top of the airbox.
Congratulations, you just disabled your Daytime Running Lights! Your headlights will still function like usual, they just won't come on at a reduced brightness during the day anymore. I wish I could've kept mine but the HID flicker needed to go away. If anyone has further questions just shoot me a PM!


 1999 Oldsmobile Aurora Autobahn