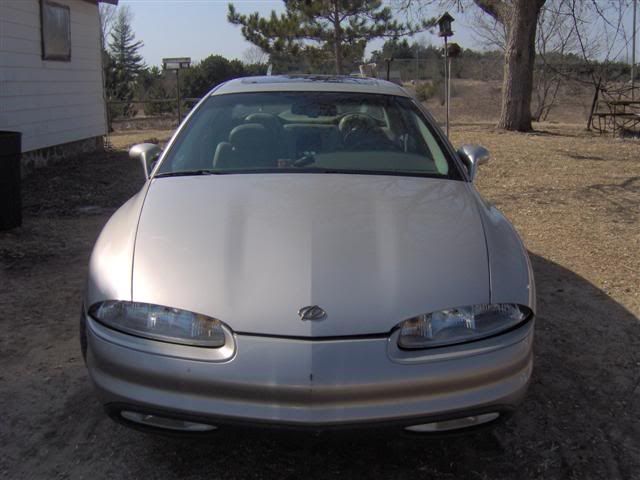
Post by Speed Neon on Apr 26, 2009 18:29:54 GMT -6
the 4t80e is a rather robust and dependable transmission. but they have a few leakage issues that are quite problematic. today i will attempt to encourage the timid and or low on cash, and inform the bold and daring on the replacement of the problematic driver side cv axle shaft seal.
alot of classics i see have the telltale dots of oil on their rear bumpers. this is were the trans fluid actual runs along the underside of the car and is sucked by airflow from under the car and onto the rear bumper. normal oil seepage will not result in this condition. only a leaking trans seal will cause this.
you will be surprised how many classics have lost transmissions to this $3.84 part failure.
the TELL TALE SIGNS:
you notice oil spots on your rear bumper
you park your classic and come back to find a trail of tranny fluid
you turn your wheel all the way to the left, put the car in reverse, set the parking brake, and see a nice trickle of tranny fluid coming from the cv axle.
THE CAUSE:
overtime the driver side output shaft bearing can develop a more than optimal amount of play. up and down, not in and out. this leads to excessive wear on the cv axle seal. which in time, a year or so depending on how you drive and how much you drive, will lead to the failure of the cv axle shaft seal.
now this does not mean your transmission is junk, or is prone to failure. my classic has required this seal every 10k for the past year, not really a big deal in the world of classic ownership. 10k is once a year for most people, and the seal is less than 4 buxs so i don't wanna hear any crying over have to replace it once a year. and once you have done it once, you will be able to do it in about 30-40 minutes. i can do mine in the parking lot of my apartment building complex in about 20 minutes. but i did this for a living also, so i may have a slight advantage on this one.
now when you see the tell tale spots on you rear bumper you have, from my experi, another 2k miles before the leak gets noticeable and starts to leave puddles were ever you park your classic for any amount of time. so when you see the bumper spots go and order your seal, than replace it at your earliest convenience.
also you can skip replacing this seal all together and keep a gallon of tranny fluid in your trunk. you will need a gallon every week or less if you chose this route. and tranny fluid is 10 buxs a gallon in my neck of the woods so i dont recommend doing this for long or you will kill your wallet, not your tranny. well you can kill your tranny from lack of fluid but your wallet will give out first i wager.
now that all the info is out the way lets replace that seal so you can park in your driveway and not be embarrassed. people may act like they dont know its your car leaking like a sith, but trust me they talk about you and your car like a sexual offender when your not around.
THE TOOLS:
may i add that a nice breaker bar and 19mm 1/2 drive socket setup is definitely useful to get the lug nuts off. even nicer is the Ingersoll titanium 1/2 impact gun. sweeeeeeeeeeeeeeeeeeeeet.
THE DIRTY WORK:
WARNING ABOUT REPLACEMENT CV AXLES!!!!!!!!!!!!!!!!!!!!!!!
WITH THE CURRENT LOSS OF SKILLED LABOR I HAVE SEEN A COMMON PROBLEM WITH REPLACEMENT AXLES.
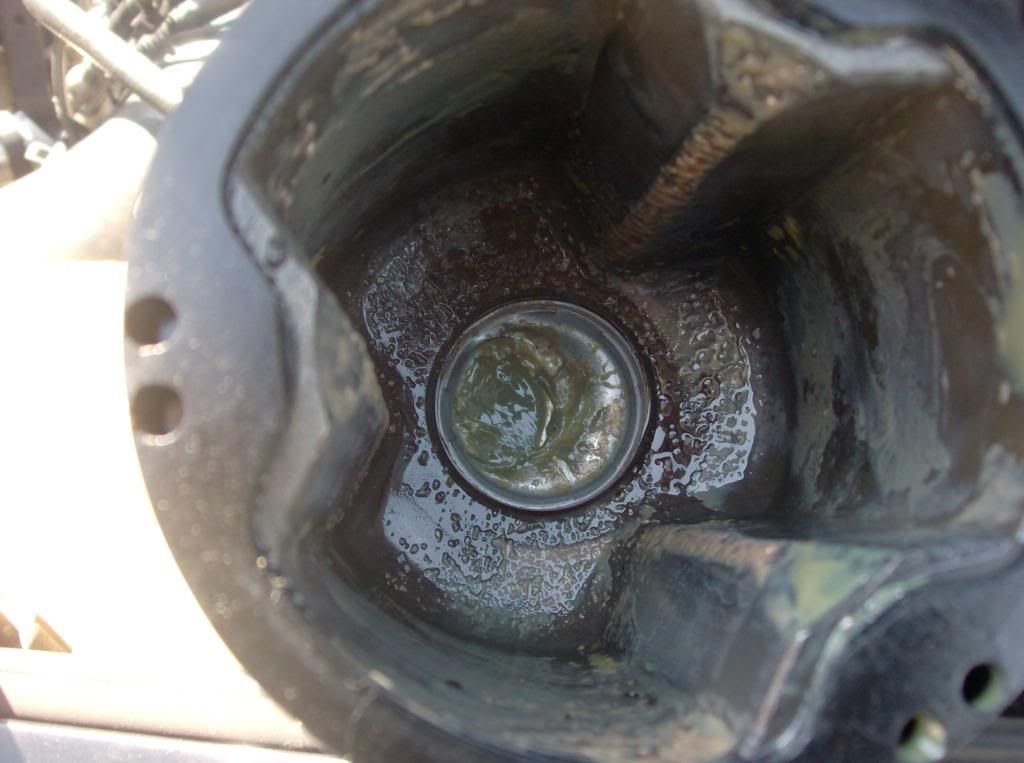
i had this axle three days before i noticed trans fluid leaking from the rubber boot of the cv axle.
as you can see the atf has completely washed away the grease from the inner tripod joint.
you also notice the pressed fit plug at the bottom of the joint is deformed. this allowed the ATF to flow down the splines of the output shaft, and into the tripod. i reinstalled just the tripod to confirm this.
BEFORE YOU INSTALL A REPLACEMENT CV AXLE check to make sure that the plug is not deformed or improperly installed. you can see the plug from the exposed, female end of the axle to confirm this. this failure can cost you a trans in short order. i lost a gallon of fluid in 20 miles once i realized the issue.
alot of classics i see have the telltale dots of oil on their rear bumpers. this is were the trans fluid actual runs along the underside of the car and is sucked by airflow from under the car and onto the rear bumper. normal oil seepage will not result in this condition. only a leaking trans seal will cause this.
you will be surprised how many classics have lost transmissions to this $3.84 part failure.
the TELL TALE SIGNS:
you notice oil spots on your rear bumper
you park your classic and come back to find a trail of tranny fluid
you turn your wheel all the way to the left, put the car in reverse, set the parking brake, and see a nice trickle of tranny fluid coming from the cv axle.
THE CAUSE:
overtime the driver side output shaft bearing can develop a more than optimal amount of play. up and down, not in and out. this leads to excessive wear on the cv axle seal. which in time, a year or so depending on how you drive and how much you drive, will lead to the failure of the cv axle shaft seal.
now this does not mean your transmission is junk, or is prone to failure. my classic has required this seal every 10k for the past year, not really a big deal in the world of classic ownership. 10k is once a year for most people, and the seal is less than 4 buxs so i don't wanna hear any crying over have to replace it once a year. and once you have done it once, you will be able to do it in about 30-40 minutes. i can do mine in the parking lot of my apartment building complex in about 20 minutes. but i did this for a living also, so i may have a slight advantage on this one.
now when you see the tell tale spots on you rear bumper you have, from my experi, another 2k miles before the leak gets noticeable and starts to leave puddles were ever you park your classic for any amount of time. so when you see the bumper spots go and order your seal, than replace it at your earliest convenience.
also you can skip replacing this seal all together and keep a gallon of tranny fluid in your trunk. you will need a gallon every week or less if you chose this route. and tranny fluid is 10 buxs a gallon in my neck of the woods so i dont recommend doing this for long or you will kill your wallet, not your tranny. well you can kill your tranny from lack of fluid but your wallet will give out first i wager.
now that all the info is out the way lets replace that seal so you can park in your driveway and not be embarrassed. people may act like they dont know its your car leaking like a sith, but trust me they talk about you and your car like a sexual offender when your not around.
THE TOOLS:
- a nice automotive, ball peen hammer.
- metric wrenches sizes 13mm,14mm,18mm,19mm
- a chisel, now dont get afraid because i said chisel
- a large flat head screwdriver
- a small flat head screwdriver
- a automotive jack, the trunk jack is not recommended without use of at least one jack stand. it is not meant for any automotive service duties and can give out at anytime. usually when your body parts are under the car. not a good thing.
- your new cv axle shaft seal of course
- a clean, or clean enough rag. doesn't have to be sparkling clean.
- for the old fashioned guys............. a pickle fork. ahem a ball joint separator.
may i add that a nice breaker bar and 19mm 1/2 drive socket setup is definitely useful to get the lug nuts off. even nicer is the Ingersoll titanium 1/2 impact gun. sweeeeeeeeeeeeeeeeeeeeet.
THE DIRTY WORK:
- lets start by placing our beloved classic on a flat working surface. set the parking brake, and proceed to jack the front driver side corner until the drivers front wheel just clears the ground. i prefer to jack on the sub frame near the driver side rear sub frame mount. its sturdy and yet out of the way.
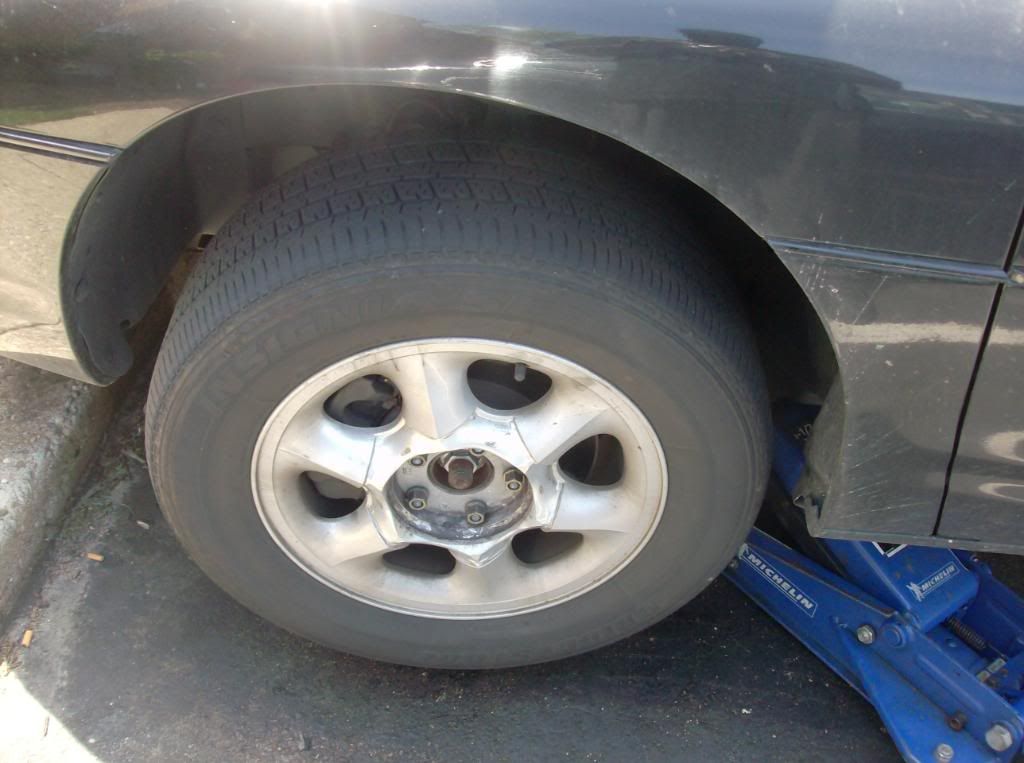
once you have the wheel off the ground pop the lug nut cover and remove the lug nuts. the wheel will not turn so dont worry about that. set the wheel aside and lets dive in. - so with the wheel off we can take a pause to admire the hard working suspension components that support our v8 powered chariots everyday........
remove the cotter pin in the outer tie-rod thru hole and than take your trusty 18mm and remove the castle nut. only remove the castle nut until the nut is even with the end of the threaded portion of the outer tie-rod. give it a good couple of upward smacks with your hammer and the outer tie-rod should be jarred free from the knuckle. than continue to remove the castle nut. - now turn the entire steering knuckle assembly towards the passenger side of the car. unhook the abs wiring and hang aside. remove the cotter pin from the lower ball joint thru hole, and than remove the castle nut. only remove the castle nut until it is even with the end of the threaded portion of the ball joint.
take your trusty chisel and insert it between the cv axle housing and the lower ball joint castle nut. give it a couple and good whacks and watch the ball joint be jarred free of the steering knuckle. sweet huh. we will use this again in this procedure. - remove the swaybar end link. now pivot the lower control arm down to provide clearance to remove the castle nut from the lower ball joint. continue to push the lower control arm down until the threaded rod of the lower ball joint clears th hole in the steering knuckle. push the entire strut steering brake assembly towards the front of the car. and allow the control arm to come back into its rest position.
- now lets take a look at what we have to deal with.

how do we get that cv axle out of the trans?
DO NOT ATTEMPT TO PULL THE AXLE OUT OF THE TRANS BY PULLING ON THE INTERMEDIATE ROD. YOU WILL RUIN THE TRIPOD JOINT. WELL NOT RUIN IT BUT YOU WILL HAVE ANOTHER PROJECT ON YOUR HANDS.
okay now there is enough space between the transmission and the sub frame rail to slide your trusty chisel between the transmission housing and the axle housing. give it a few gentle smacks with your trusty hammer and watch the cv axle pop free on the transmission. sweet, no fuss no cuss. - pivot the cv axle and knuckle assembly like so that the inner housing is facing the rear of the car. it wont hurt the car at all. an you need the space to get the axle seal out.
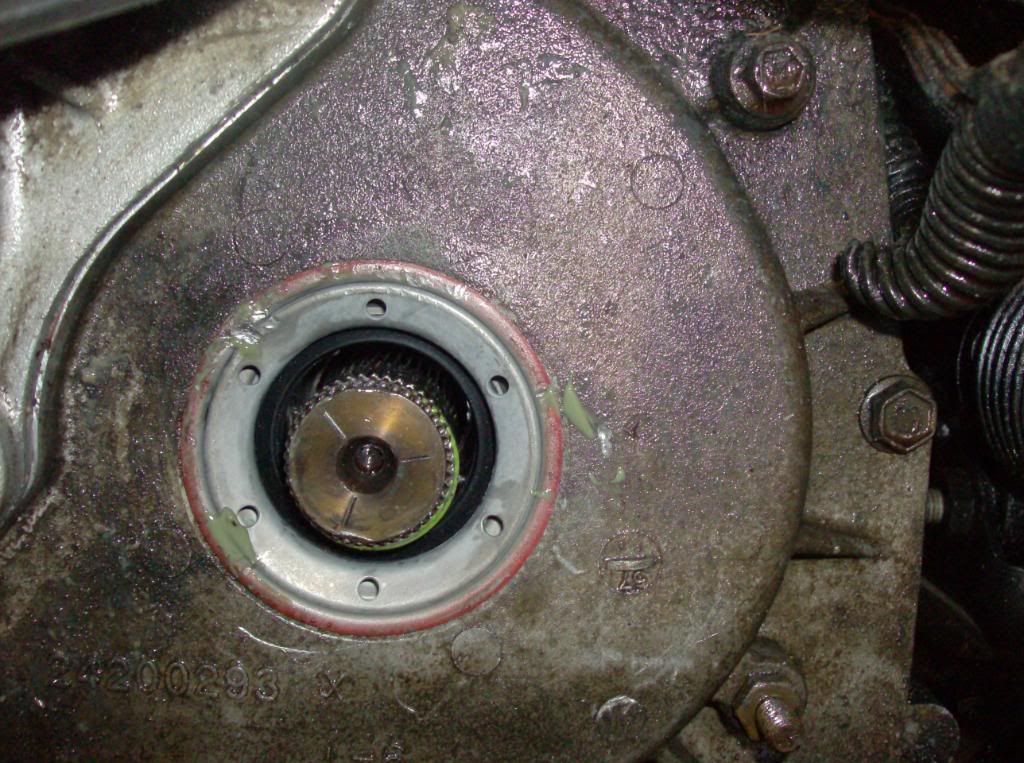
now this seal is a pressed fit. the center will pop out easily leaving the pressed fit outer portion. so go ahead now and pop the center part of the seal out using you small flat head screwdriver. use the output shaft for leverage, an make sure you cover the splines with a rag to avoid damaging them, they are quite softer than you would expect and the cv axle to spline fit is quite tight. an damage and the cv axle will refuse to go back over the output shaft.
with the center portion removed take your large flathead screwdriver and again using the output shaft for leverage pry it out of the transmission housing being careful not to gouge the transmission housing. you will destroy the seal removing it so dont feel bad if yours is beat all to hell and back. just try to make sure you keep the outer ring intact as you will need to use it to help reinstall the new seal.
- with the seal out make sure the transmission housing is undamaged and clean the seal bore with your rag.
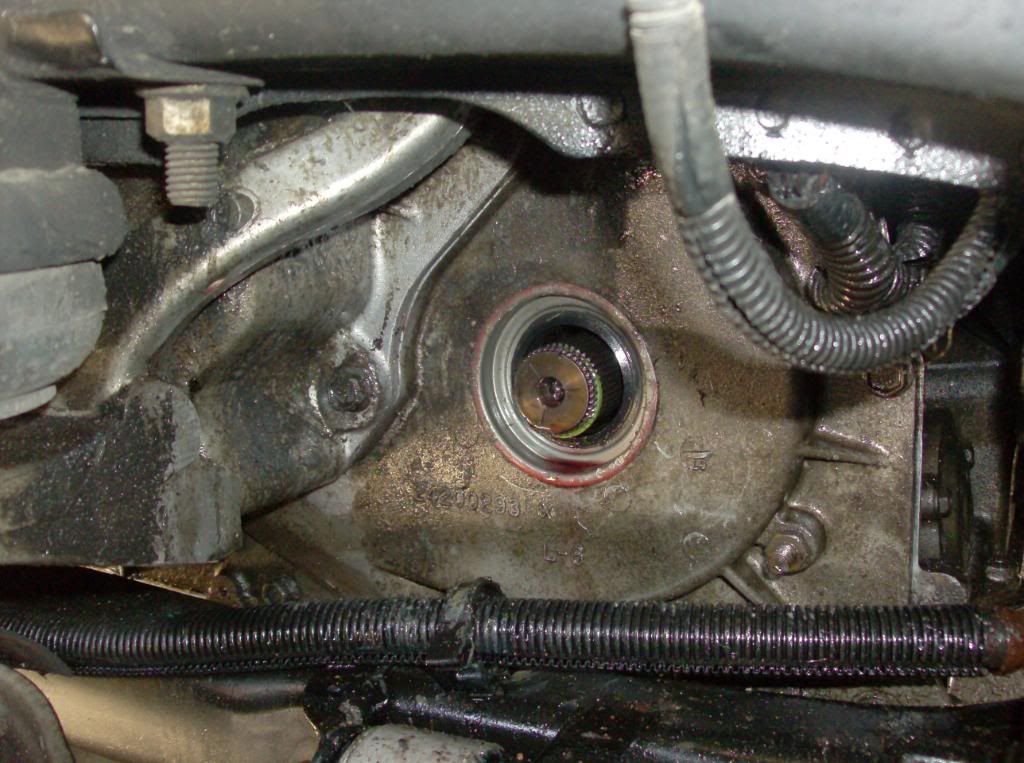
its time to install the new seal. but you need to read carefully.
GM has a special tool for installing this seals. likewise you can use a 2 1/2 inch socket to drive it in. or ( cue dramatic music) you can use the speedneon 5 bux aurora cv axle seal installer.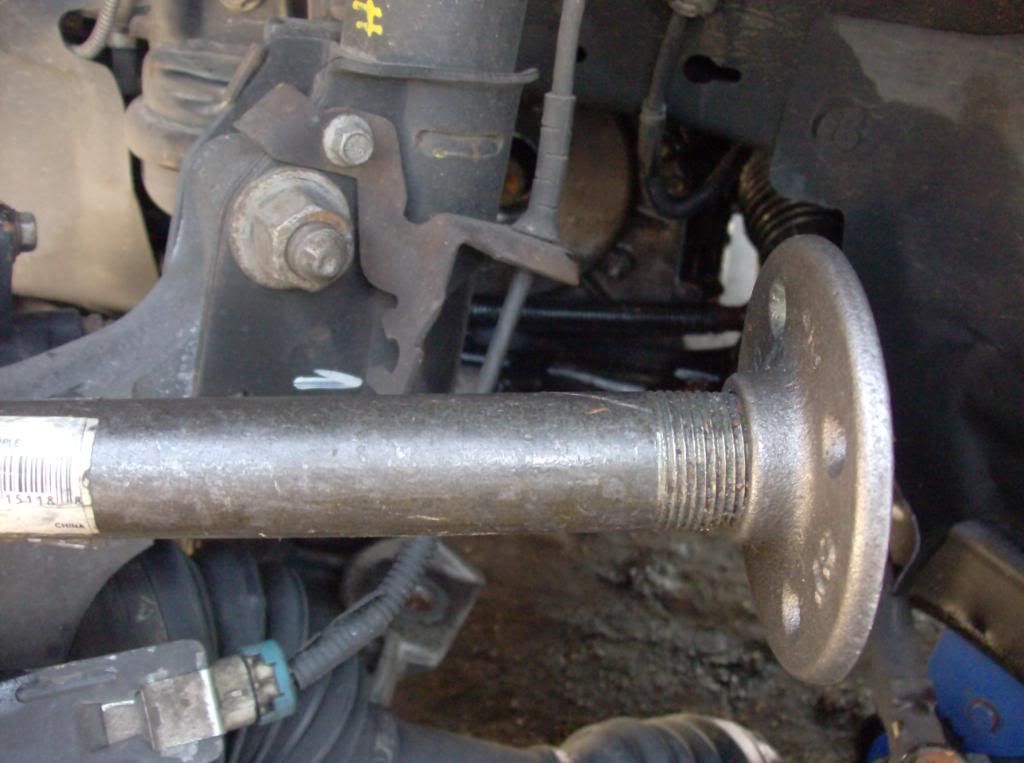
thats right aurora patrons, with a trip down to your local hardware store you can purchase a foot long pipe of 1/2 OD pipe and matching flange to assemble your own seal installer.
i got this idea after realizing that most aurora DIY'ers wouldn't have the proper tool to install the seal.
now if your using your own seal installer, i wont tell you how to use it. but if your using my hardware store special will shoe you how to use it. - first say to yourself this will never work, its what i thought when i came up with it. now take the outer ring from the old seal and stack it like so with the new seal.
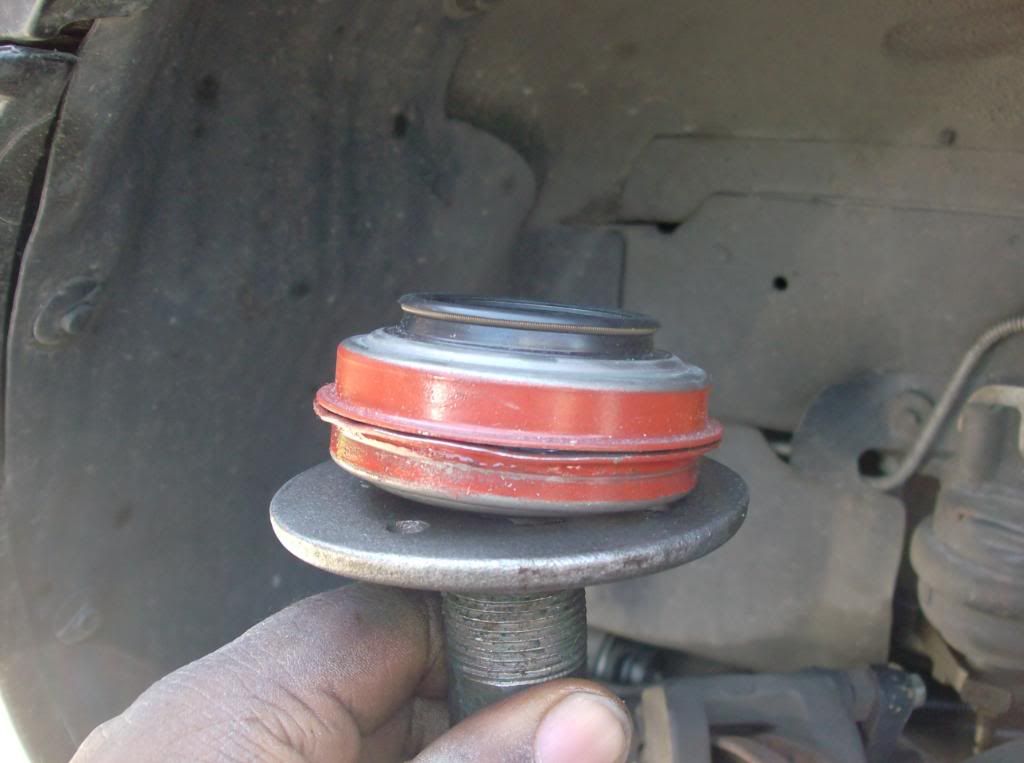
than maneuver the whole assembly into the bore on the transmission. give it a couple good smacks on the end with your hammer and bingo.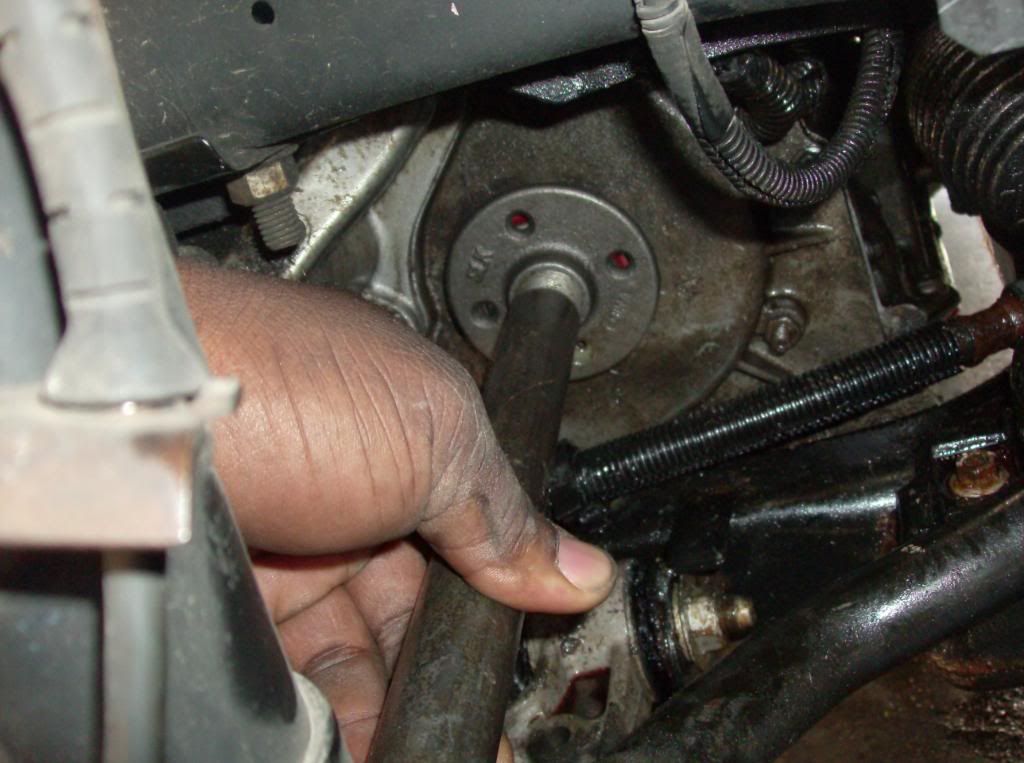
the finished product:
yessir you have just installed the cv axle seal. - now not all seals fail due to bearing wear. some fail due to excessive wear on the sealing surface of the inner cv axle tripod.
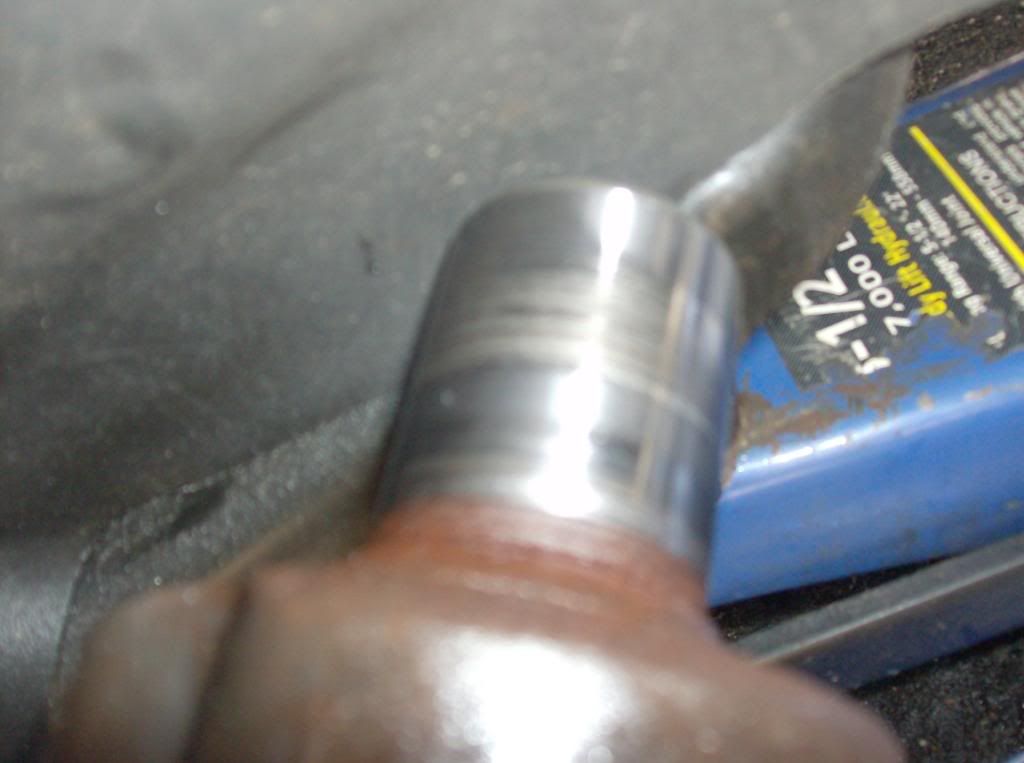
now the dark marks do not mean bad cv axle tripod surface. those are normal marks from the rubber of the seal. now if you have deep gouges or ridges or the outer tripod seal surface you will need to completely replace the cv axle. but i have a warning on replacement axles also. - reassembly is the opposite of disassembly. but sure to coat the inner joints seal surface with clean ATF before sliding it into the new/dry axle seal. tighten all bolts securely and be sure to replace the cotter pins with new ones on the ball joint and outer tie-rod castle nuts.
WARNING ABOUT REPLACEMENT CV AXLES!!!!!!!!!!!!!!!!!!!!!!!
WITH THE CURRENT LOSS OF SKILLED LABOR I HAVE SEEN A COMMON PROBLEM WITH REPLACEMENT AXLES.

i had this axle three days before i noticed trans fluid leaking from the rubber boot of the cv axle.
as you can see the atf has completely washed away the grease from the inner tripod joint.
you also notice the pressed fit plug at the bottom of the joint is deformed. this allowed the ATF to flow down the splines of the output shaft, and into the tripod. i reinstalled just the tripod to confirm this.
BEFORE YOU INSTALL A REPLACEMENT CV AXLE check to make sure that the plug is not deformed or improperly installed. you can see the plug from the exposed, female end of the axle to confirm this. this failure can cost you a trans in short order. i lost a gallon of fluid in 20 miles once i realized the issue.


