Post by XJSman89 on Feb 19, 2011 13:43:47 GMT -6
One of my lights in the third brake light burned out recently and I took it as a sign to start this quick, simple mod. A few have done it already (95mushroom is the name that sicks out to me but I'm sure there are a few others) but a writeup has never been made for it.
This mod is quite simple, takes only a couple hours, and looks great once its done!
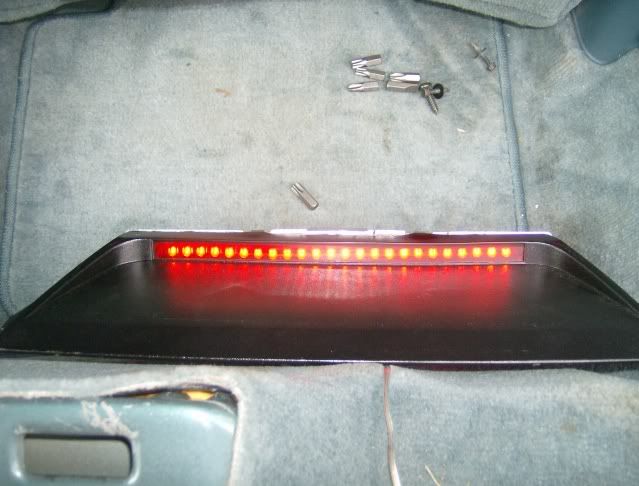
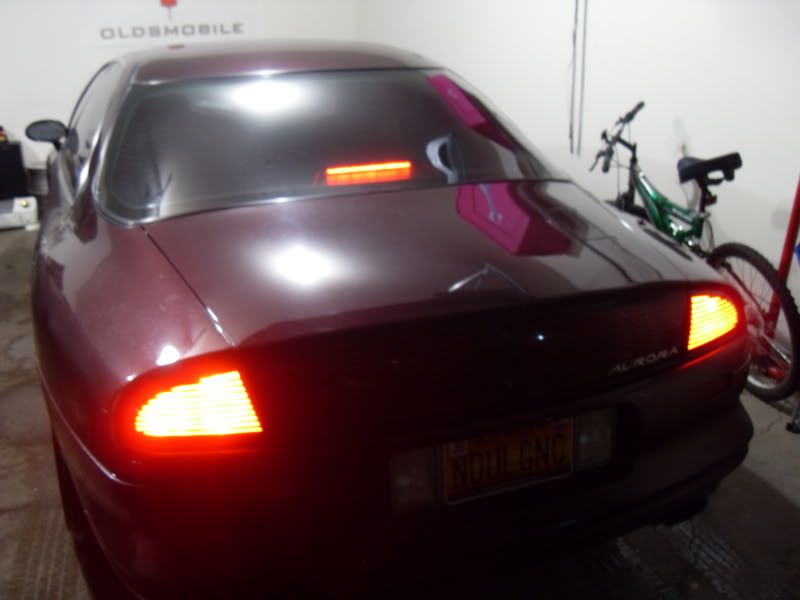
This is what the finished product looks like. It looks pretty good if I do say so myself!
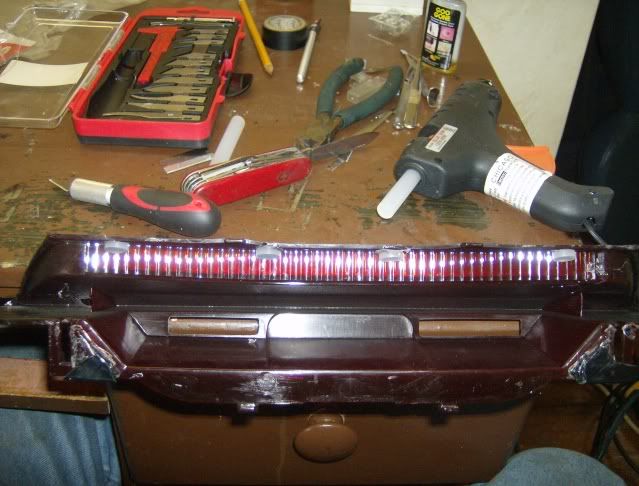
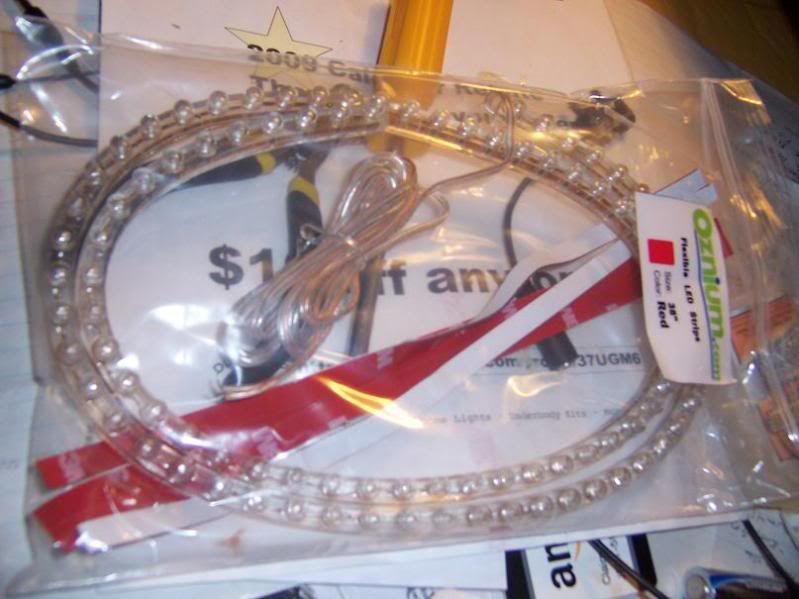
This is the LED strip that I used. I had it left over from when I did my LED rear panel. I cut it roughly in half. They can be cut every three lights, the one that I used ended up being 21 lights long. So to do this you would just use a 24" long red LED strip.
I first tried attaching it to the outside, that didn't work. You could see it through the window in the daytime even with tinted windows... not good. So I decided to open it up! It's really easy to do, all you need is patience. The red plastic will separate from the black plastic with some time and a little elbow grease.
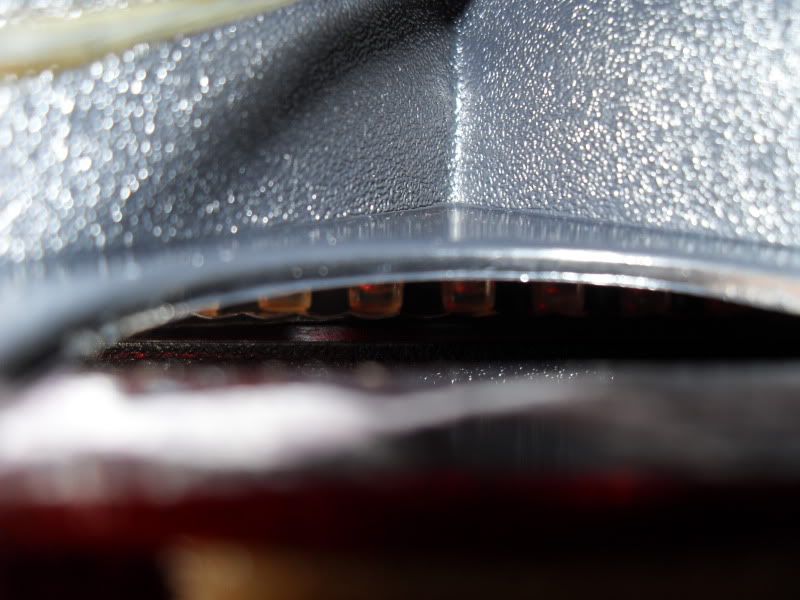
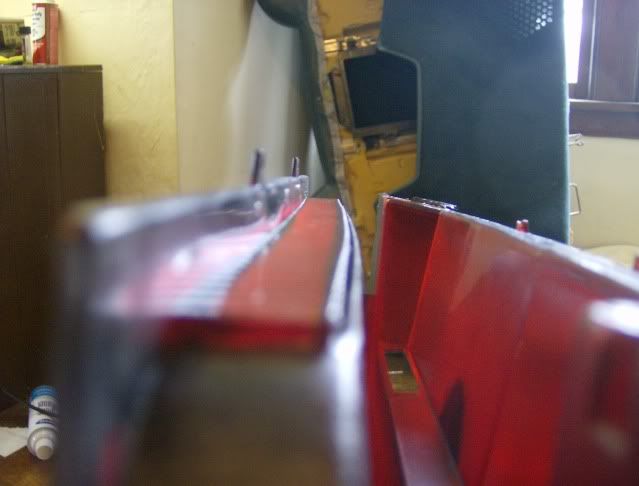
If you look in the gap in that picture you can see where I attached the LED strip to. There is a flat part on the top right behind where the lights shine through, you'll see it when you get the whole part out. You want to glue the LED to that top part, super glue will work just fine. Make sure you attach the SIDE of the strip to the top of the part so that the LEDs shine toward the rear.
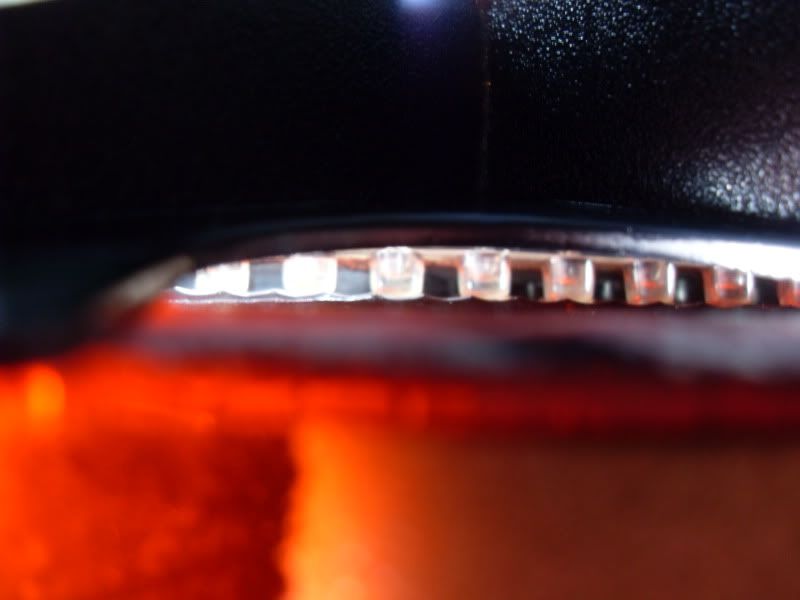
Now, to get it out of the car! It's actually quite simple. First, locate the plastic cover in the trunk. Its a glossy black trapezoid shaped piece right underneath where the third brake light shines through the glass, obviously. There is a small black quick-connect on either side. They are the same style as the ones used in the wheel well, curb finder, etc.
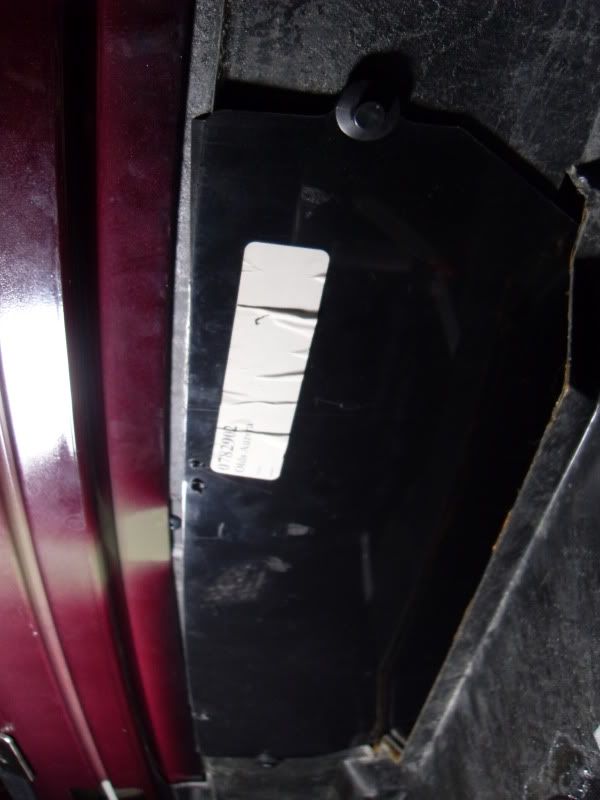
Like all the others, just hold the black ring with one hand and either pull on the circle-shaped insert in the middle or get a pair of pliers and yank it out. After you get these two out the black plastic piece can be removed.
In there you will notice a metal bar holding both the insulation and the third brake light in place. It is attached via a rivet to the body, and has a little resting place in the plastic towards the front of the car. You might be able to bend it enough to get it out of there without breaking it but wear eye protection in case it snaps on you. I just cut it with some tin snips. You'll notice it looks somewhat intact... when I went to reinstall it I just placed the piece that I cut on top of the piece that was remaining; the part riveted to the frame. It stays in place just fine and the glossy black cover helps hold it there. It has worked for me this way so far.
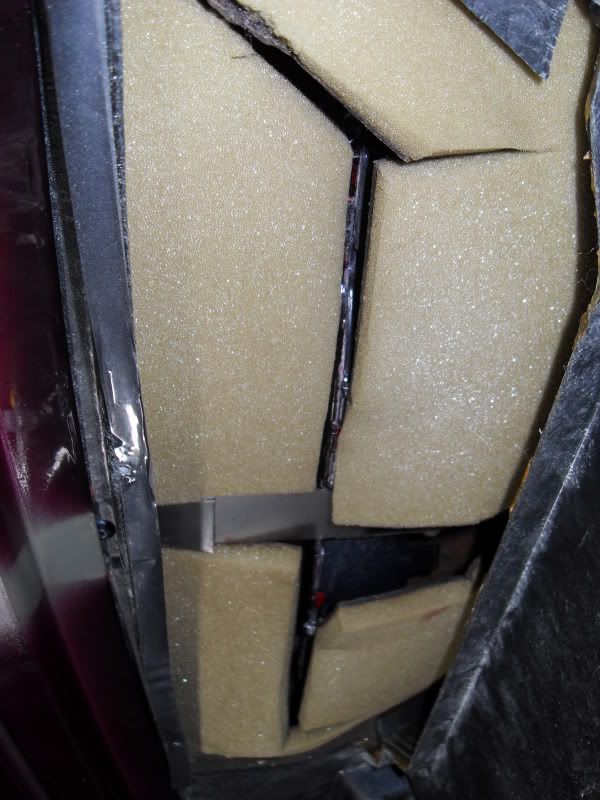
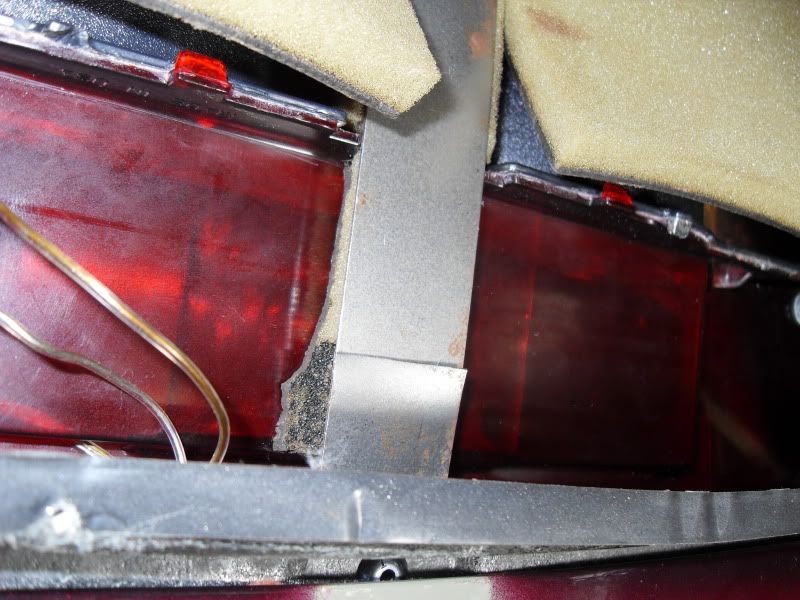
Part of the insulation needs to get out of the way for you to work, also. It is already cut in some strategic places. In order to get some good pictures I removed the smallest two pieces toward the back of the trunk, I had to tear them a bit. They fit back in OK and are held in place of the plastic but it's your choice. If you want to try to leave them in there it will just take a little more time.
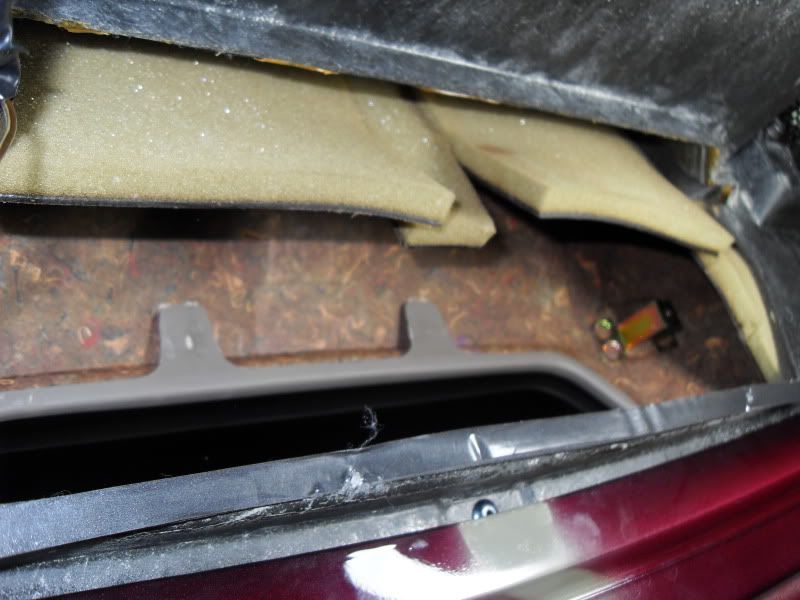
After you have removed/parted the insulation you can either look for or feel around for the two bolts holding the part to the back shelf cover. They screw into the gold mounts sticking down from the rear shelf carpet. You can see one of them in the picture above. Here is a close up:
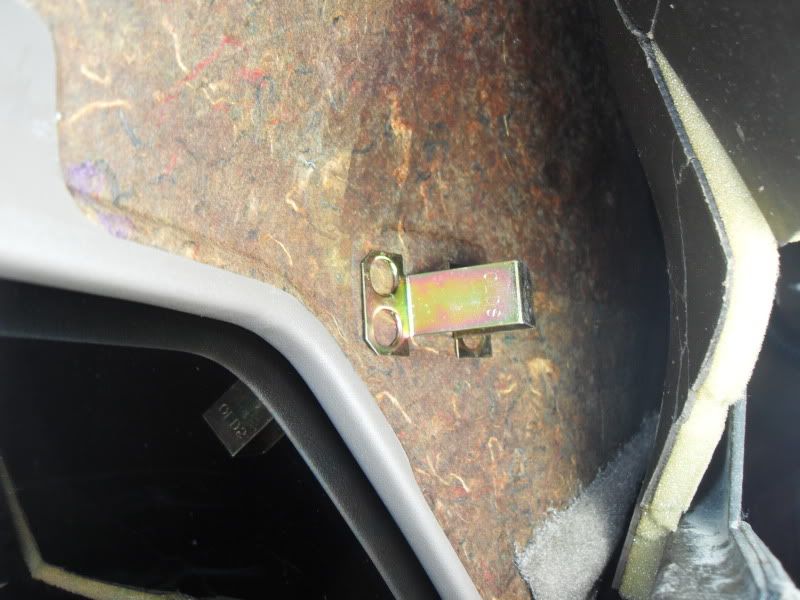
There is one on either side at the back of the part, toward the front of the car. The bolts in my car needed a star/torx bit (in a GM... go figure.) but I was able to use a 7mm nutdriver instead.
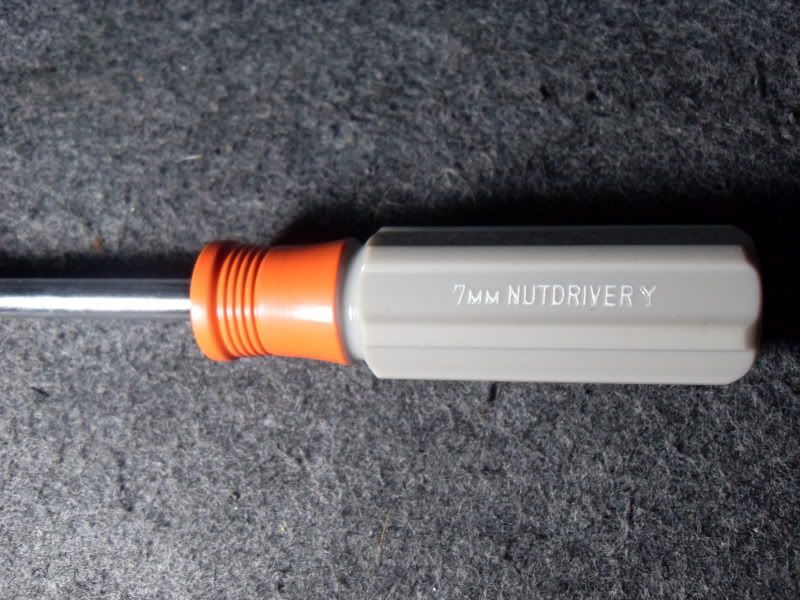
Once you un-do those bolts it will be a little easier to reach behind the part and detatch the light housings. There are two. You just twist them (counterclockwise I believe) and they will be in the right spot for you to take them out. Push them back a bit so that you have room to work and then work the third brake light assembly out of there. You have to mess with it a little bit but I guarantee it does come out!
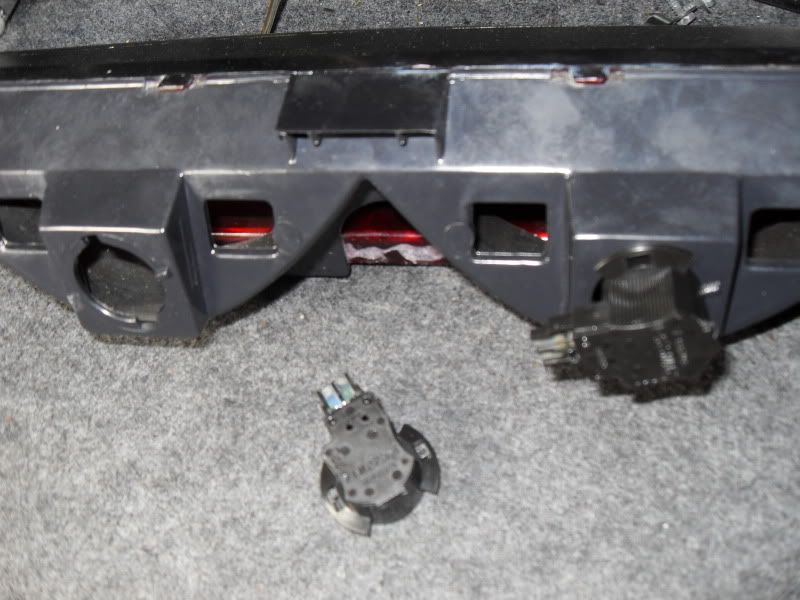
Once you have it out, work on separating the black plastic from the clear red plastic. You'll see where the two faces mate to each other. I used a combo of a box cutter, a flathead screwdriver, and a small chisel to get them detatched. A dremel or something of the sort would probably work as well. Just take your time and work slowly to avoid too much cracking. It's alright if it does a little bit, you're just going to superglue them back together later.
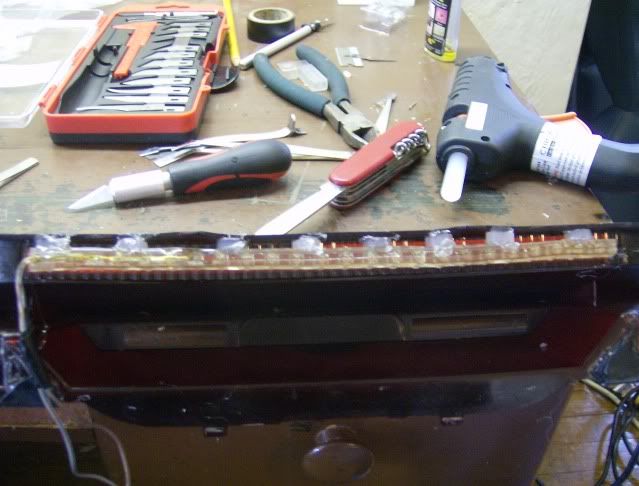
Once you have them separated you will be able to clearly see where you are going to glue the lights to. Just get some superglue and put it on there, then press your light onto the piece. A couple tips:
Once it is glued in let it dry for a bit just to be safe. Once its dry then you can glue the to pieces of the housing back together. Let that dry for a while as well. Applying pressure as it dries will ensure that they fit together perfectly and are where you want it to be. Do this with the LED as well.
Now you should wire it up and test it. Attached to the two light housings that you removed earlier are a a couple connectors. One has two wires, the other has three.
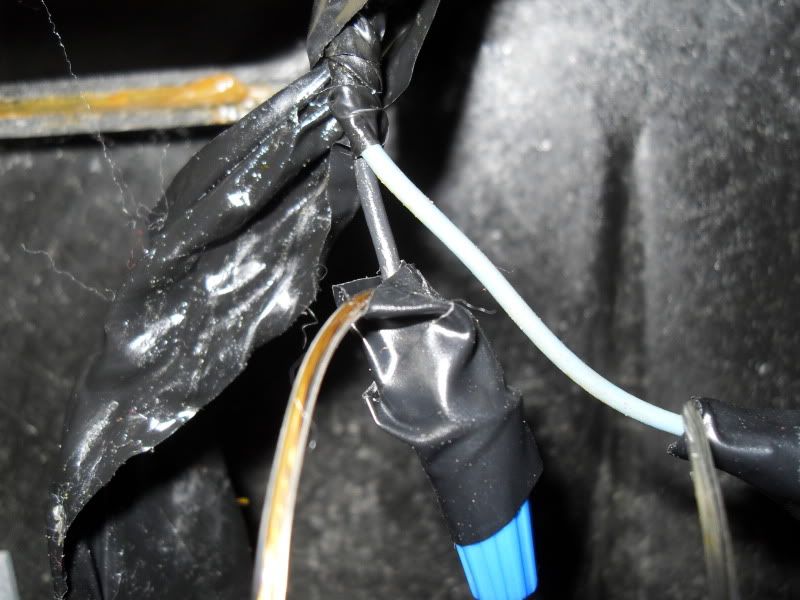
Remove the connectors from the light housings if you wish, I did so. Next, take the black wire from the two wire connector and in whatever manner you choose, splice it to the ground wire of the LED. Take the other (medium green/teal) wire from the connector and splice it with the LED's positive wire. I used simple wire nuts to attach the wires. You can use inline splices if you want, but these are a bit more reliable. Just strip the wires a bit, twist the corresponding LED wire and brake light wire together, and twist the wire nut onto those.
LEDs DO have a positive and negative wire. For these the darker wire was the ground, this may not always be true. There is a very easy way to figure it out, though! Stip off the ends of the LED wires so that bare wire is showing. Now grab a 9V battery and put one wire onto the positive terminal and one onto the negative terminal. If it lights up, mark the wires accordingly. If it doesn't light then just switch the wires, you have them reversed.
Now test it out! Either place the housing somewhere that you can see it or have a buddy press on the brake pedal for you. Bingo! You should see it light up.
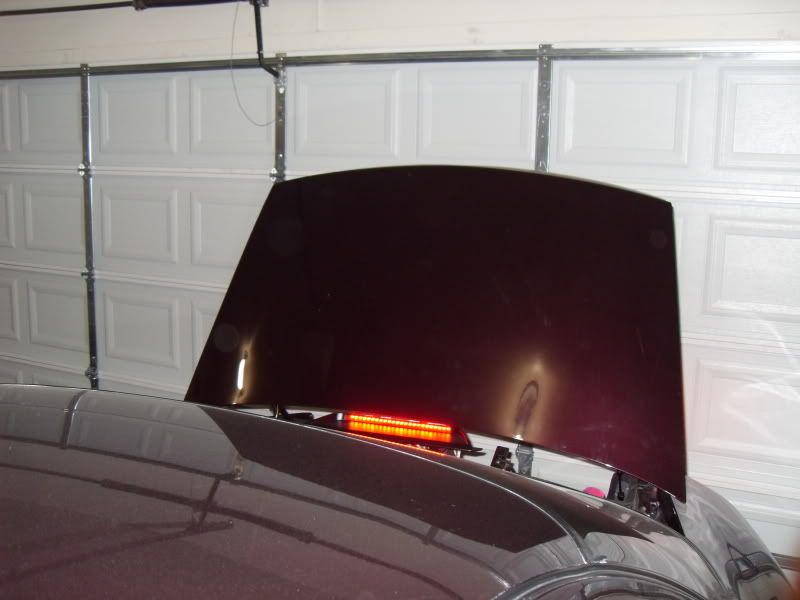
Now slap some electrical tape on there to make sure everything is good to go and reverse the installation procedure to get her back in there! I chose to leave the old incandescent light housings in there because that way I won't loose them. (With the connectors unplugged and lights removed, of course.) You may choose to do the same.
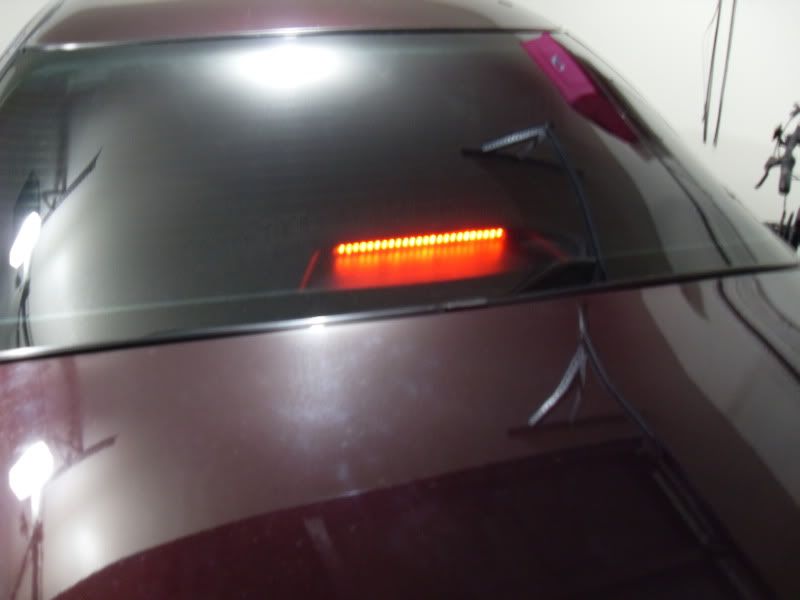

There you have it! Simple, relatively quick, and it looks amazing. Post any and all questions, the more Classics we have out there with an LED third brake light the better! ;D
This mod is quite simple, takes only a couple hours, and looks great once its done!
This is what the finished product looks like. It looks pretty good if I do say so myself!

This is the LED strip that I used. I had it left over from when I did my LED rear panel. I cut it roughly in half. They can be cut every three lights, the one that I used ended up being 21 lights long. So to do this you would just use a 24" long red LED strip.

I first tried attaching it to the outside, that didn't work. You could see it through the window in the daytime even with tinted windows... not good. So I decided to open it up! It's really easy to do, all you need is patience. The red plastic will separate from the black plastic with some time and a little elbow grease.

If you look in the gap in that picture you can see where I attached the LED strip to. There is a flat part on the top right behind where the lights shine through, you'll see it when you get the whole part out. You want to glue the LED to that top part, super glue will work just fine. Make sure you attach the SIDE of the strip to the top of the part so that the LEDs shine toward the rear.

Now, to get it out of the car! It's actually quite simple. First, locate the plastic cover in the trunk. Its a glossy black trapezoid shaped piece right underneath where the third brake light shines through the glass, obviously. There is a small black quick-connect on either side. They are the same style as the ones used in the wheel well, curb finder, etc.

Like all the others, just hold the black ring with one hand and either pull on the circle-shaped insert in the middle or get a pair of pliers and yank it out. After you get these two out the black plastic piece can be removed.
In there you will notice a metal bar holding both the insulation and the third brake light in place. It is attached via a rivet to the body, and has a little resting place in the plastic towards the front of the car. You might be able to bend it enough to get it out of there without breaking it but wear eye protection in case it snaps on you. I just cut it with some tin snips. You'll notice it looks somewhat intact... when I went to reinstall it I just placed the piece that I cut on top of the piece that was remaining; the part riveted to the frame. It stays in place just fine and the glossy black cover helps hold it there. It has worked for me this way so far.


Part of the insulation needs to get out of the way for you to work, also. It is already cut in some strategic places. In order to get some good pictures I removed the smallest two pieces toward the back of the trunk, I had to tear them a bit. They fit back in OK and are held in place of the plastic but it's your choice. If you want to try to leave them in there it will just take a little more time.

After you have removed/parted the insulation you can either look for or feel around for the two bolts holding the part to the back shelf cover. They screw into the gold mounts sticking down from the rear shelf carpet. You can see one of them in the picture above. Here is a close up:

There is one on either side at the back of the part, toward the front of the car. The bolts in my car needed a star/torx bit (in a GM... go figure.) but I was able to use a 7mm nutdriver instead.

Once you un-do those bolts it will be a little easier to reach behind the part and detatch the light housings. There are two. You just twist them (counterclockwise I believe) and they will be in the right spot for you to take them out. Push them back a bit so that you have room to work and then work the third brake light assembly out of there. You have to mess with it a little bit but I guarantee it does come out!

Once you have it out, work on separating the black plastic from the clear red plastic. You'll see where the two faces mate to each other. I used a combo of a box cutter, a flathead screwdriver, and a small chisel to get them detatched. A dremel or something of the sort would probably work as well. Just take your time and work slowly to avoid too much cracking. It's alright if it does a little bit, you're just going to superglue them back together later.
Once you have them separated you will be able to clearly see where you are going to glue the lights to. Just get some superglue and put it on there, then press your light onto the piece. A couple tips:
- BE SURE NOT TO USE TOO MUCH GLUE. It will run and if any gets on the red part that the LED shines through then it will look horrible.
- These lights came with some double-sided 3M tape. You may use this if you like, I felt a little more comfortable with super glue. Both will probably work fine.
- Be sure that it is tight against both surfaces, you don't want to have it fall or anything making you go back in and have to fix it!
Once it is glued in let it dry for a bit just to be safe. Once its dry then you can glue the to pieces of the housing back together. Let that dry for a while as well. Applying pressure as it dries will ensure that they fit together perfectly and are where you want it to be. Do this with the LED as well.
Now you should wire it up and test it. Attached to the two light housings that you removed earlier are a a couple connectors. One has two wires, the other has three.

Remove the connectors from the light housings if you wish, I did so. Next, take the black wire from the two wire connector and in whatever manner you choose, splice it to the ground wire of the LED. Take the other (medium green/teal) wire from the connector and splice it with the LED's positive wire. I used simple wire nuts to attach the wires. You can use inline splices if you want, but these are a bit more reliable. Just strip the wires a bit, twist the corresponding LED wire and brake light wire together, and twist the wire nut onto those.
LEDs DO have a positive and negative wire. For these the darker wire was the ground, this may not always be true. There is a very easy way to figure it out, though! Stip off the ends of the LED wires so that bare wire is showing. Now grab a 9V battery and put one wire onto the positive terminal and one onto the negative terminal. If it lights up, mark the wires accordingly. If it doesn't light then just switch the wires, you have them reversed.
Now test it out! Either place the housing somewhere that you can see it or have a buddy press on the brake pedal for you. Bingo! You should see it light up.

Now slap some electrical tape on there to make sure everything is good to go and reverse the installation procedure to get her back in there! I chose to leave the old incandescent light housings in there because that way I won't loose them. (With the connectors unplugged and lights removed, of course.) You may choose to do the same.


There you have it! Simple, relatively quick, and it looks amazing. Post any and all questions, the more Classics we have out there with an LED third brake light the better! ;D



 Any pics of actually laying it in the housing? Is it just one row of LED?