Forum")

Post by clones on Jul 15, 2011 21:16:17 GMT -6
Hopefully this will prove helpful to those looking to replace the fabric on the shade that covers the sunroof. This is the first How-To I've written however, and I had already started when I decided to do a write up, so I missed pictures of the first couple of steps. Some good basic info can be read in these two threads as well: aurorah.proboards.com/index.cgi?action=display&board=nextgeneration&thread=21049&page=1
aurorah.proboards.com/index.cgi?action=display&board=Interior&thread=9415&page=1
My Aurora is 2G, so I would expect some of the removal and install procedures will be different on a 1G. However, I expect the actual fabric replacement will be much the same. That being said, know your own skill level and if you think this may be above your skill, I suggest not trying it on your own. This is a do it at your own risk kind of deal, I can't be held responsible for your results. So, shall we begin?
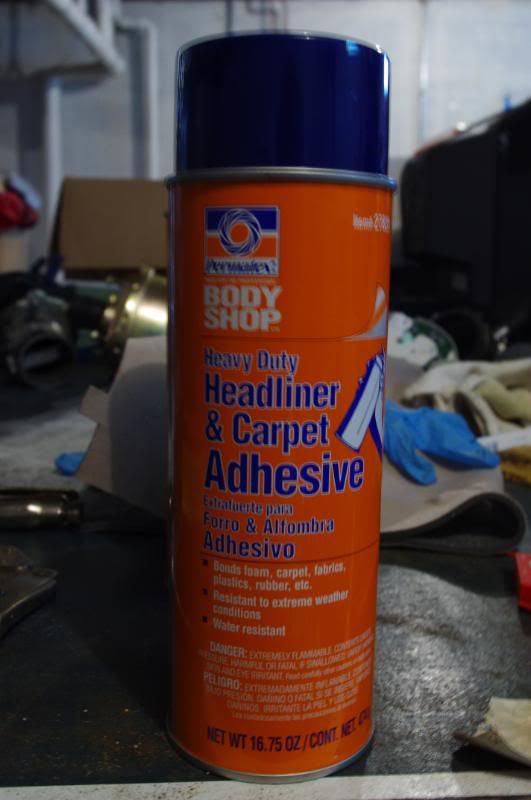
First up, this is the adhesive I used, I got it at Advance Auto for about $12. The 3M stuff was about $20 and if I wasn't broke, I would probably have bought that, although this stuff seemed to work very well.
On my car, removal of the sunshade was extremely easy. First you have to get the sunshade to slide forward of the glass, which I did by gently pressing down in the middle of the shade panel while pulling it forward. Then there were 4 spring loaded clips which held it in place. You can see one quite clearly in a couple of the later shots. I just had to push in the spring on two of them and pop them up and the whole panel slid out through the opening from outside.
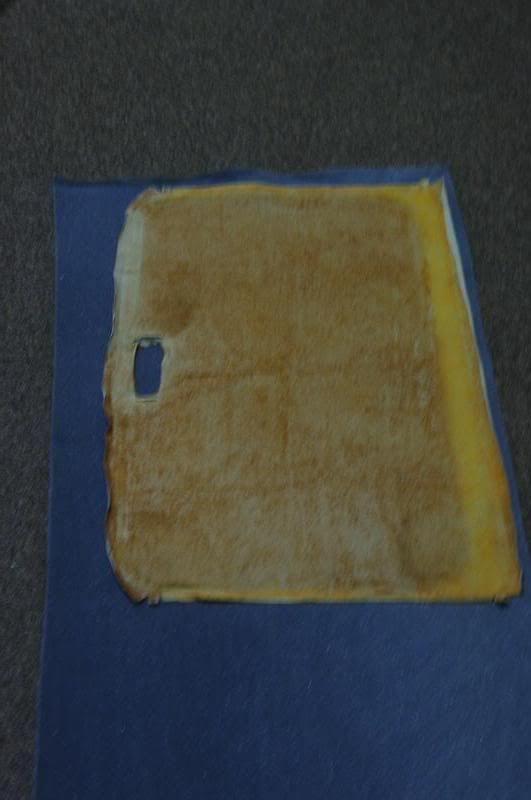
Once the sunshade is out, you can peel off the fabric, mine also had a sort of plastic backing as well. Try and get it off in one piece as you can use this as a rough pattern later for the new material.
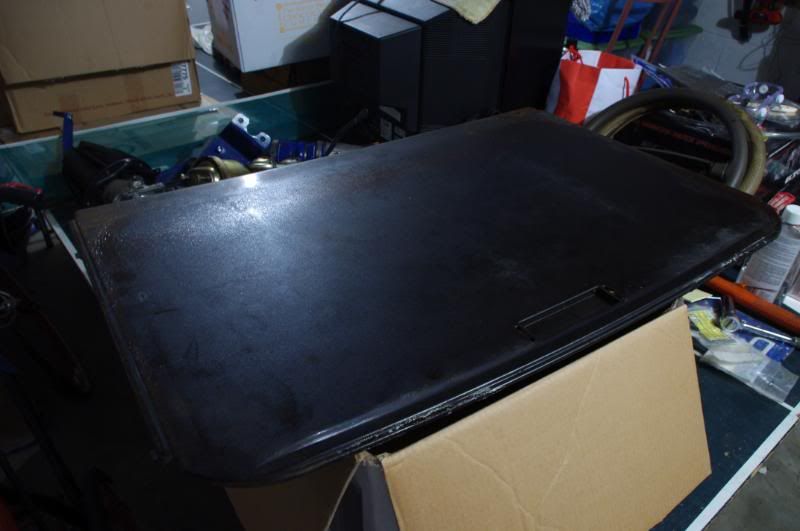
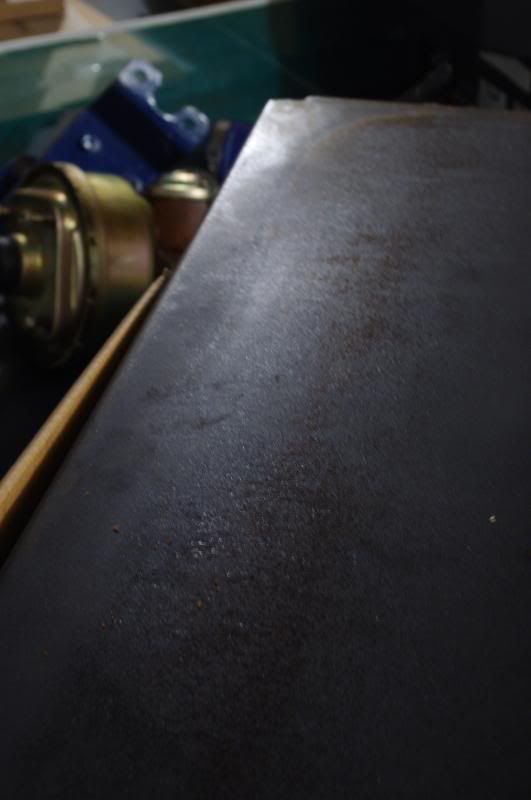
Next, you'll be left with the bare plastic panel. You need to sand off the old glue residue and such.
This is what mine looked like after pulling off the fabric.
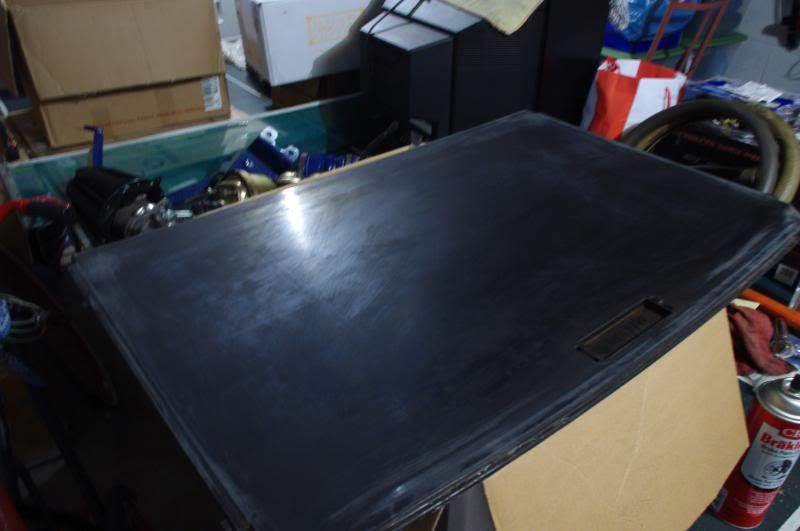
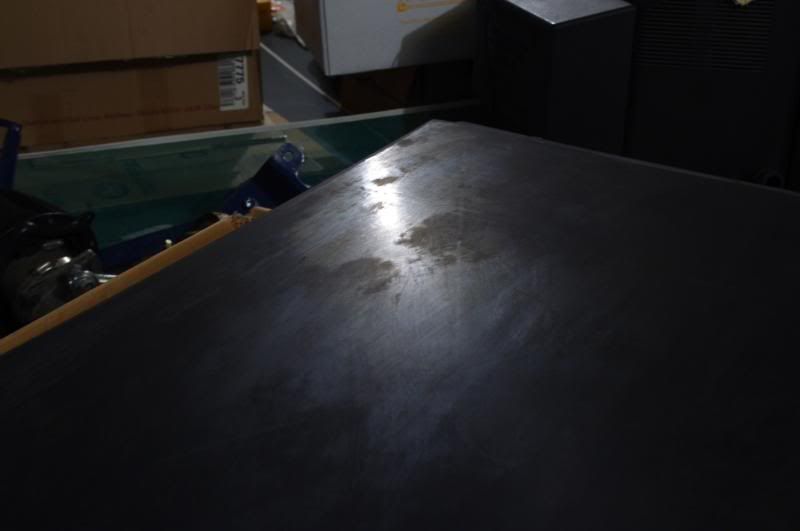
Once sanded, the surface should be fairly smooth. I probably could have gone more but I was using some scrap sandpaper I had (don't even remember what grit, probably 200 or so) and I ran out. This is how things looked after sanding.
This is the point at which I went and got fabric, however you could just as easily get the fabric before you start. I'd recommend getting a yard, as that should allow you to have extra material in case you screw up. (Which I did the first go-round). I got mine at a local fabric store (Hancock Fabrics), but the other thread mentions getting it from a custom auto interior shop or a website. You need foam-backed headliner fabric. A yard cost me about $14. I will say it is helpful to have something to use to match up colors with as well. We took our old fabric in to use.
Now that you have the panel ready and the fabric, you can cut out the new stuff. We used the old fabric from the sunshade as a pattern. I'd recommend cutting the new material a bit bigger than the old, we did about an inch. You can always trim it later, but once the stuff is stuck down you don't want to try and remove it for a new piece.
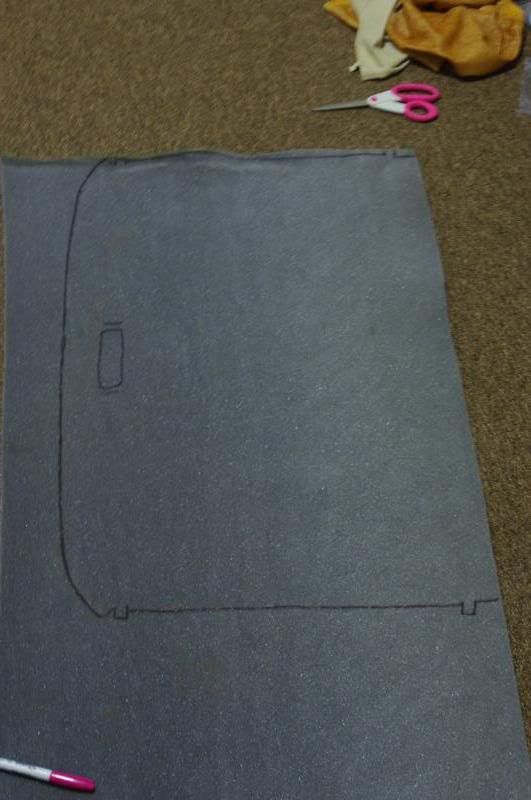
Once you've got a nice new piece cut out, you can go about figuring out how it will all lay down. I focused on getting the main flat panel glued down first before working the edges. One pretty big factor is the opening for the handle. Make sure the handle fits in and you have slots cut for the tabs that hold the plastic handle trim piece in place.
Once you're sure it will all fit, you can get ready to glue the new fabric down. This is where I initially screwed up. I sprayed the entire panel and tried to lay the fabric down all at once. DON'T DO THAT! I ended up wasting an entire piece of fabric, and because we hadn't bought enough fabric the first time to make a second piece, had to go back to the store to buy more. Also, I had to scrape off all that glue I had sprayed on the plastic panel, which was not fun at all!
Here is the approach we took the second time around
I placed the handle in place lightly, folded the fabric back and sprayed about a 4-6 inch section of both the plastic and the foam according to the directions on the can and let it set up a few minutes. Then, slowly begin laying the fabric down, gently working from the middle out with your hands to make sure it lays flat and smooth. It can be helpful to have a helper for this part. Once that set up a bit, I essentially repeated the process until the majority of the flat bit was glued down. Make sure, as you work back to cover the new material to protect it from the glue you spray. Once the back portion was done, I removed the handle trim piece, and did the front in the same manner.
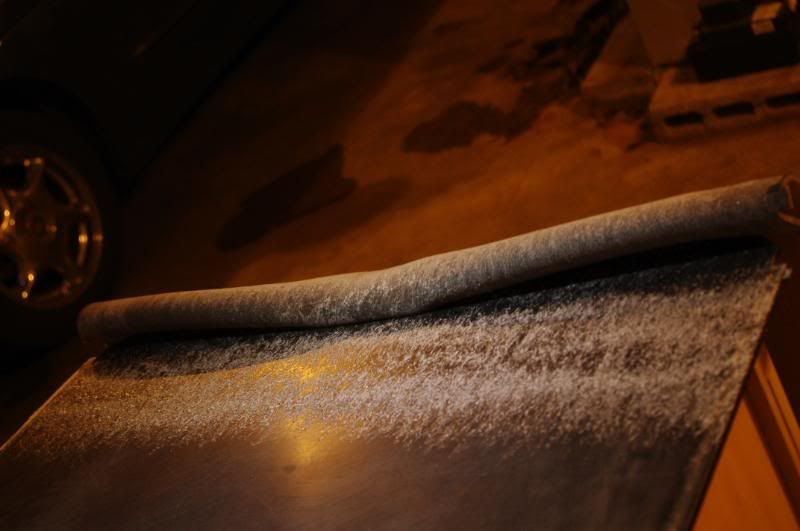
Now you can begin figuring out what trimming you need to do to get things to fold over and lay right. I'd recommend always working from the center when you do this, and it will be a bit different for everyone. You just don't want and bunching or wrinkles. This is what I ended up one the rounded section on the front of the panel.
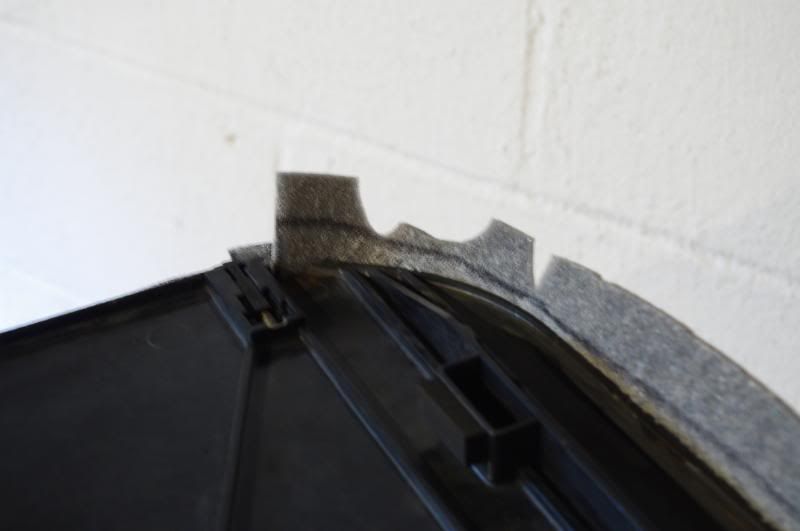
Then its simply a matter of spraying the glue and sticking it down as you had planned, and you end up with something like this
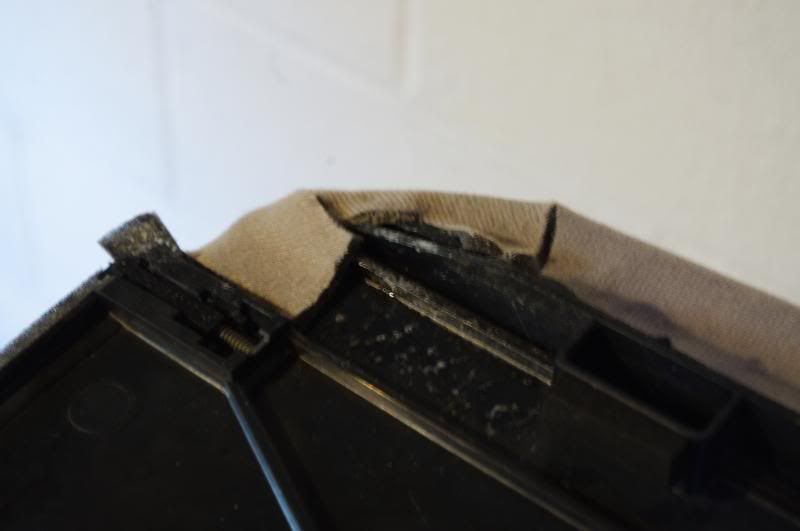
Note that in that pic you can see one of the spring clips I mentioned at the beginning.
I didn't have much material to wrap over the sides, so I simply sprayed the side bits and glued them, though I had to cover the spring clips to keep glue out of them, and trim the fabric over them as well so it didn't interfere with their operation.
Once that is done, you are finished with the actual recovering of the panel and should have something like this!
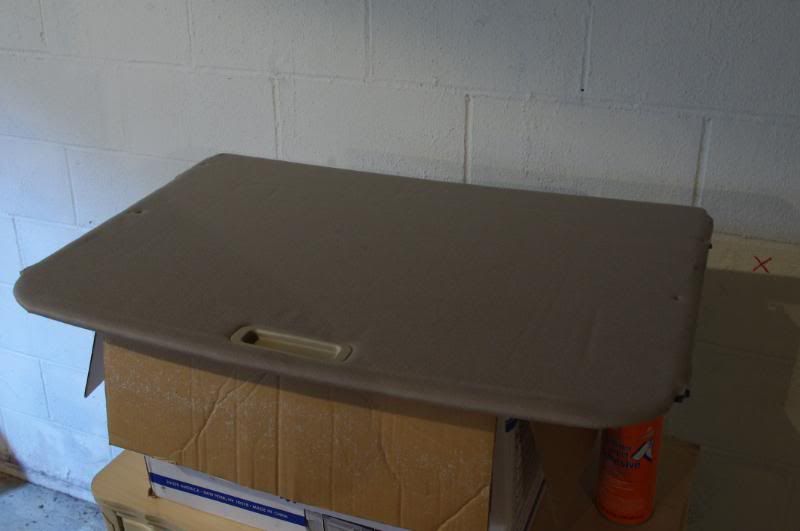
Now comes the uh, fun part. Getting the panel back in. Mine came out so easily I figured it would be a cakewalk going in as well, but I was dead wrong. This is how I was able to get mine back in, keep in mind I've had this car all of about 3.5-4 months and have no service manual to work off of, so it was a bit improvised. I found that by removing the screws holding the drivers sunvisor up, gently popping loose the a and b pillar covers, and pulling down the door weatherstripping, I could pull the headliner down just enough at the rear of the sunroof opening to slide my arm (from outside) to the back of the glass when it was half closed (or was it half open?). I was then able to grab the sunshade panel at the back and pull it down in the middle and back to get it over the bar or whatever grabs it and pulls it back with the glass when the sunroof opens. Sorry I don't have pictures, I was working solo at the time and well, it just wasn't possible. Put everything back together and you are done. Now you can kick back and enjoy your nice new sunroof shade. Here's mine, all done. The color isn't an exact match, as the store didn't carry one that matched exactly, but its close and complimentary to the original color.

Like I said, hopefully this is helpful to those looking to undertake this project themselves.
aurorah.proboards.com/index.cgi?action=display&board=Interior&thread=9415&page=1
My Aurora is 2G, so I would expect some of the removal and install procedures will be different on a 1G. However, I expect the actual fabric replacement will be much the same. That being said, know your own skill level and if you think this may be above your skill, I suggest not trying it on your own. This is a do it at your own risk kind of deal, I can't be held responsible for your results. So, shall we begin?
First up, this is the adhesive I used, I got it at Advance Auto for about $12. The 3M stuff was about $20 and if I wasn't broke, I would probably have bought that, although this stuff seemed to work very well.
On my car, removal of the sunshade was extremely easy. First you have to get the sunshade to slide forward of the glass, which I did by gently pressing down in the middle of the shade panel while pulling it forward. Then there were 4 spring loaded clips which held it in place. You can see one quite clearly in a couple of the later shots. I just had to push in the spring on two of them and pop them up and the whole panel slid out through the opening from outside.
Once the sunshade is out, you can peel off the fabric, mine also had a sort of plastic backing as well. Try and get it off in one piece as you can use this as a rough pattern later for the new material.
Next, you'll be left with the bare plastic panel. You need to sand off the old glue residue and such.
This is what mine looked like after pulling off the fabric.
Once sanded, the surface should be fairly smooth. I probably could have gone more but I was using some scrap sandpaper I had (don't even remember what grit, probably 200 or so) and I ran out. This is how things looked after sanding.
This is the point at which I went and got fabric, however you could just as easily get the fabric before you start. I'd recommend getting a yard, as that should allow you to have extra material in case you screw up. (Which I did the first go-round). I got mine at a local fabric store (Hancock Fabrics), but the other thread mentions getting it from a custom auto interior shop or a website. You need foam-backed headliner fabric. A yard cost me about $14. I will say it is helpful to have something to use to match up colors with as well. We took our old fabric in to use.
Now that you have the panel ready and the fabric, you can cut out the new stuff. We used the old fabric from the sunshade as a pattern. I'd recommend cutting the new material a bit bigger than the old, we did about an inch. You can always trim it later, but once the stuff is stuck down you don't want to try and remove it for a new piece.
Once you've got a nice new piece cut out, you can go about figuring out how it will all lay down. I focused on getting the main flat panel glued down first before working the edges. One pretty big factor is the opening for the handle. Make sure the handle fits in and you have slots cut for the tabs that hold the plastic handle trim piece in place.
Once you're sure it will all fit, you can get ready to glue the new fabric down. This is where I initially screwed up. I sprayed the entire panel and tried to lay the fabric down all at once. DON'T DO THAT! I ended up wasting an entire piece of fabric, and because we hadn't bought enough fabric the first time to make a second piece, had to go back to the store to buy more. Also, I had to scrape off all that glue I had sprayed on the plastic panel, which was not fun at all!
Here is the approach we took the second time around
I placed the handle in place lightly, folded the fabric back and sprayed about a 4-6 inch section of both the plastic and the foam according to the directions on the can and let it set up a few minutes. Then, slowly begin laying the fabric down, gently working from the middle out with your hands to make sure it lays flat and smooth. It can be helpful to have a helper for this part. Once that set up a bit, I essentially repeated the process until the majority of the flat bit was glued down. Make sure, as you work back to cover the new material to protect it from the glue you spray. Once the back portion was done, I removed the handle trim piece, and did the front in the same manner.
Now you can begin figuring out what trimming you need to do to get things to fold over and lay right. I'd recommend always working from the center when you do this, and it will be a bit different for everyone. You just don't want and bunching or wrinkles. This is what I ended up one the rounded section on the front of the panel.
Then its simply a matter of spraying the glue and sticking it down as you had planned, and you end up with something like this
Note that in that pic you can see one of the spring clips I mentioned at the beginning.
I didn't have much material to wrap over the sides, so I simply sprayed the side bits and glued them, though I had to cover the spring clips to keep glue out of them, and trim the fabric over them as well so it didn't interfere with their operation.
Once that is done, you are finished with the actual recovering of the panel and should have something like this!
Now comes the uh, fun part. Getting the panel back in. Mine came out so easily I figured it would be a cakewalk going in as well, but I was dead wrong. This is how I was able to get mine back in, keep in mind I've had this car all of about 3.5-4 months and have no service manual to work off of, so it was a bit improvised. I found that by removing the screws holding the drivers sunvisor up, gently popping loose the a and b pillar covers, and pulling down the door weatherstripping, I could pull the headliner down just enough at the rear of the sunroof opening to slide my arm (from outside) to the back of the glass when it was half closed (or was it half open?). I was then able to grab the sunshade panel at the back and pull it down in the middle and back to get it over the bar or whatever grabs it and pulls it back with the glass when the sunroof opens. Sorry I don't have pictures, I was working solo at the time and well, it just wasn't possible. Put everything back together and you are done. Now you can kick back and enjoy your nice new sunroof shade. Here's mine, all done. The color isn't an exact match, as the store didn't carry one that matched exactly, but its close and complimentary to the original color.
Like I said, hopefully this is helpful to those looking to undertake this project themselves.